
These Killing Floor tactics are targeted to solo play on Hell on Earth difficulty with the Support Specialist perk, but you can practice at any level of play or with any perk.
Most of these were originally found on the Steam Killing Floor forums by xX_Renegade_Xx and now a Steam guide. I copied it here mainly to embed the screenshots with the info for those of us alt-tabbing or with dual monitors while we play Killing Floor.
It can be hard finding a good team to complete HoE so I’ve listed each map that can be completed solo (or full team, certain maps I’ve done with a good team) using the Support perk (Level 6), the weapons I used were the shotgun and the AA-12. I’ll add more if you find these tactics useful.
Abusement Park – This area is just in front of spawn, use the yellow tickets on the floor to get an idea where to stand.
Stand Here

You must keep checking behind during each wave, the majority of the zeds will approach from the front and the Husk is a major problem due to his range, if you are pushed back check behind firstly as you can find yourself surrounded very quickly.
For Patriarch
Place 2 pipe bombs just in front of you and wait for him to hit them, hit him with the AA12 as soon as he does.
Aperture – Weld the door to your left and stand in this position.
Stand Here

You must not move too far right from this position as the zeds will spawn behind the cubes to your left. Be careful of the Husk as his fireballs will do some serious damage, side step left to avoid them.
If the welded door is attacked it should hold for the entire wave. Use pipe bombs for the Fleshpounds if you need them.
For the Patriarch, place 2 pipe bombs approximately 5m in front of where you were standing and hit him with the AA12 as soon as he hits the pipe bombs.
Bedlam – This position is on the balcony opposite the stairs.
Stand Here
Weld the double door to your left, it will be attacked early so listen for it breaking, clear as necessary.
The majority of the zeds will approach from the front but the Husks are a real problem due to their range so side step behind the pillar until they are close enough to kill. Use pipe bombs for the Fleshpounds if needed.
For the Patriarch, this area is behind the double door that you welded, place 2 pipe bombs behind the door and close it, hit him with the AA12 as soon he hits the pipe bombs.
Biohazard – Weld every door except the one to the right (see screenshot) and stand on the sofa.
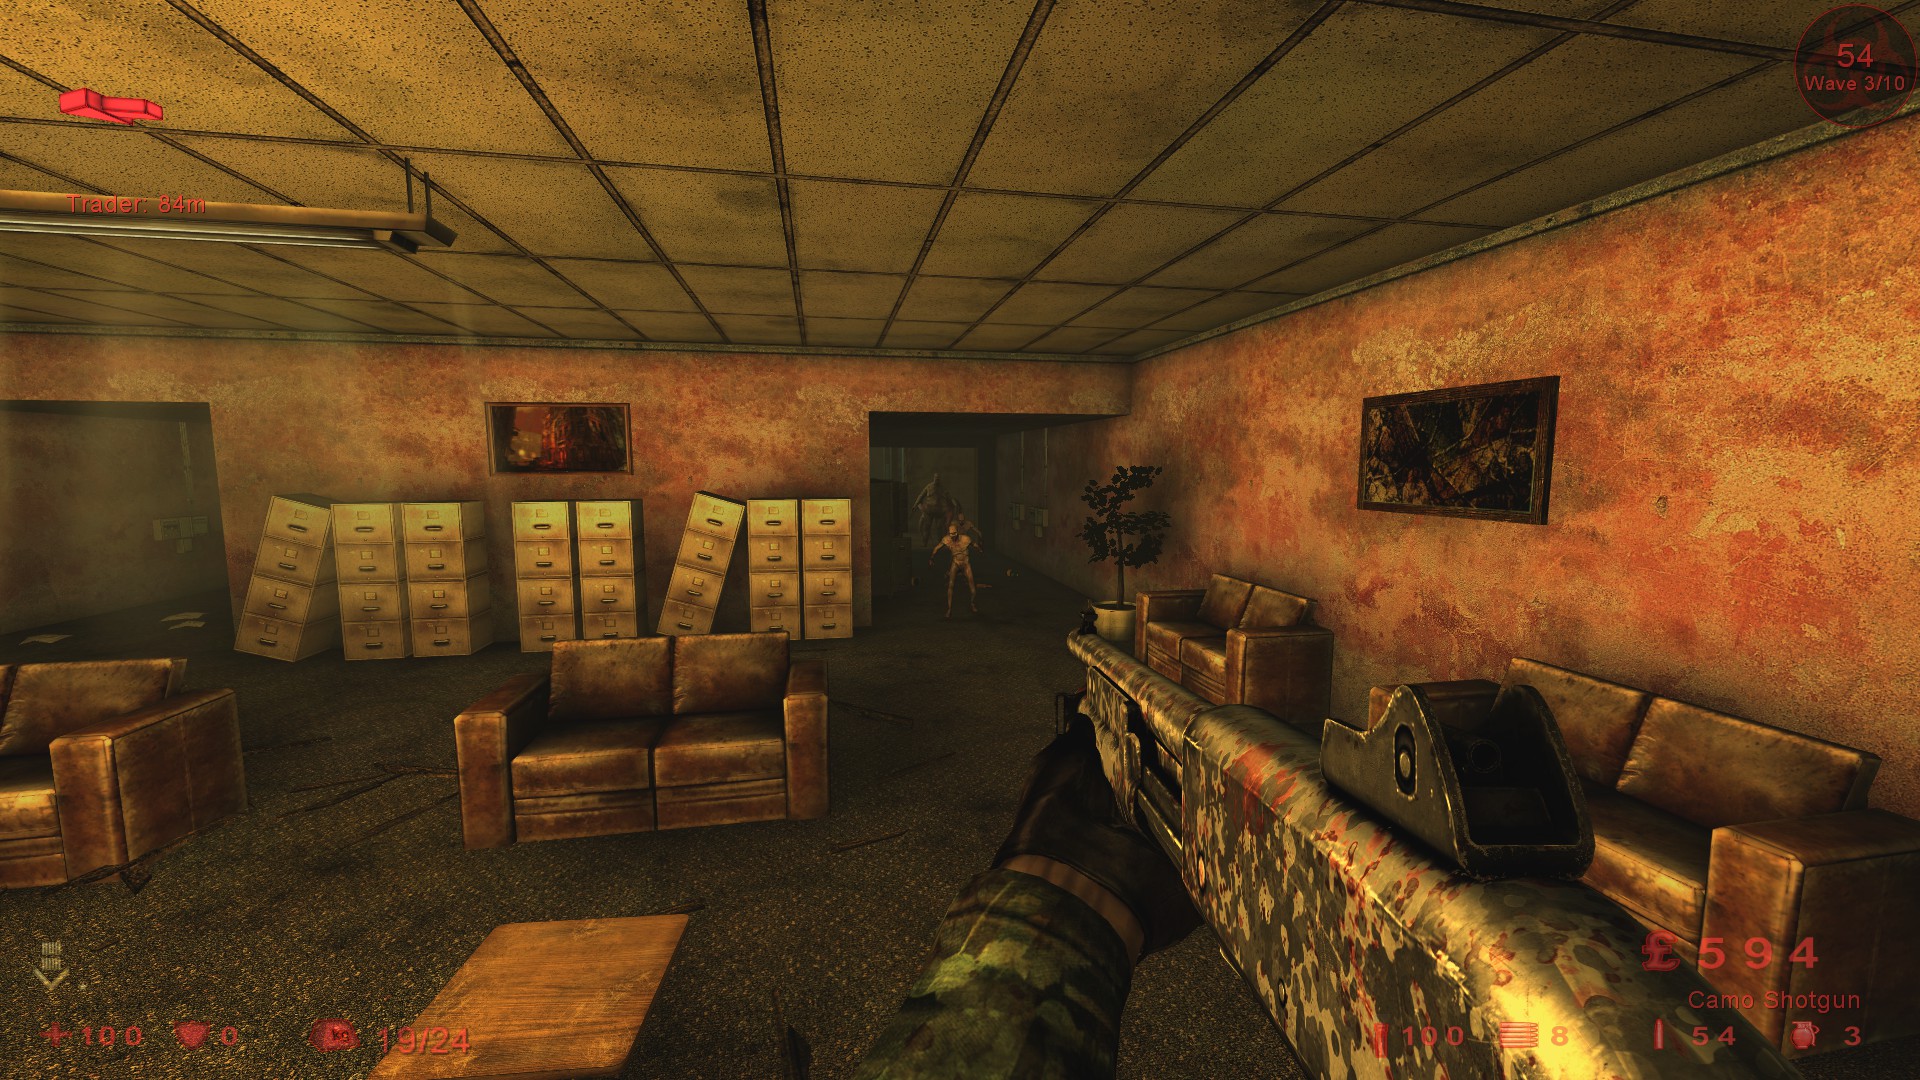
All the zeds will approach from the front, if any do attack the welded door behind you the weld should hold until the wave is complete. Be careful of the trader distance and shoot your way out of this area if the trader is near spawn. Very Important: Do not move too far from the position in the screenshot as the zeds will spawn behind you if you’re not careful.
For the Patriarch, place 2 pipe bombs close to the filing cabinets and wait around the corner, hit him with the AA12 as soon as he hits the pipe bombs.
Biotics Lab – Weld all the doors around the spawn area but listen for them being broken during the waves, reweld before the wave starts, most zeds will approach from the front but be careful of moving from this area (see screenshot) as the zeds will spawn to your left or right or behind you if you move forward.

When facing the Patriarch, place 2 pipes around 10-15m from spawn, wait around the corner, hit him with the AA-12 as soon as he hits the pipes. Use more pipes again if in a full team.
Crash – This area is just to the right of spawn, through the curtain. Weld the door behind you up the stairs and the double door to your right and stand in this position.
This position is ideal for the shotgun as the zeds will group together as they come around the corner, the Scrakes and Fleshpounds are not a problem as you’ll have plenty of time to reload.
The welded door behind should hold for the entire wave as the majority of zeds will approach from the front.
For the Patriarch, place 2 pipe bombs just in front of where you were standing and wait around the corner with the welded double door behind you, hit him with the AA12 as soon he hits the pipe bombs.
Departed – Weld the door to your right and stand in this position.

Everything will approach from the front, be careful of the Husk and the Siren.
Use pipe bombs for the Fleshpounds if needed and try and leave 1 zed before the wave finishes as the trader is quite a distance on some waves.
For the Patriarch, place 2 pipe bombs inside the room close to the door and hide around the corner, hit him with the AA12 as soon as he hits the pipe bombs.
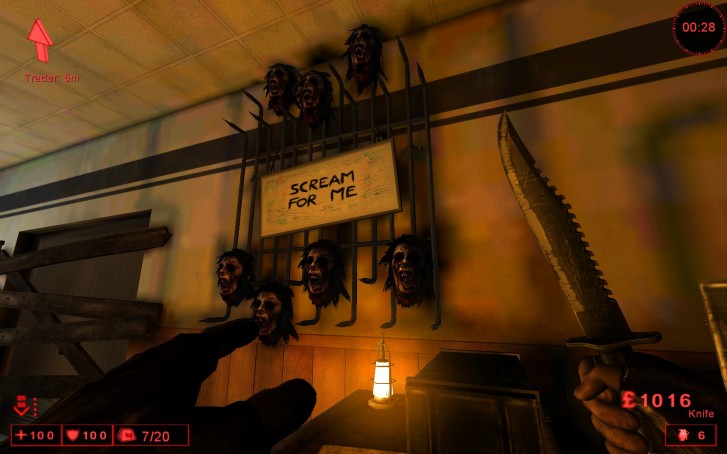
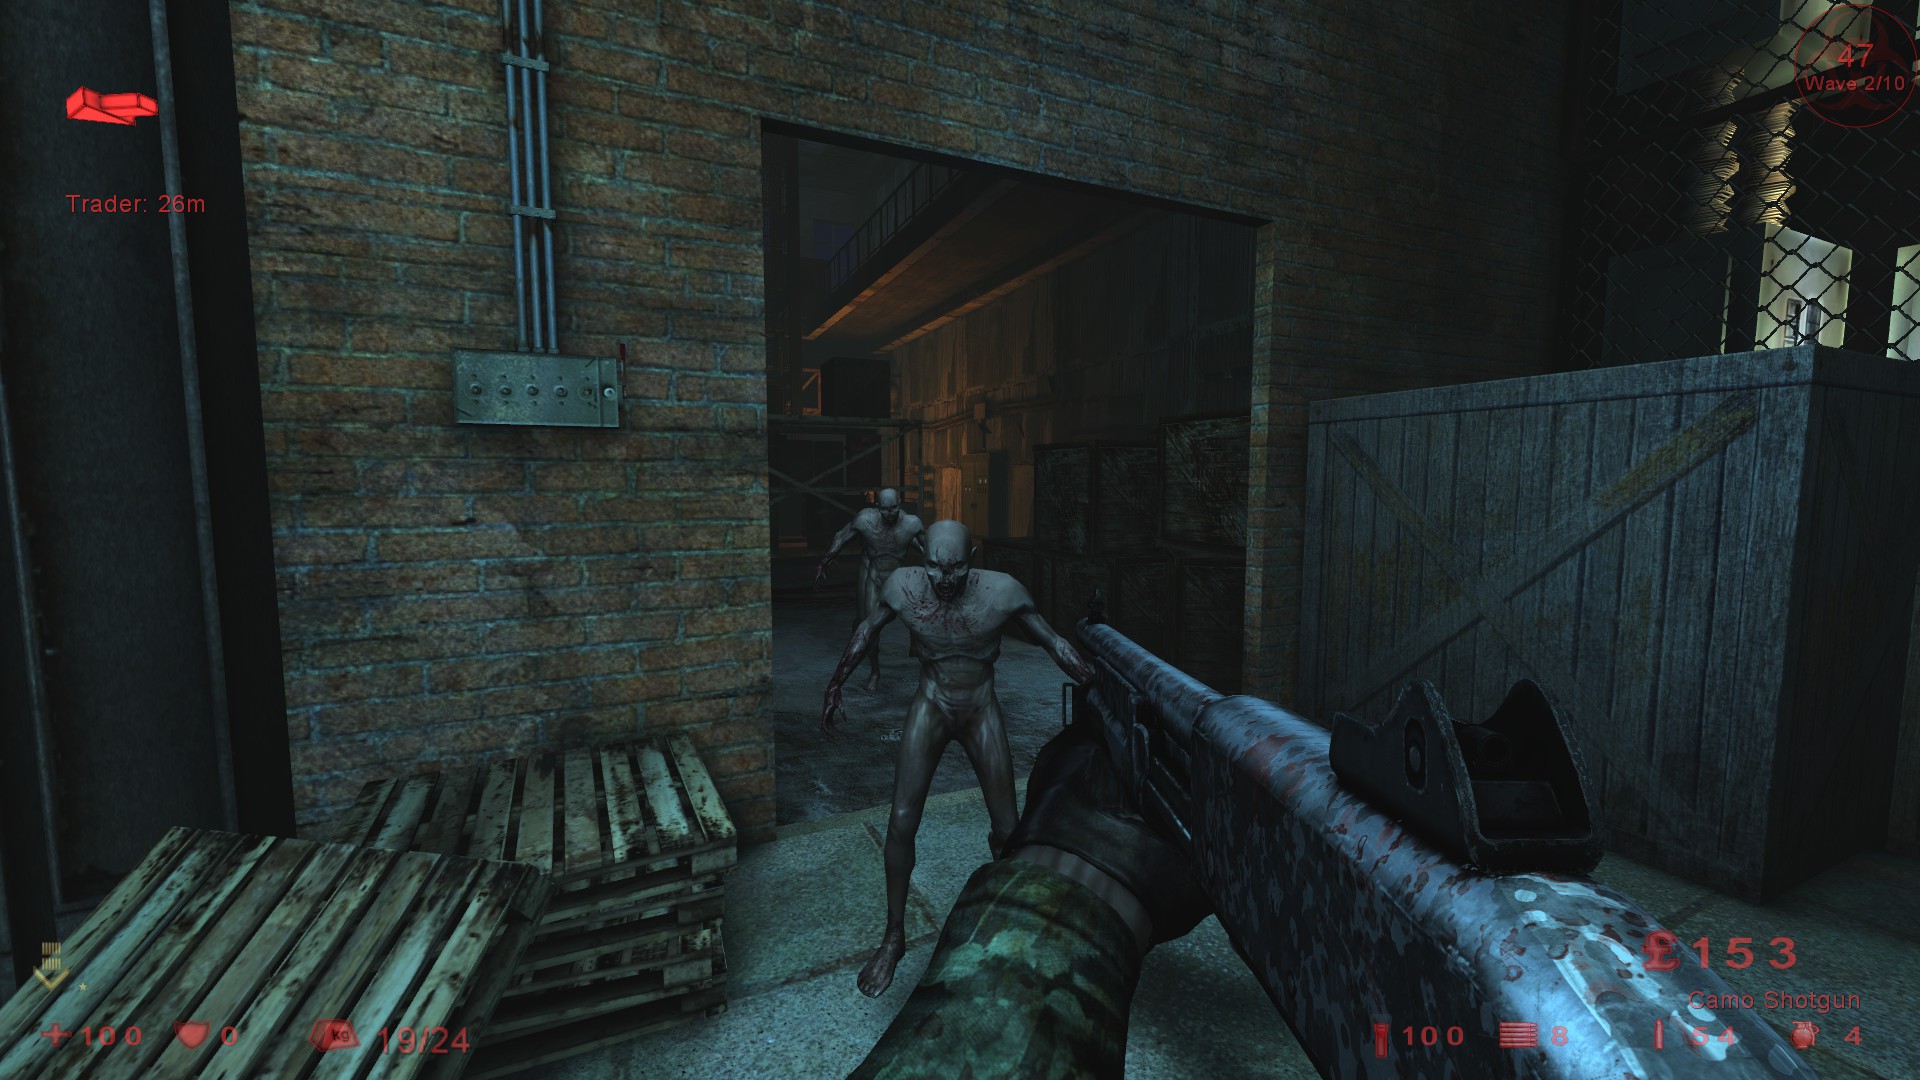
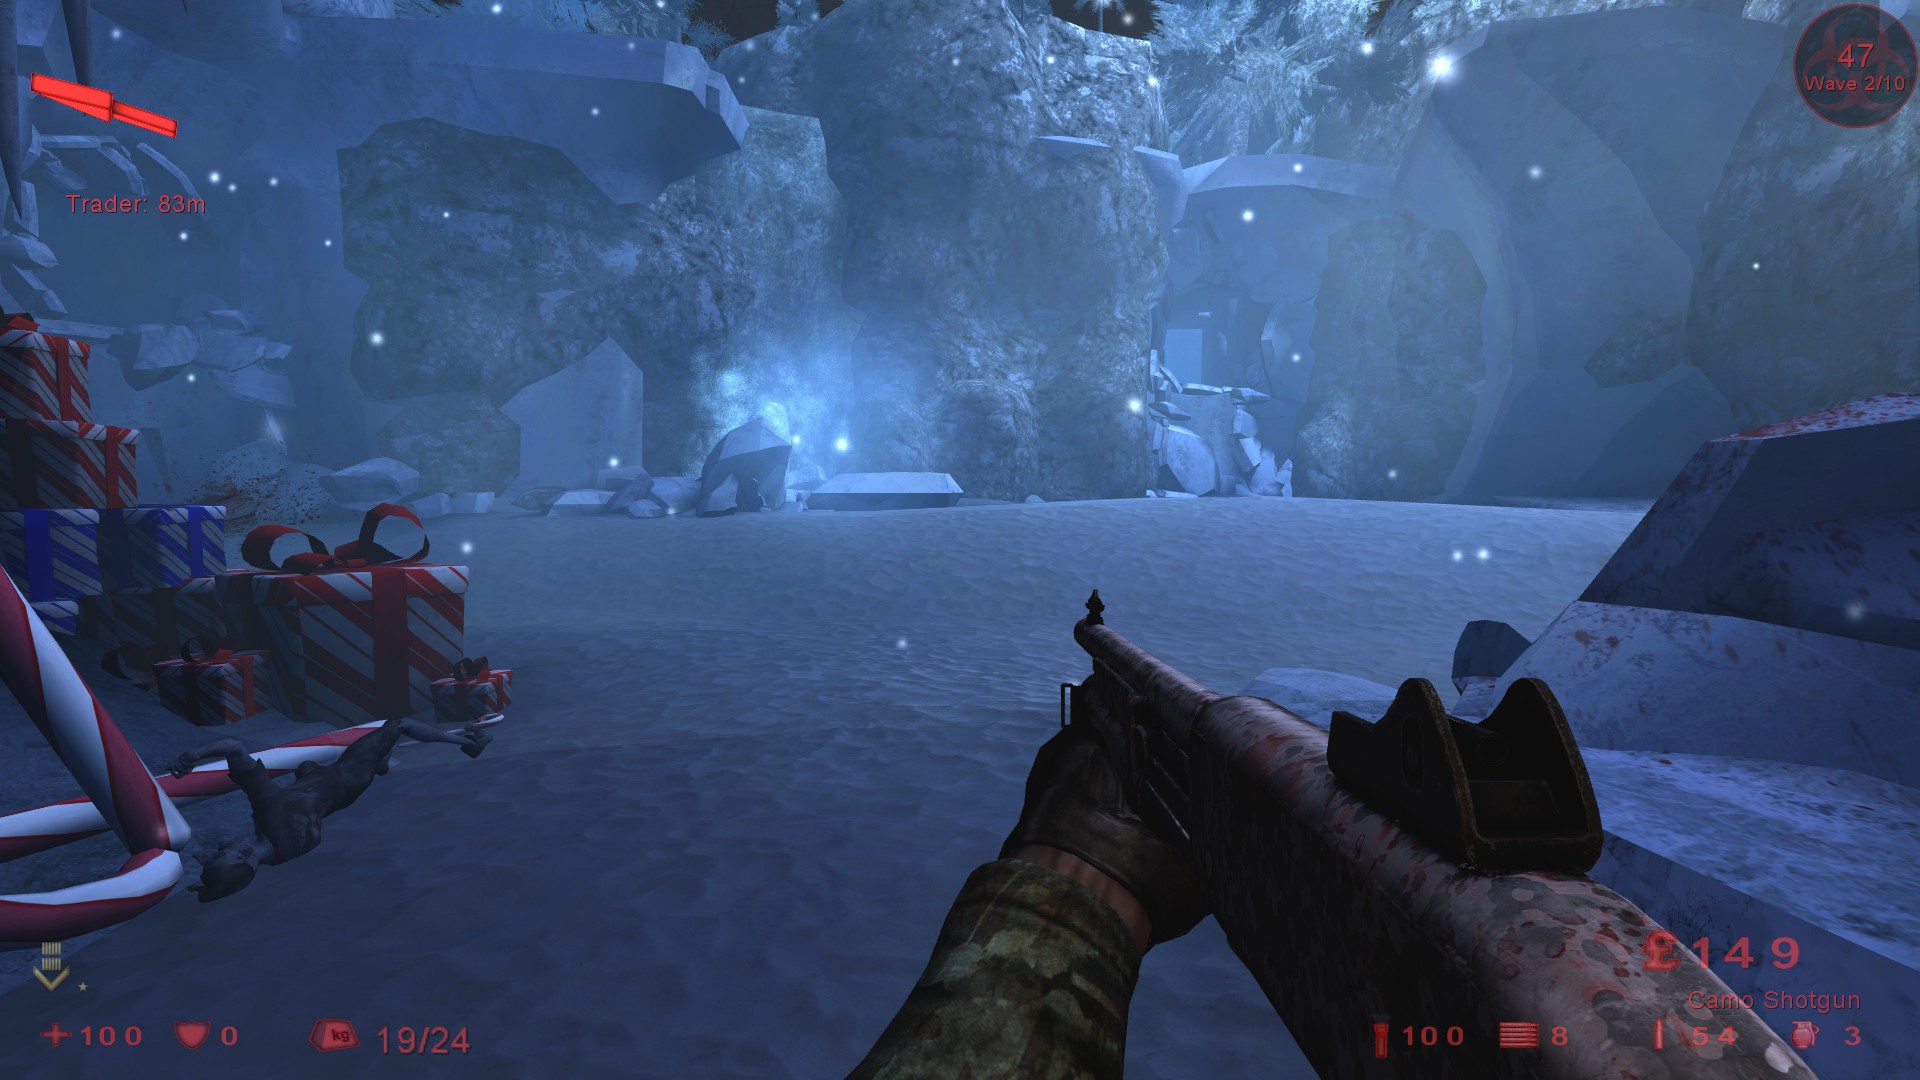
Evil Santa’s Lair – The camp spot is just behind spawn, turn around and you’ll see a large container with prezzies inside.
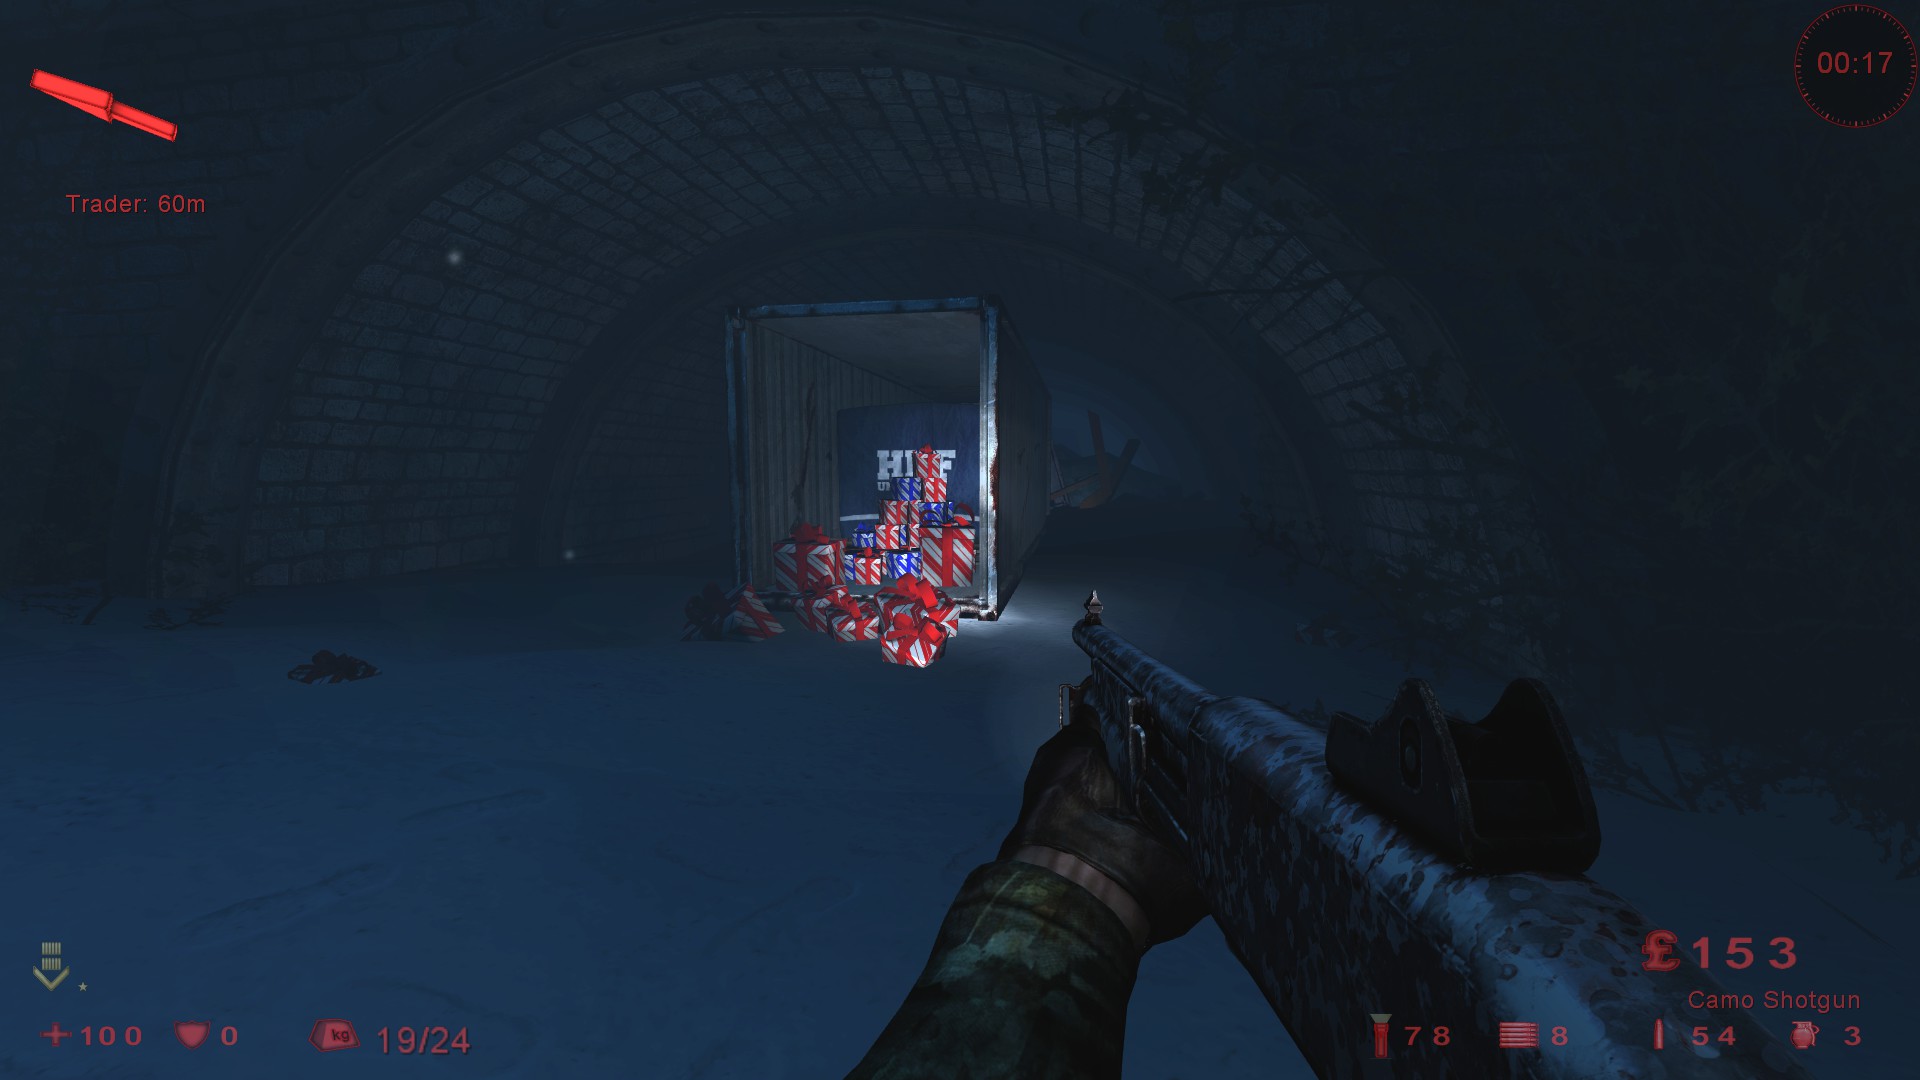
Stand just beside it on the right side.
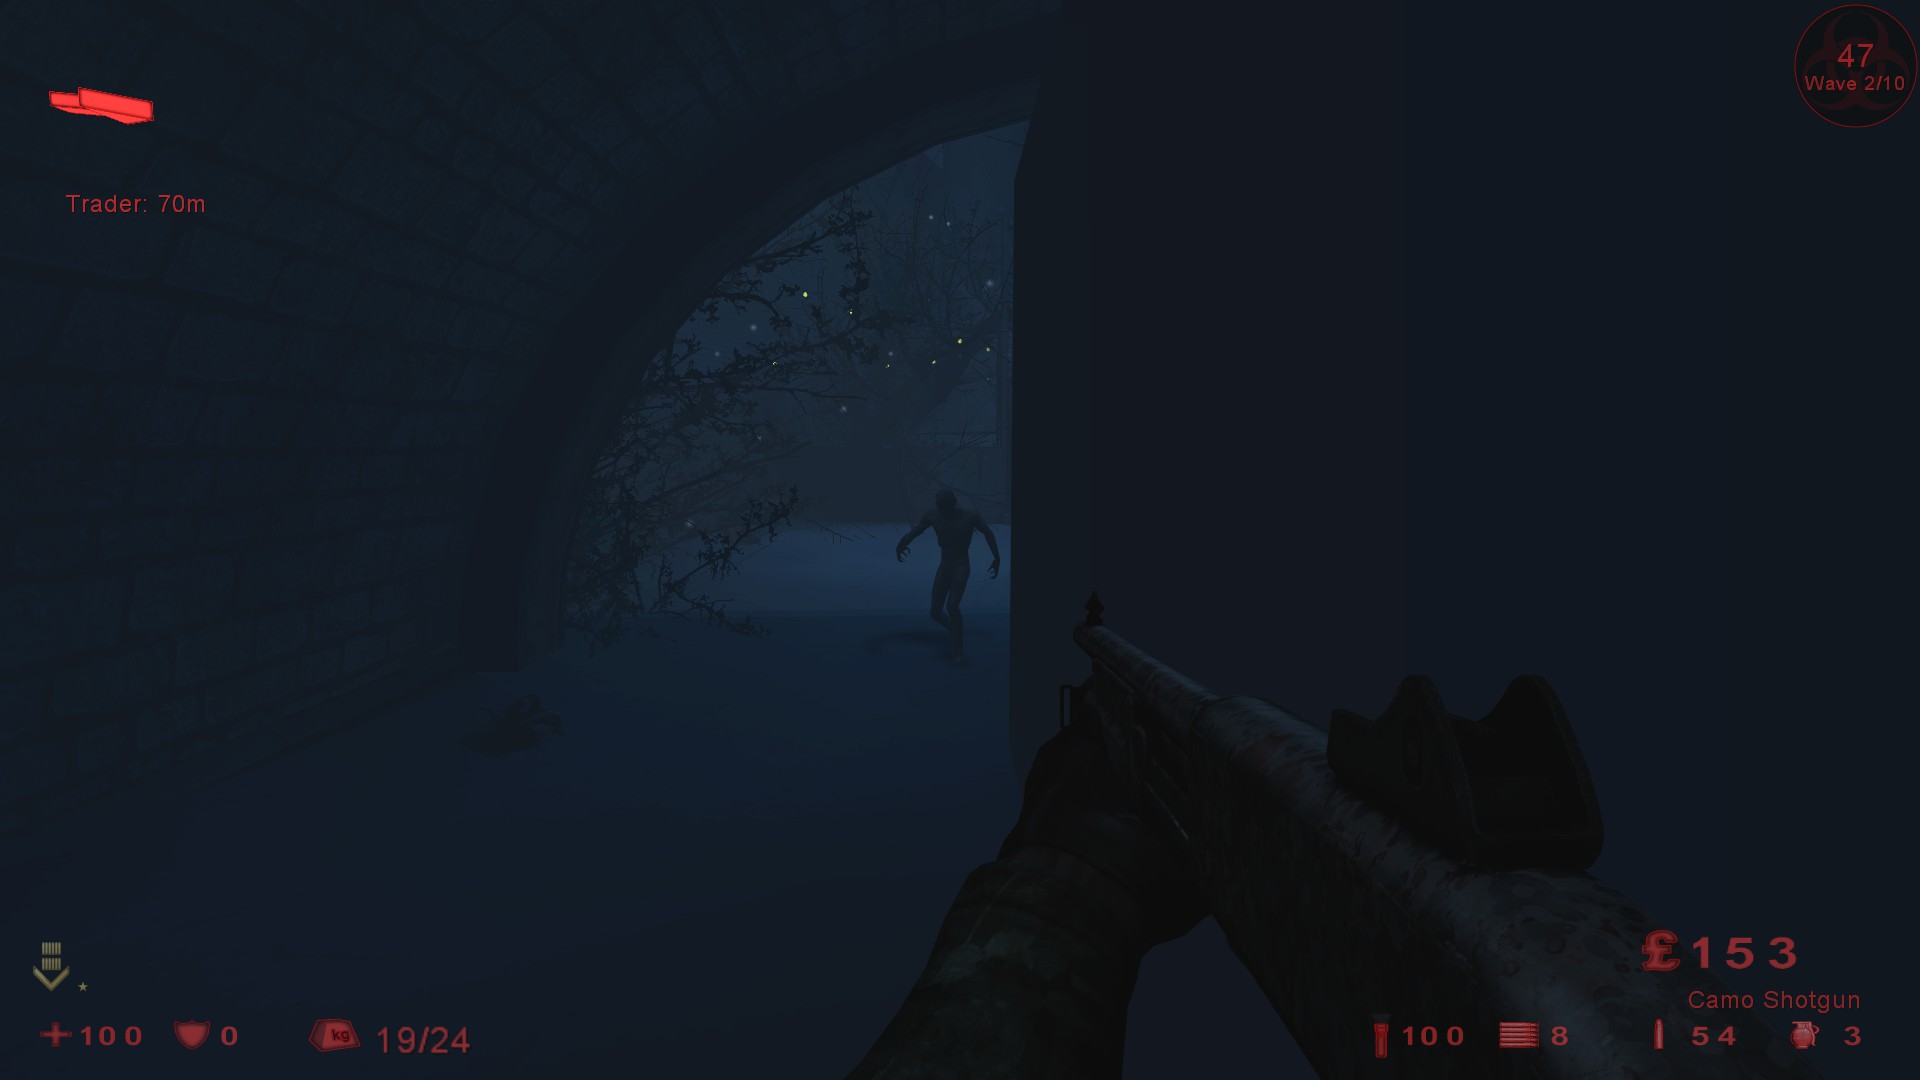
Everything will approach from the front and the Crawlers and Stalkers are a major issue as they will be on you in seconds so either crouch to kill a lot or switch to the AA12 to clear. Side step to avoid the Husks fireballs. Try and leave 1 zed before you finish the wave as the trader is some distance away on certain waves.
You can use pipe bombs for the Fleshpounds but they will be wasted on Clots/Gorefasts so grenades are much better to use.
For the Patriarch, place 2 pipe bombs at the entrance near the double gates and hit him with the AA12 as soon as he hits the pipe bombs.
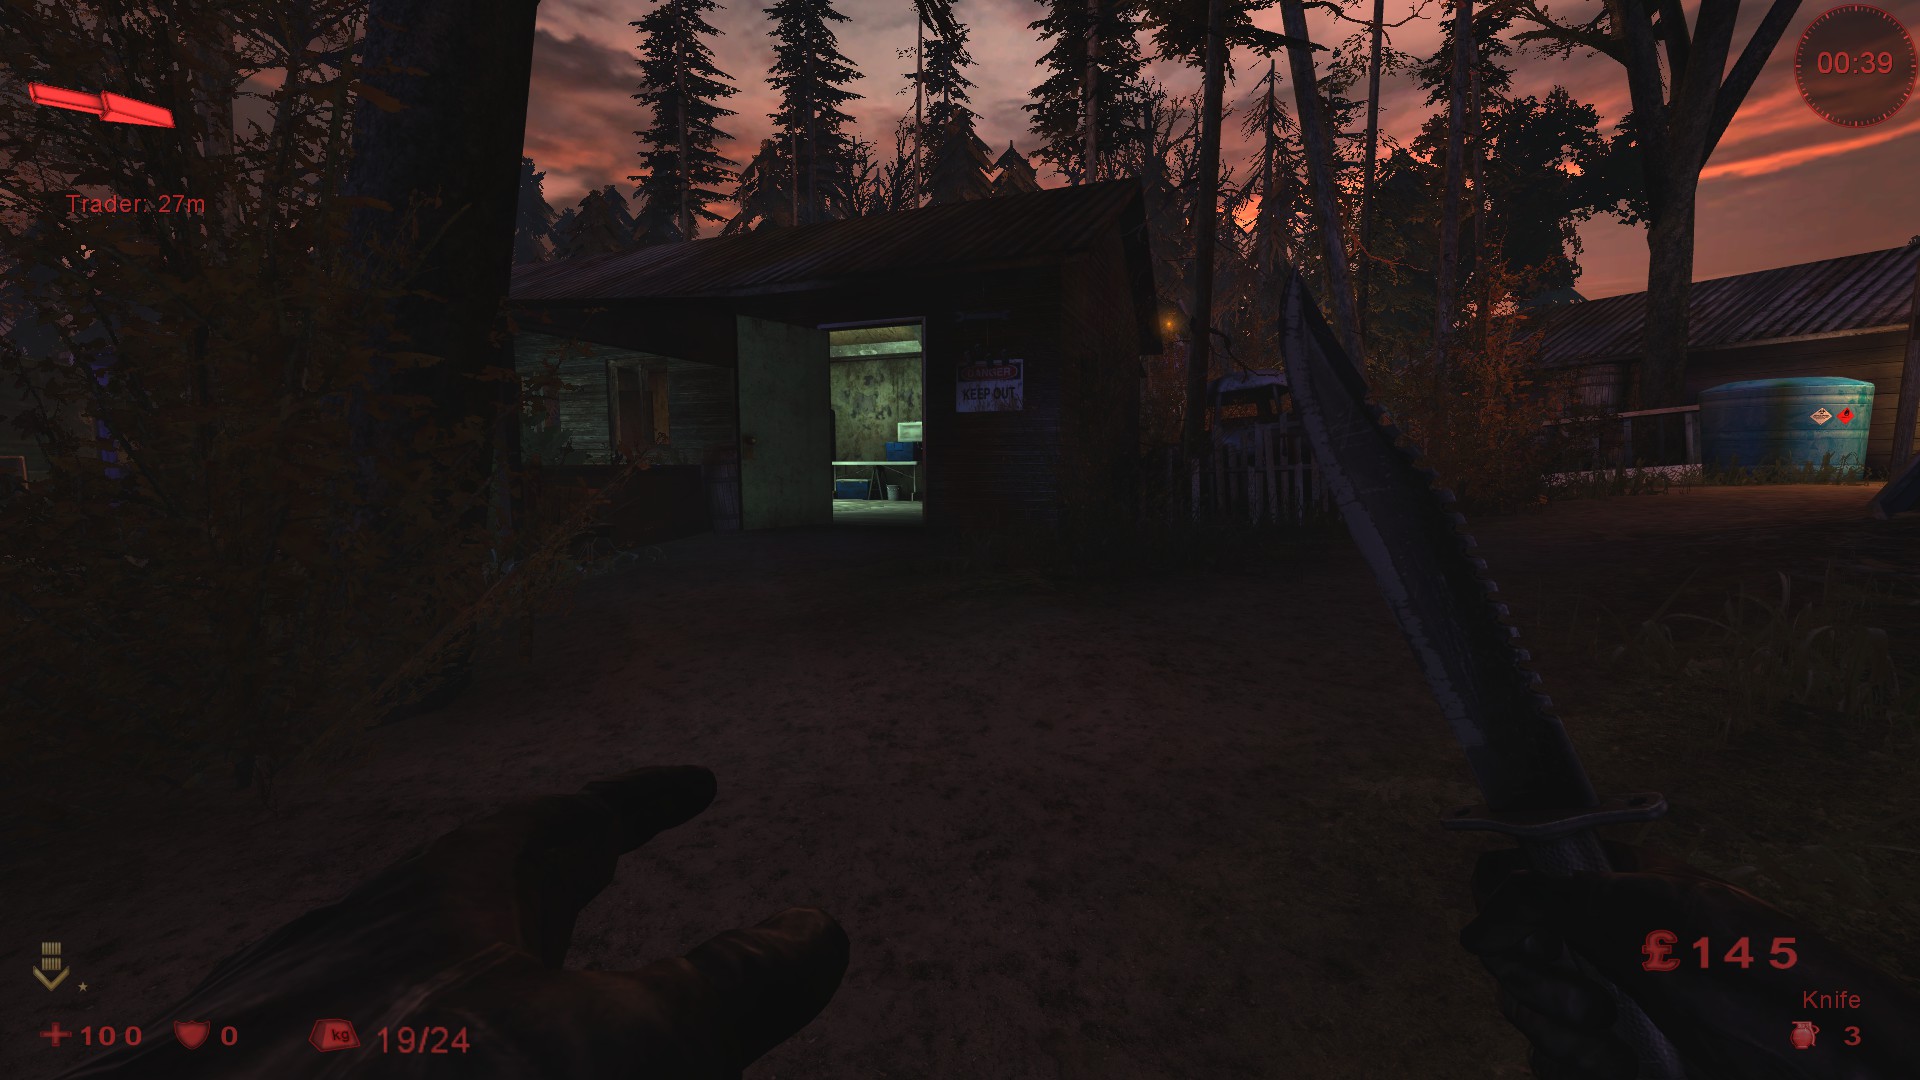
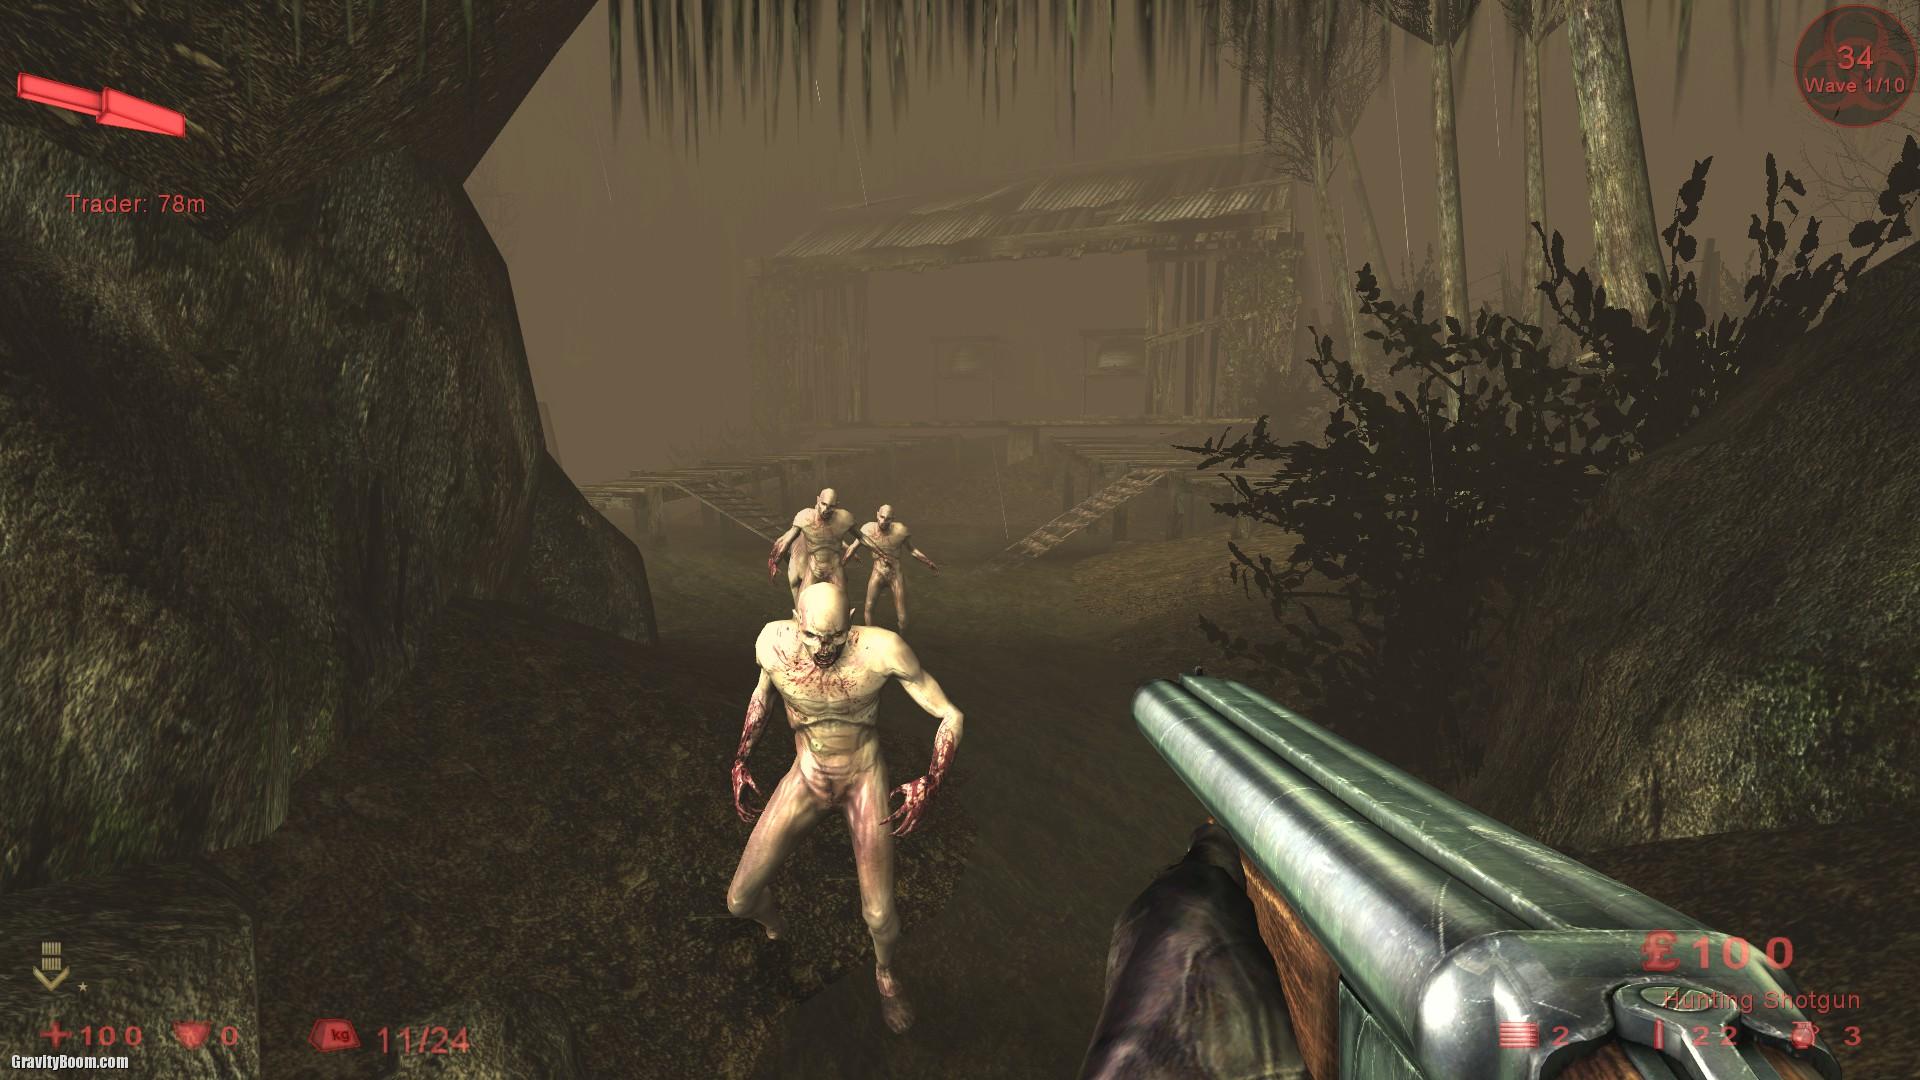
Farm – Find this building.
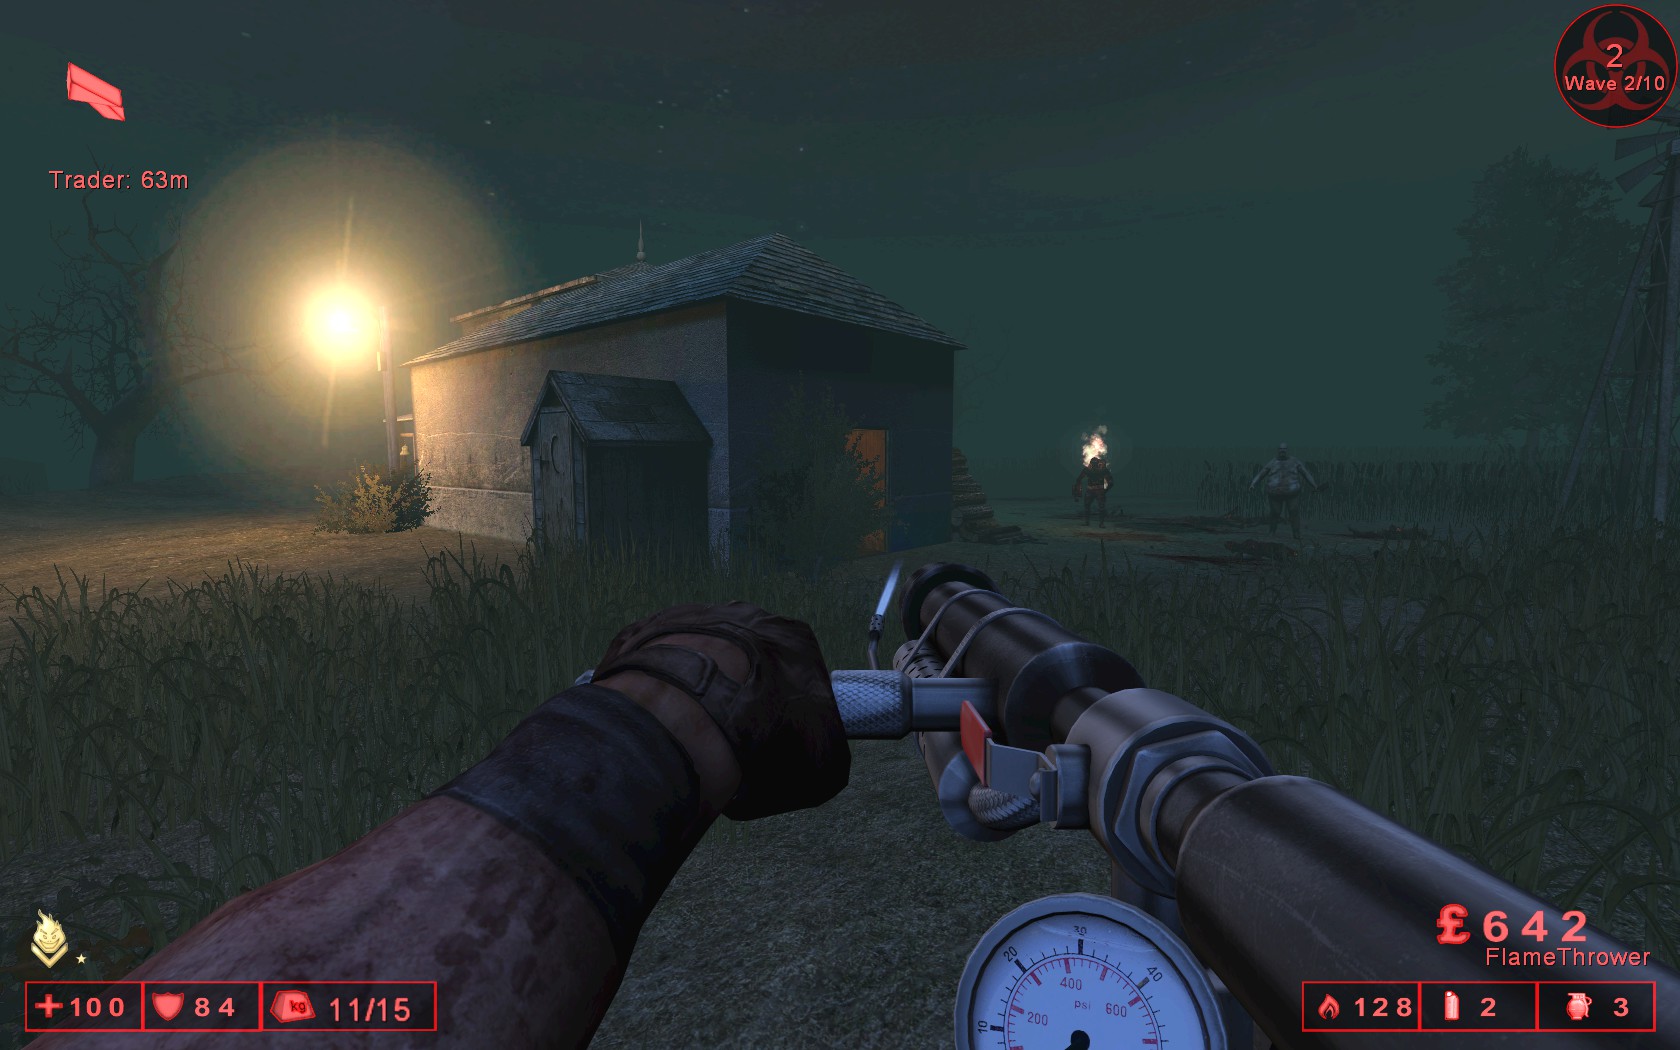
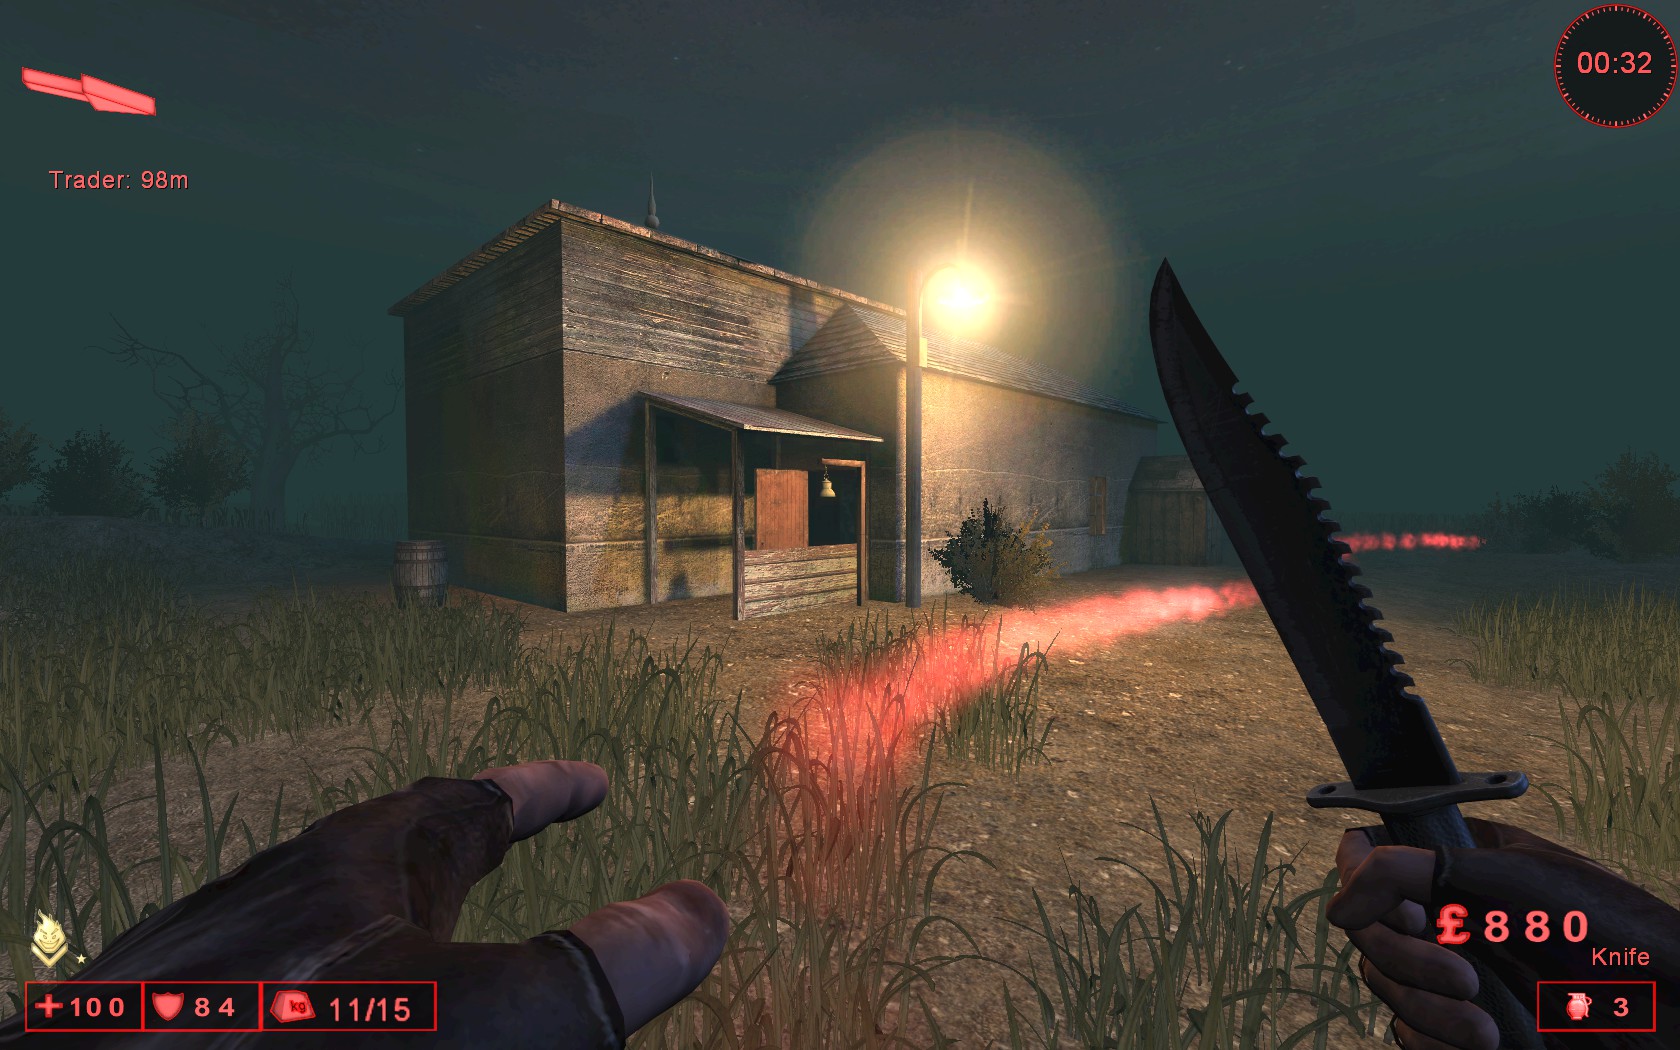
Weld the door behind you inside this building (see screenshot below), everything should approach from the front but in the later waves you will get the odd zed trying to break the door down, the weld should hold until you complete the wave.
Be careful of the trader distance, if need be shoot your way out of this room when you have around 15 zeds left but watch for sirens. In wave 10, place 1 pipe inside the doorway and keep it clear until the fleshpounds arrive, finish them off with the AA-12. When facing the Patriarch, place 2 pipes inside the doorway and wait just around the corner (stay away from the windows), hit him as he hits the pipes.
Filth’s Cross – This position was suggested by another player so I thought I’d try it, weld both sets of double doors behind you and stand in this position.
Everything will approach from the front until the later waves, the doors will hold until the wave is complete, remember to check them before you start a new wave.
Very easy camp spot and 3 Fleshpounds could also spawn in wave 10, you’ll have plenty of time to reload. Make sure you leave at least 1 zed before you finish the wave as the trader is far away on some waves.
For the Patriarch, I used my old camp spot, weld the double doors behind you and place 2 pipe bombs around the corner, hit him with the AA12 as soon as he hits the pipe bombs.
He could approach from either side so be ready to change sides if he does, you will take a hit if he can’t get away to heal.
Forgotten – Use spawn as a starting point, you will have to kite around the map to complete each wave.
You have several spawn points around spawn so you can get overrun very quickly, keep checking behind during each wave and kite the remaining zeds.
For the Patriarch, place 1 pipe bomb either side of any wall near the trader and stay out of sight, hit him with the AA12 as soon as he hits a pipe bomb.
The HoE achievement will also be given if you complete a short game.
Foundry – Go to the top floor and weld the door that will be behind you on the left side.
The majority of the zeds will approach from the front, pipe bombs are not needed for the Fleshpounds as you will have plenty of grenades and the AA12. Note that you might also get 3 Fleshpounds on this map in the last wave.
For the Patriarch, place 2 pipe bombs near the corner where you were standing and wait for him to hit them, if he runs to heal he could run towards you so be aware of that.
Fright Yard – Go to the far right at the back of the yard and weld the double doors on your right and stand in this position.
You will be attacked from 3 sides, the unwelded door, the left side and every so often from the right side.
Check your surroundings before you take on a Fleshpound.
The welded door will be attacked but not until the later waves, if the door does break use that as your escape route.
For the Patriarch, place 2 pipe bombs the other side of the door and close it, he could spawn on your right and will be able to see you through the broken windows so crouch near the wall to avoid his line of sight, as soon as he hits the pipe bombs hit him with the AA12.
The HoE achievement will also be given if you complete a short game.
Fright Yard Objective
Start – Choose any perk.
Wave 1 – THE MURDER GAMES. Kill all zeds.
Trader – Switch to berserker.
Wave 2 – Export: Slaughter. Kite zeds while you unweld container doors but do not open them. Keep unwelding doors until 32 max zeds have spawned. Then open the container doors (no zeds will spawn in your face) until you locate both parts. Don’t pick up any ammo boxes. Now kill zeds. Don’t pick up both parts until you raise 1500+ dosh.
Trader – Switch to support specialist and buy the AA12 and a secondary shotgun for trash. You don’t need to spend much money on ammo if you left all the ammo boxes from wave 2. The next wave won’t start until you assemble the parts so you have all the time you want.
Wave 3 – Crate Job!. You stand on the switch plate and blast any zeds that get close. Make sure the shotgun blasts don’t knock you back off the switch plate. Use secondary shotgun on trash and AA12 for big zeds or if you get in trouble.
Trader – Switch back to berserker.
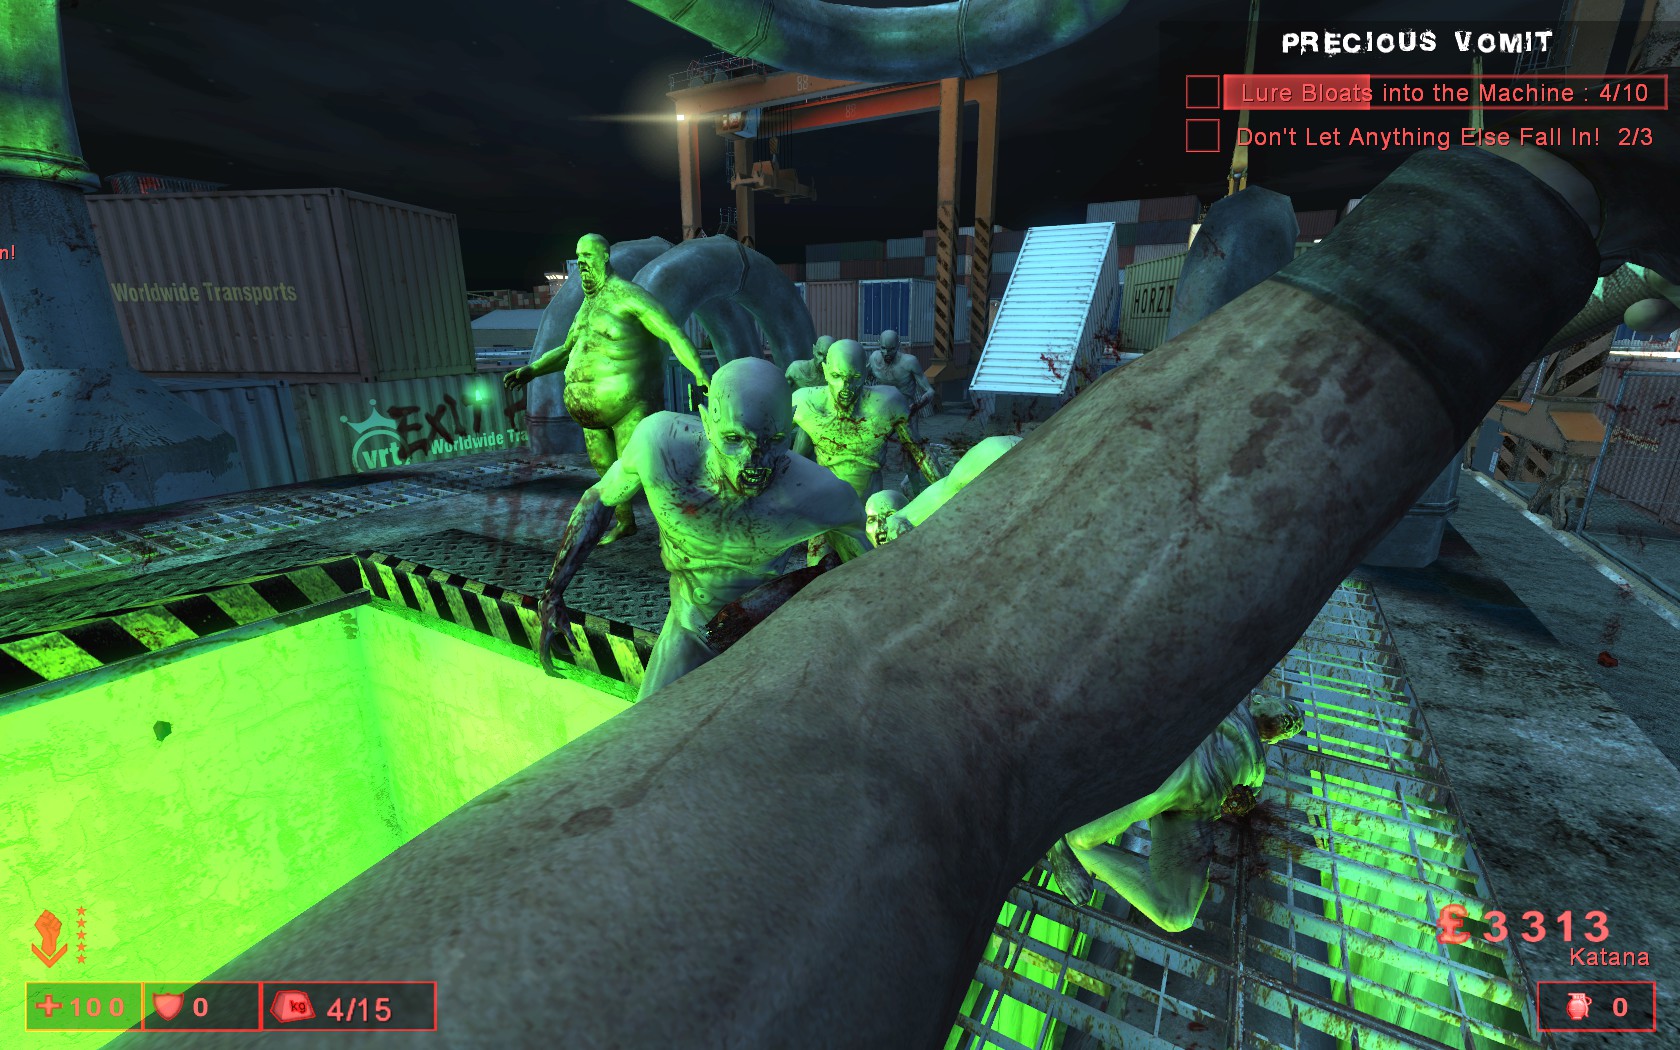
Wave 4 – Precious Vomit. This is the hardest wave imo. Stand on the side of the bile pit so bloats jump in and the rest come to get killed. The only problems arise when you have to move/kite. Make sure there are no zeds closer to the pit than to you or they will jump in. If you do it right (which is difficult) it should only take 2 or 3 tries.
Trader – Your perk of choice. I chose Support Specialist.
Wave 5 – Gassy Gambling. Kite or kill zeds while gambling for gas.
Trader – Your perk of choice. I chose Support Specialist.
Wave 6 – Dock Party. Kill or kite all zeds while the timer runs down. Your choice.
Trader – Switch to demolitions and load key areas with pipe bombs. I chose the corner near the previous trader and 7 pipe bombs was an instant Patriarch kill.
Wave 7 – Defeat the Patriarch.
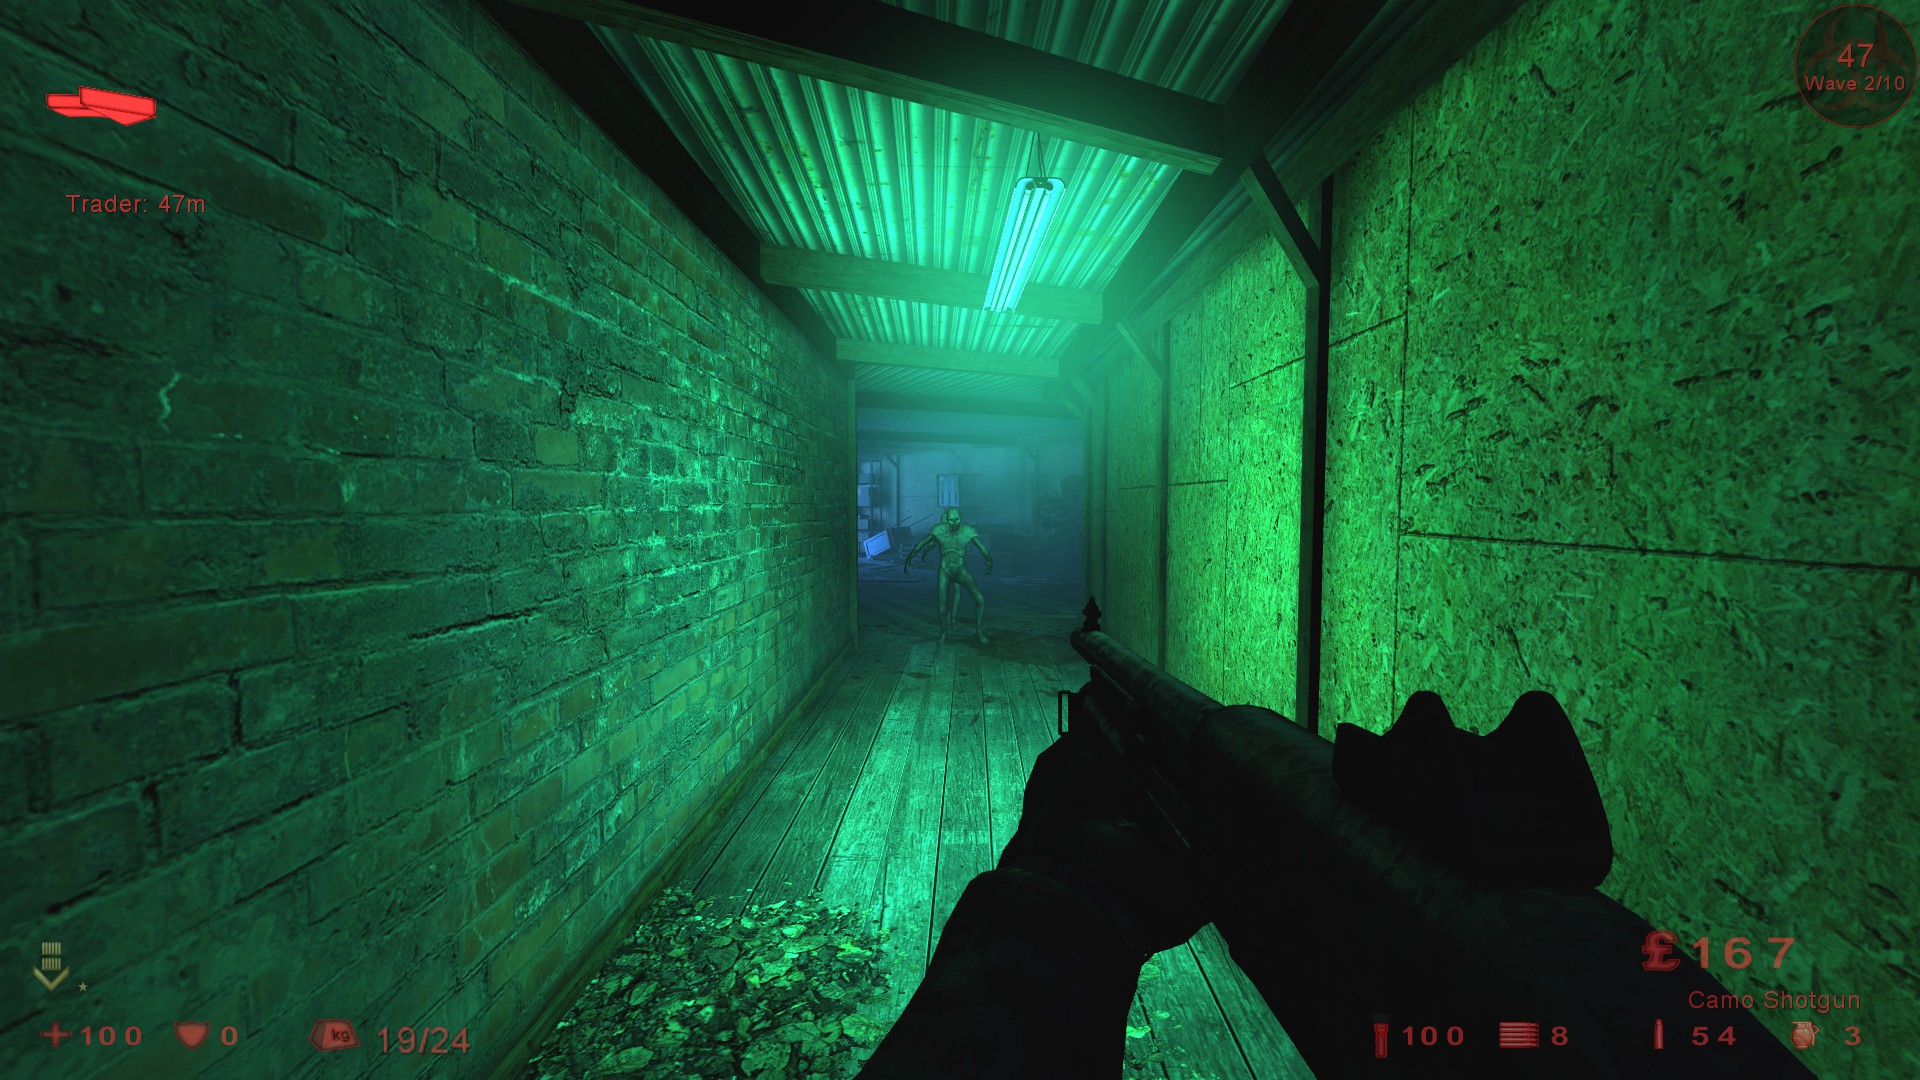
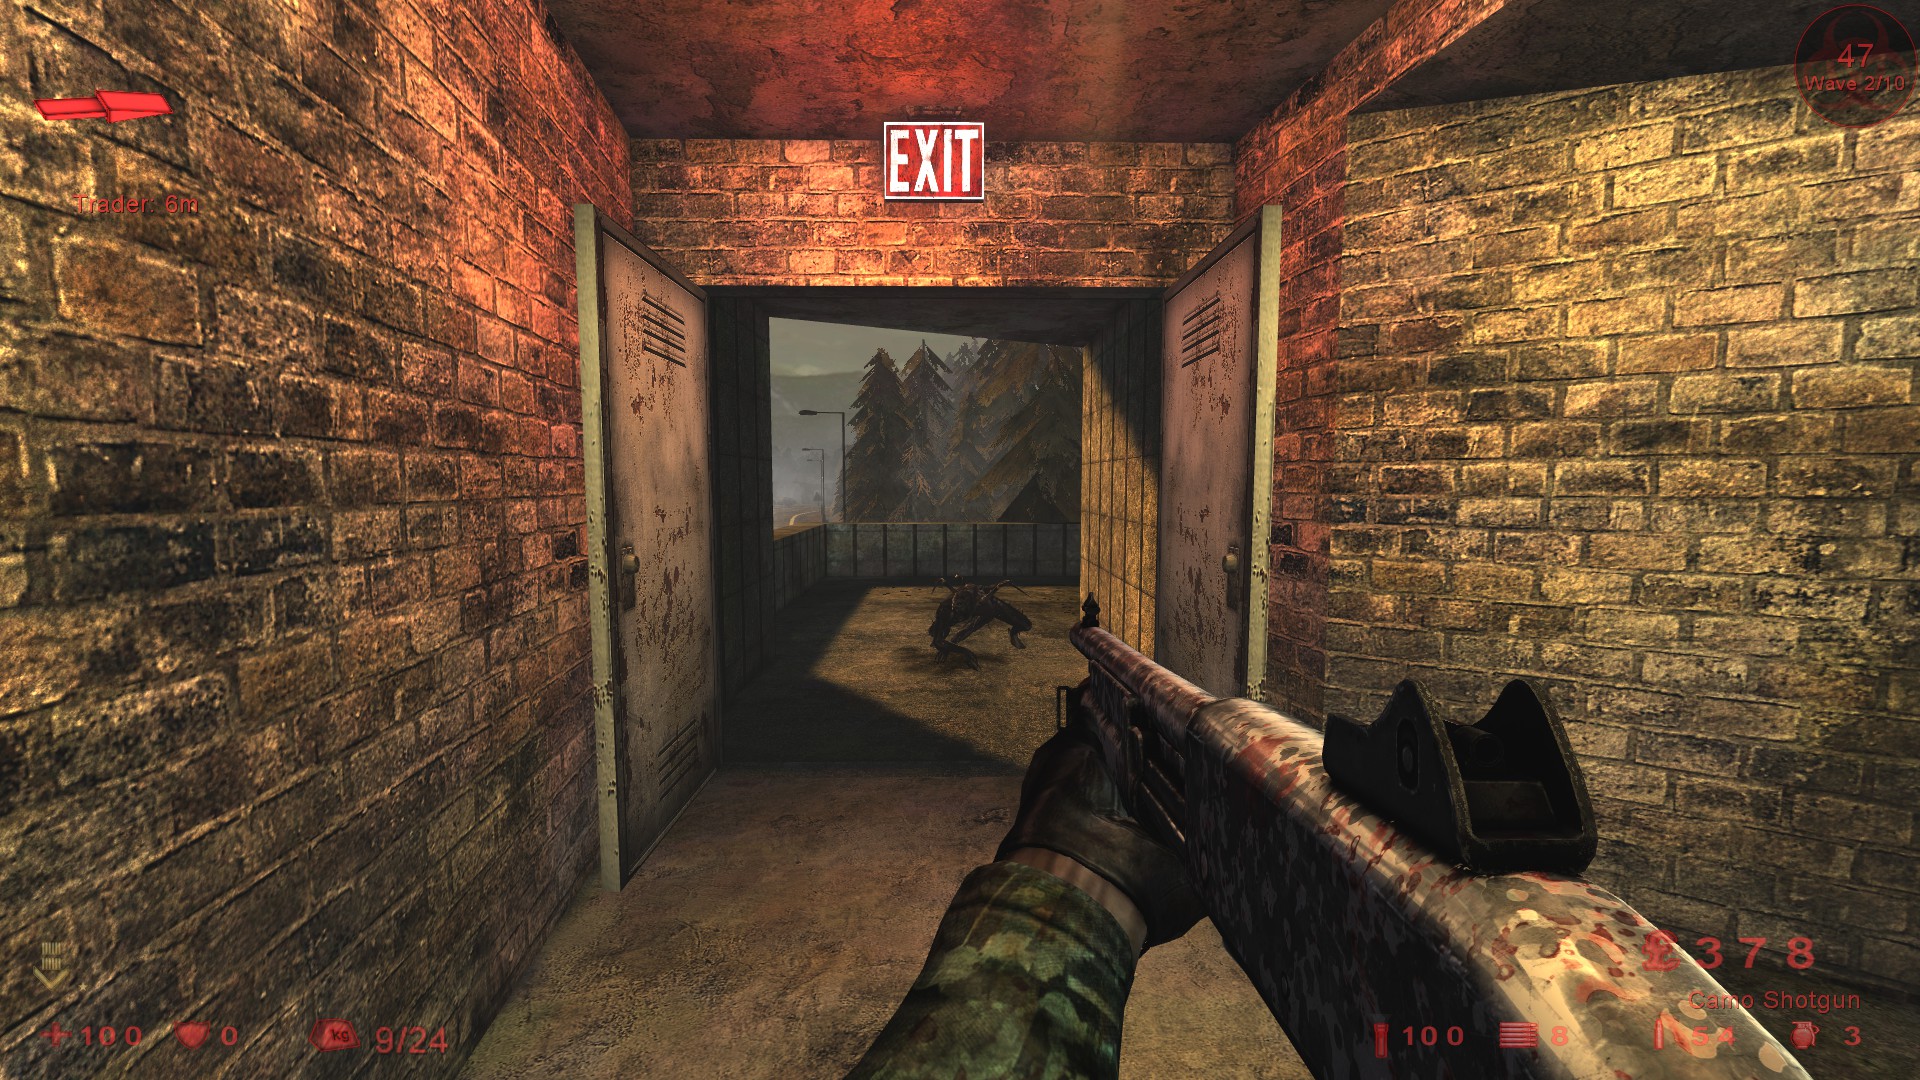
Hell – This area is just right of spawn, weld the door to your right to avoid the Husks fireballs from that side.
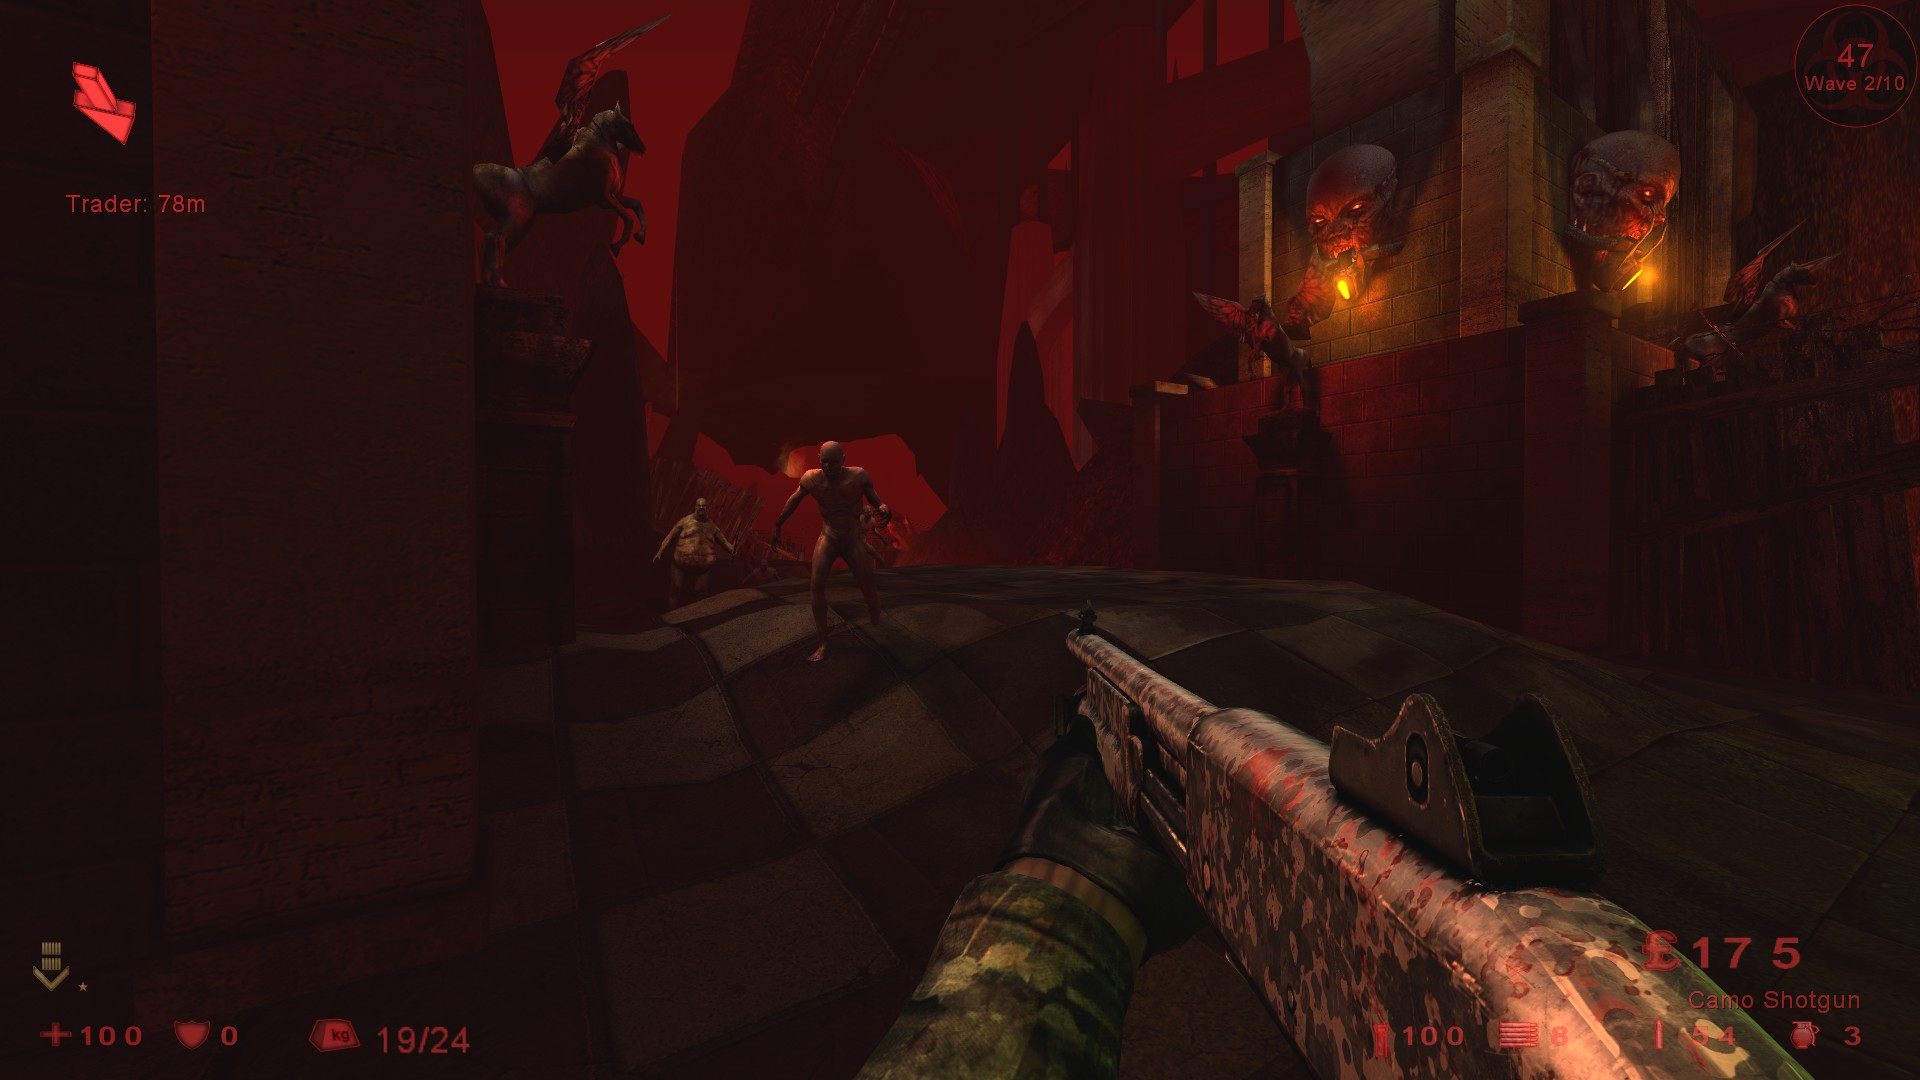
Be careful of the trader distance on some waves. You have plenty of time to reload and pipe bombs are not needed for the Fleshpounds.
For the Patriarch, place 2 pipe bombs on the top of the mound in front of you and hit him with the AA12 when he hits them, very easy map.
The HoE achievement will also be given if you complete a short game.
Hellride – Use this doorway to get to the camp spot, turn left and weld the door at the top of the ramp.
Stand in this position with the welded door behind you.
The door will be attacked but the zeds are grouped together as they approach so the wave will be almost over if they break through.
Use pipe bombs for the Fleshpounds if needed but you’ll have plenty of time to reload.
For the Patriarch, use 2 pipe bombs where the trader is and hit him with the AA12 as soon as he hits the pipe bombs.
The HoE achievement will also be given if you complete a short game.
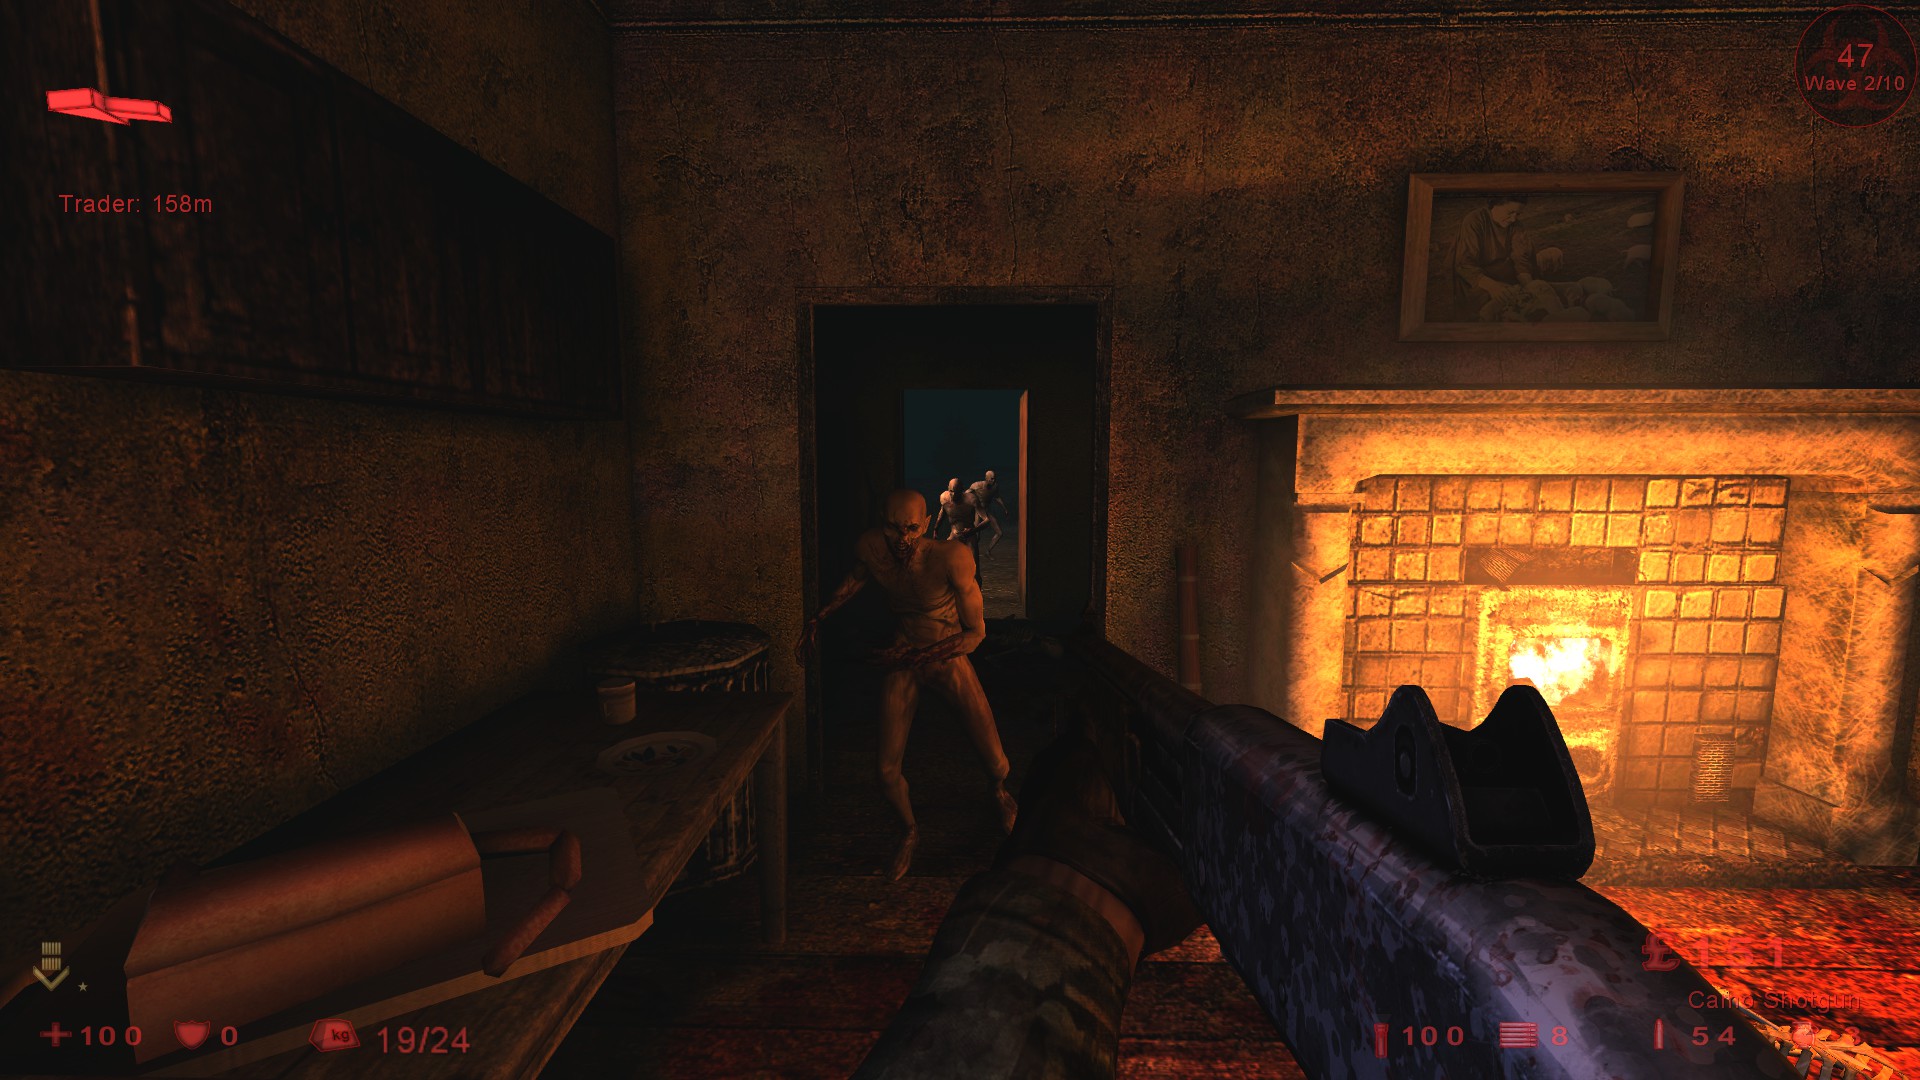
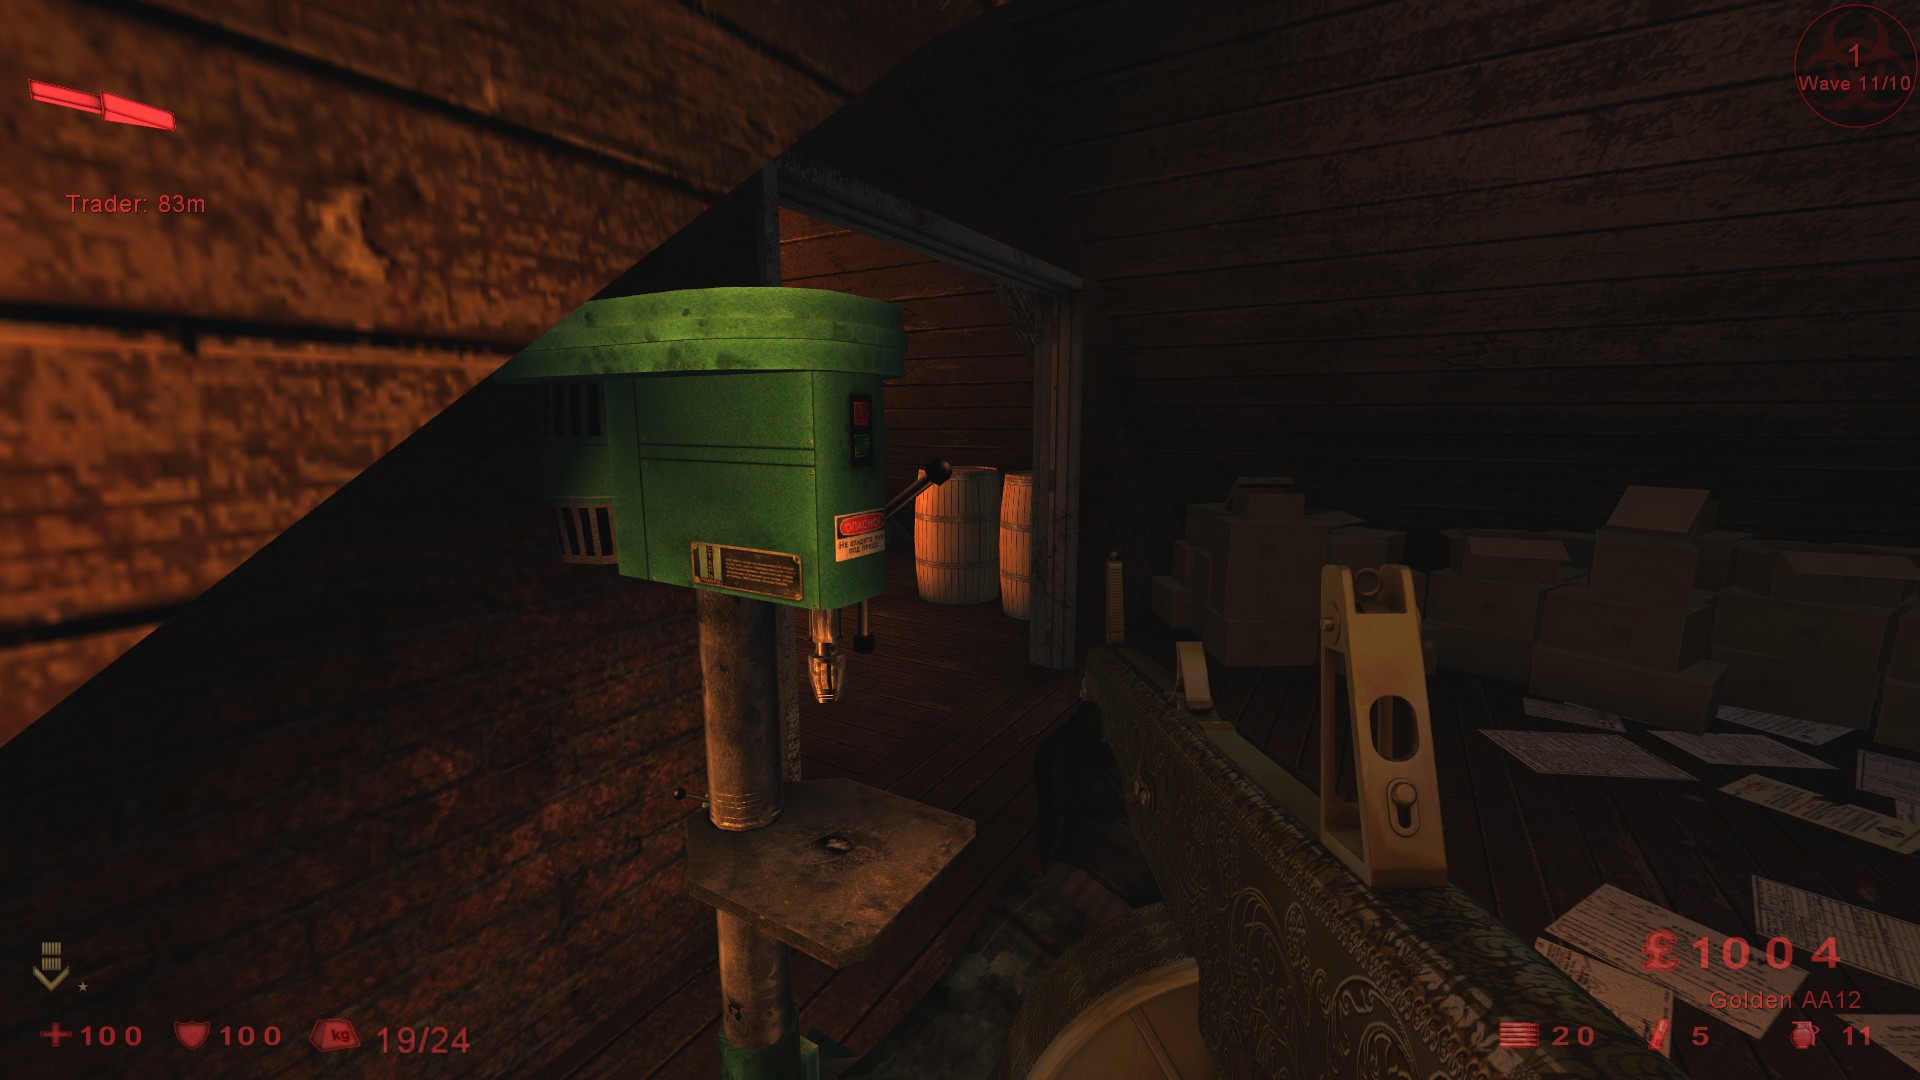
Hillbilly Horror – Use this building as a camping spot.
Weld the door behind you and stand in this position, try and keep the refrigerator on your right as close as possible and the welded door will not be attacked.
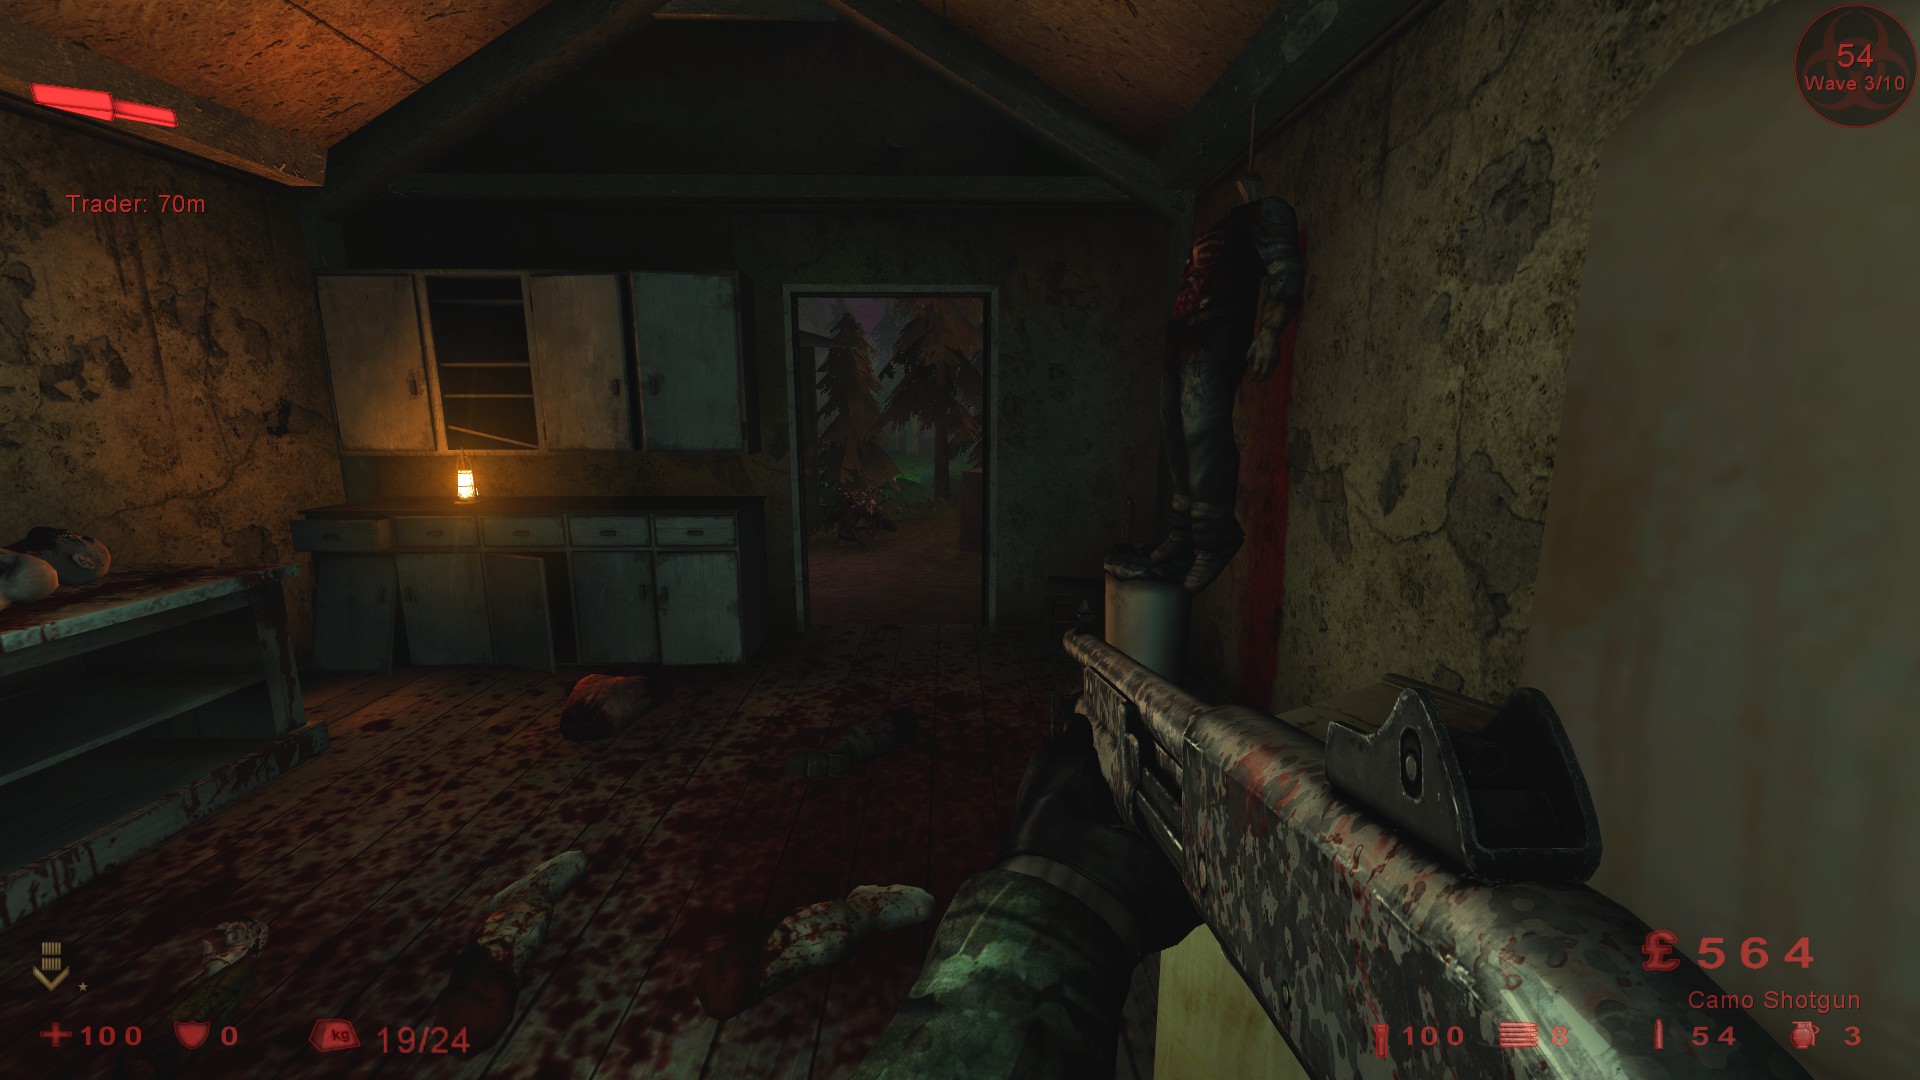
Everything will approach from the front and because the door is narrow the zeds will get stuck from time to time, gives you chance to heal or reload.
For the Patriarch, you have a number of spots that work on this map but I decided to try the same room I was camping in, place 2 pipe bombs outside the door and close it, crouch as he approaches, hit him with the AA12 as soon as he hits the pipe bombs.
The HoE achievement will also be given if you complete a short game.
Hospital Horrors – This area is on the first floor near the trader, weld the double doors behind you and stand in this position.
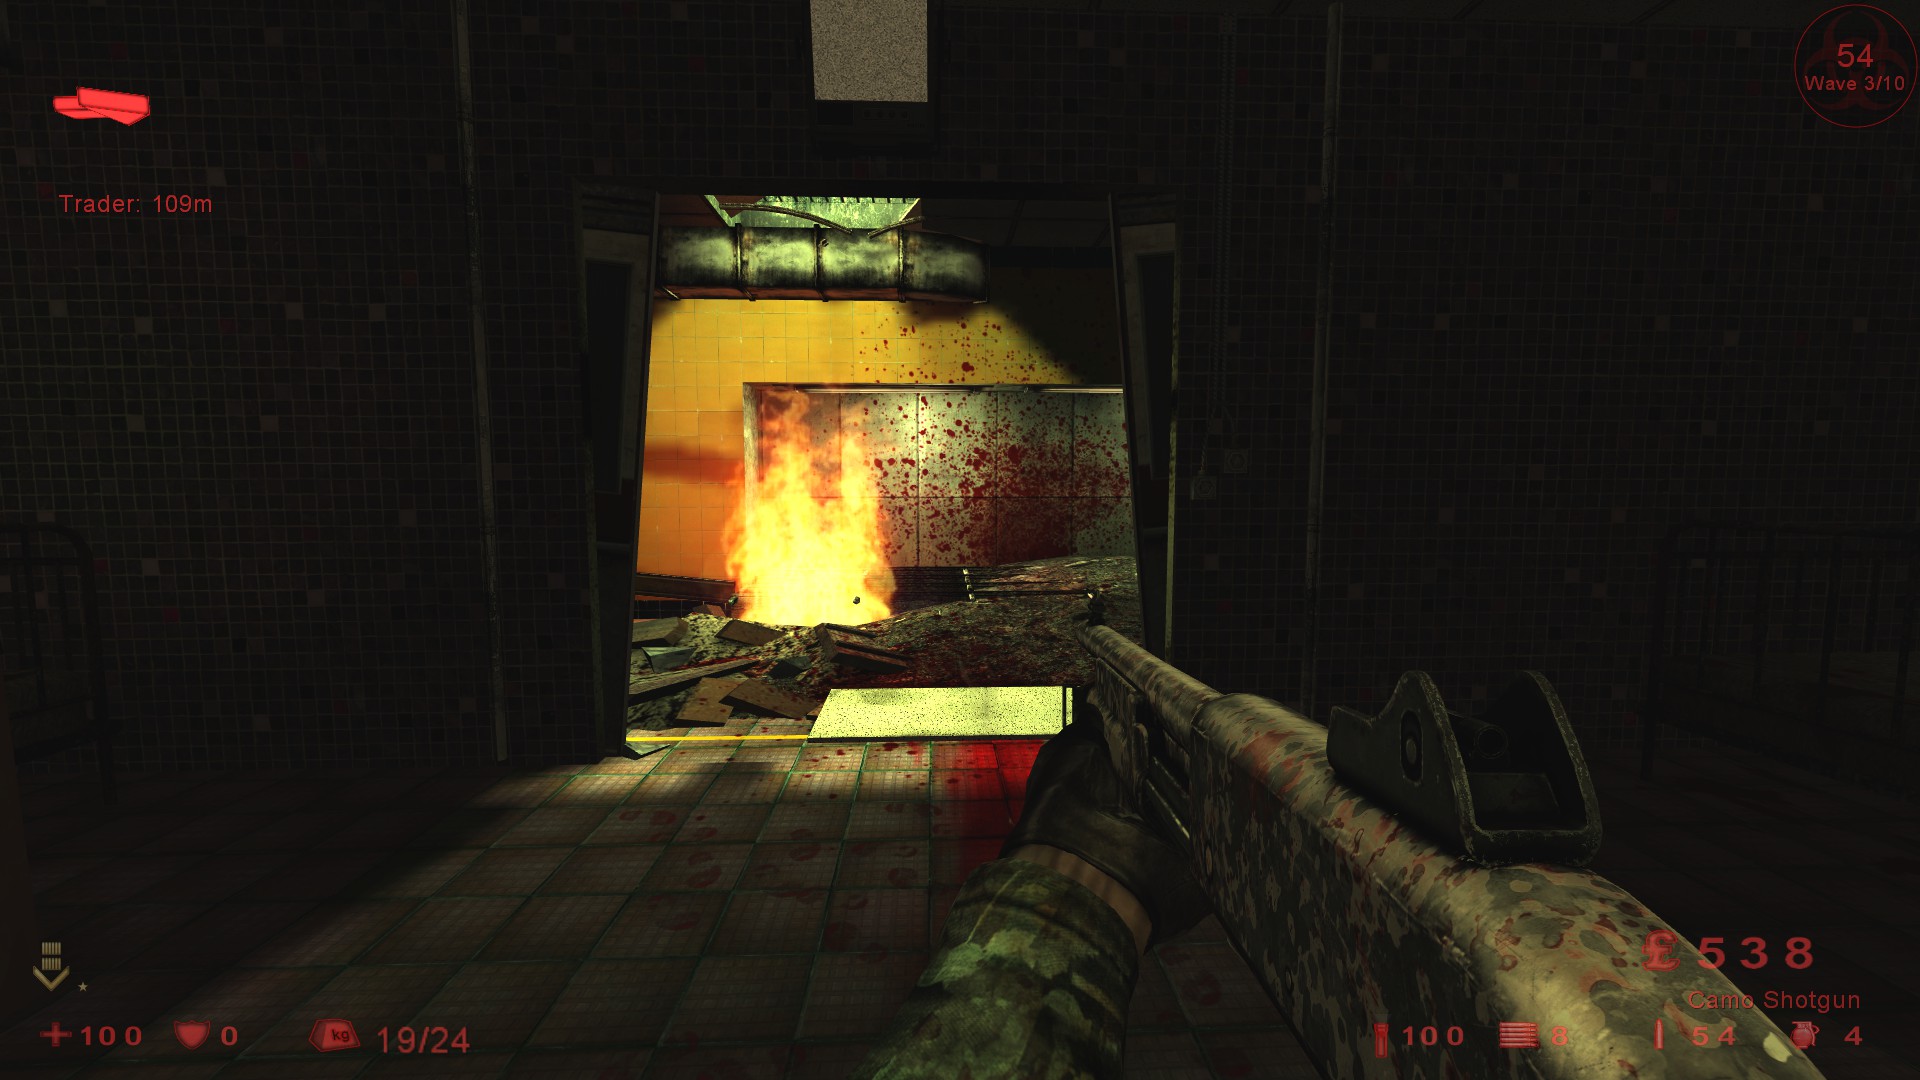
Stand in the doorway to see what is coming towards you, if you get pushed back into this room it becomes very busy very quickly, in the later waves try and hit the Fleshpounds before they get near the door but do not leave the room.
Be careful of the trader distance on some waves.
For the Patriarch, place 1 pipe bomb outside the door on either side and wait inside the room, use grenades when you hear him approaching to do him extra damage, hit him with the AA12 as soon he hits a pipe bomb.
Icebreaker – Walk towards the top of the ship until you’re on the right staircase.
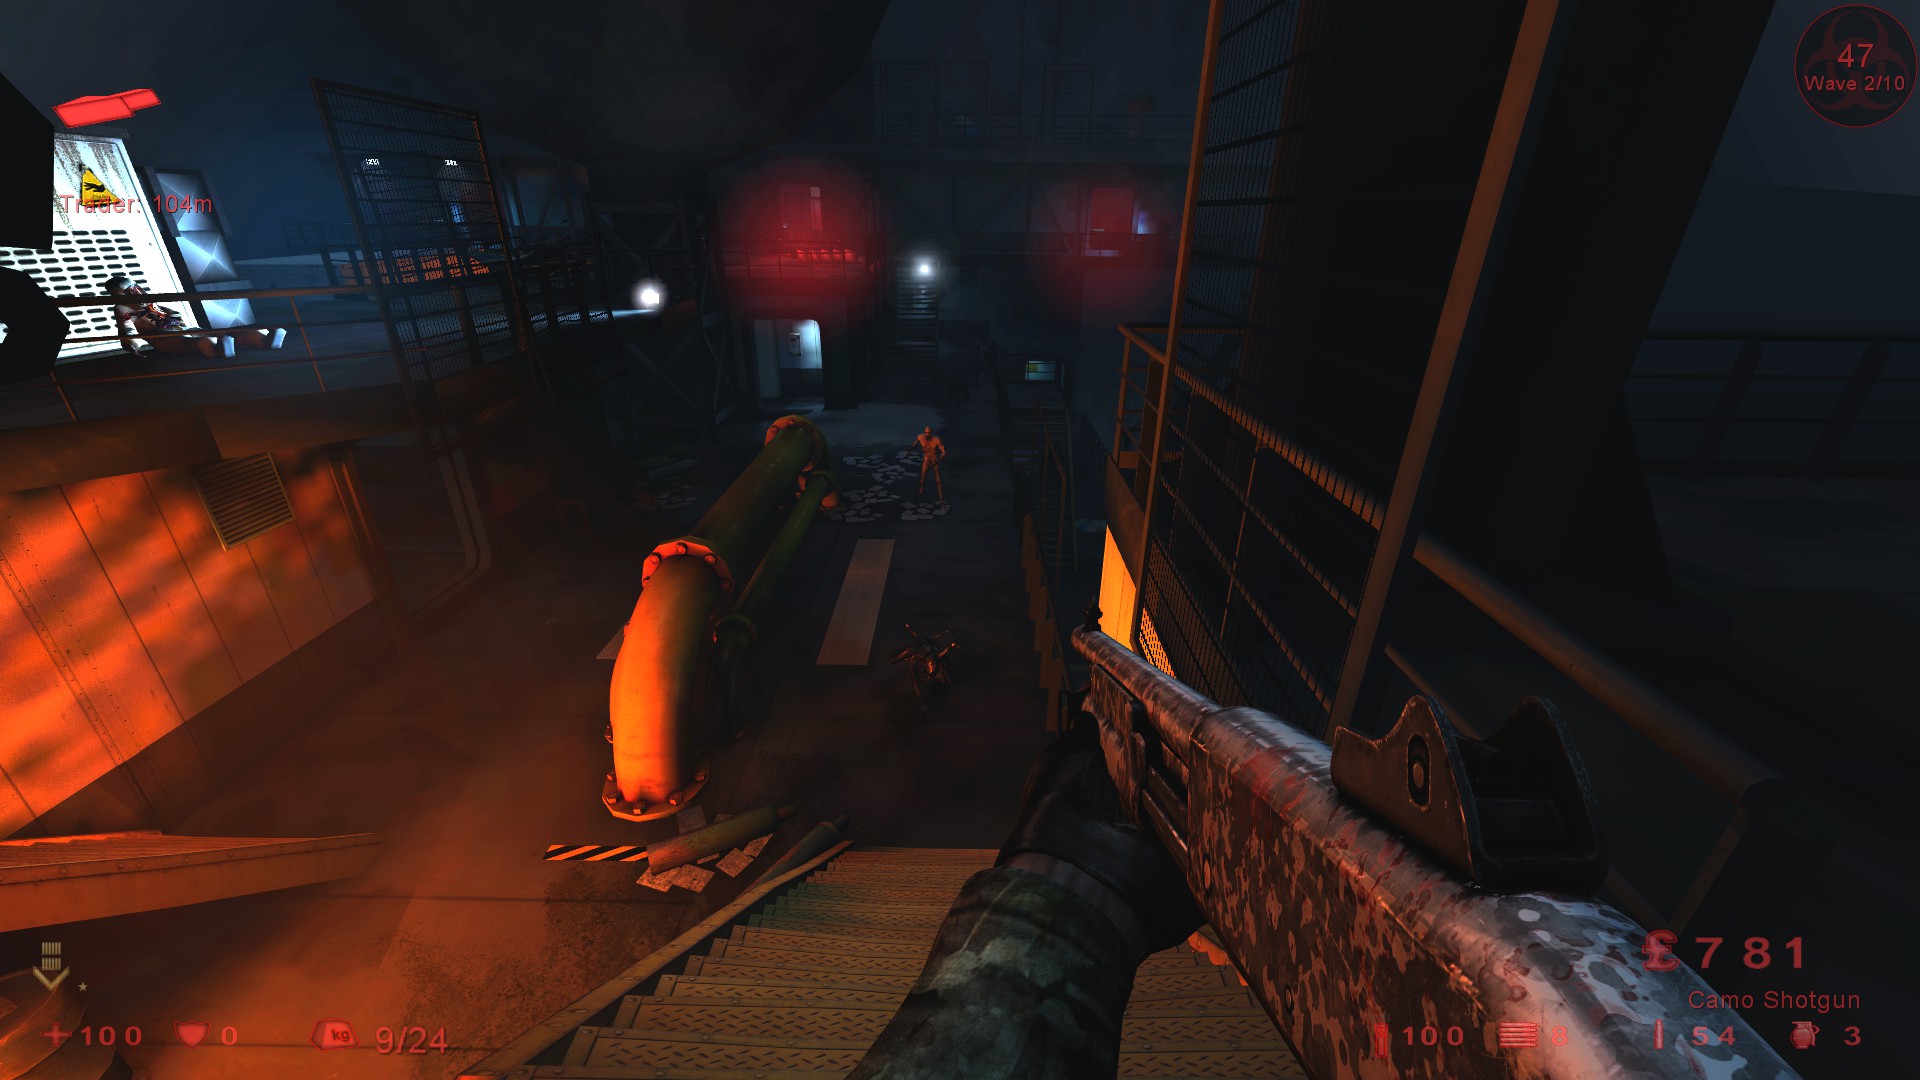
If you don’t move too far forward everything will approach from the front, the Gorefasts are very dangerous as they can run up the stairs and slash at you within a second or two. The dead body on your left spawns a handcannon quite often, take it and sell it.
Use pipe bombs for the Fleshpounds if you need them.
For the Patriarch, this area is at the back of the ship near the trader, place 2 pipe bombs near the top of the stairs and hit him with the AA12 as soon as he hits the pipe bombs.
Ice Cave – From the spawn area, weld the double doors behind you and use this position as a starting point.
The welded door will be attacked very early and you will not be able to hold this position for long as you’re surrounded by spawn points, kite the remaining zeds around the map, be especially careful of Sirens in the tunnels and only reload the AA12 when you are clear of that area.
For the Patriarch, go to the throne room, this area is up the steep slope near the trader, place 1 pipe bomb either side of this area and wait out of sight, hit him with the AA12 as soon as he hits the pipe bomb.
The HoE achievement will also be given if you complete a short game.
Manor – Stay inside the cave entrance, watch for gorefasts/clots/crawlers which might approach from behind. You must keep checking behind during each wave, they will approach from behind in the very early waves so always keep checking your back, it’s an easy spot to hold so you should have no problems.
Stand Here
For the Patriarch I used a new spot, it’s in the lower basement area.
Weld one door so he can approach easily from one side then place 2 pipe bombs around the corner and hit him with the AA12 as soon he hits them.
Moonbase – Head towards control room B and weld the door behind you and stand in this position.
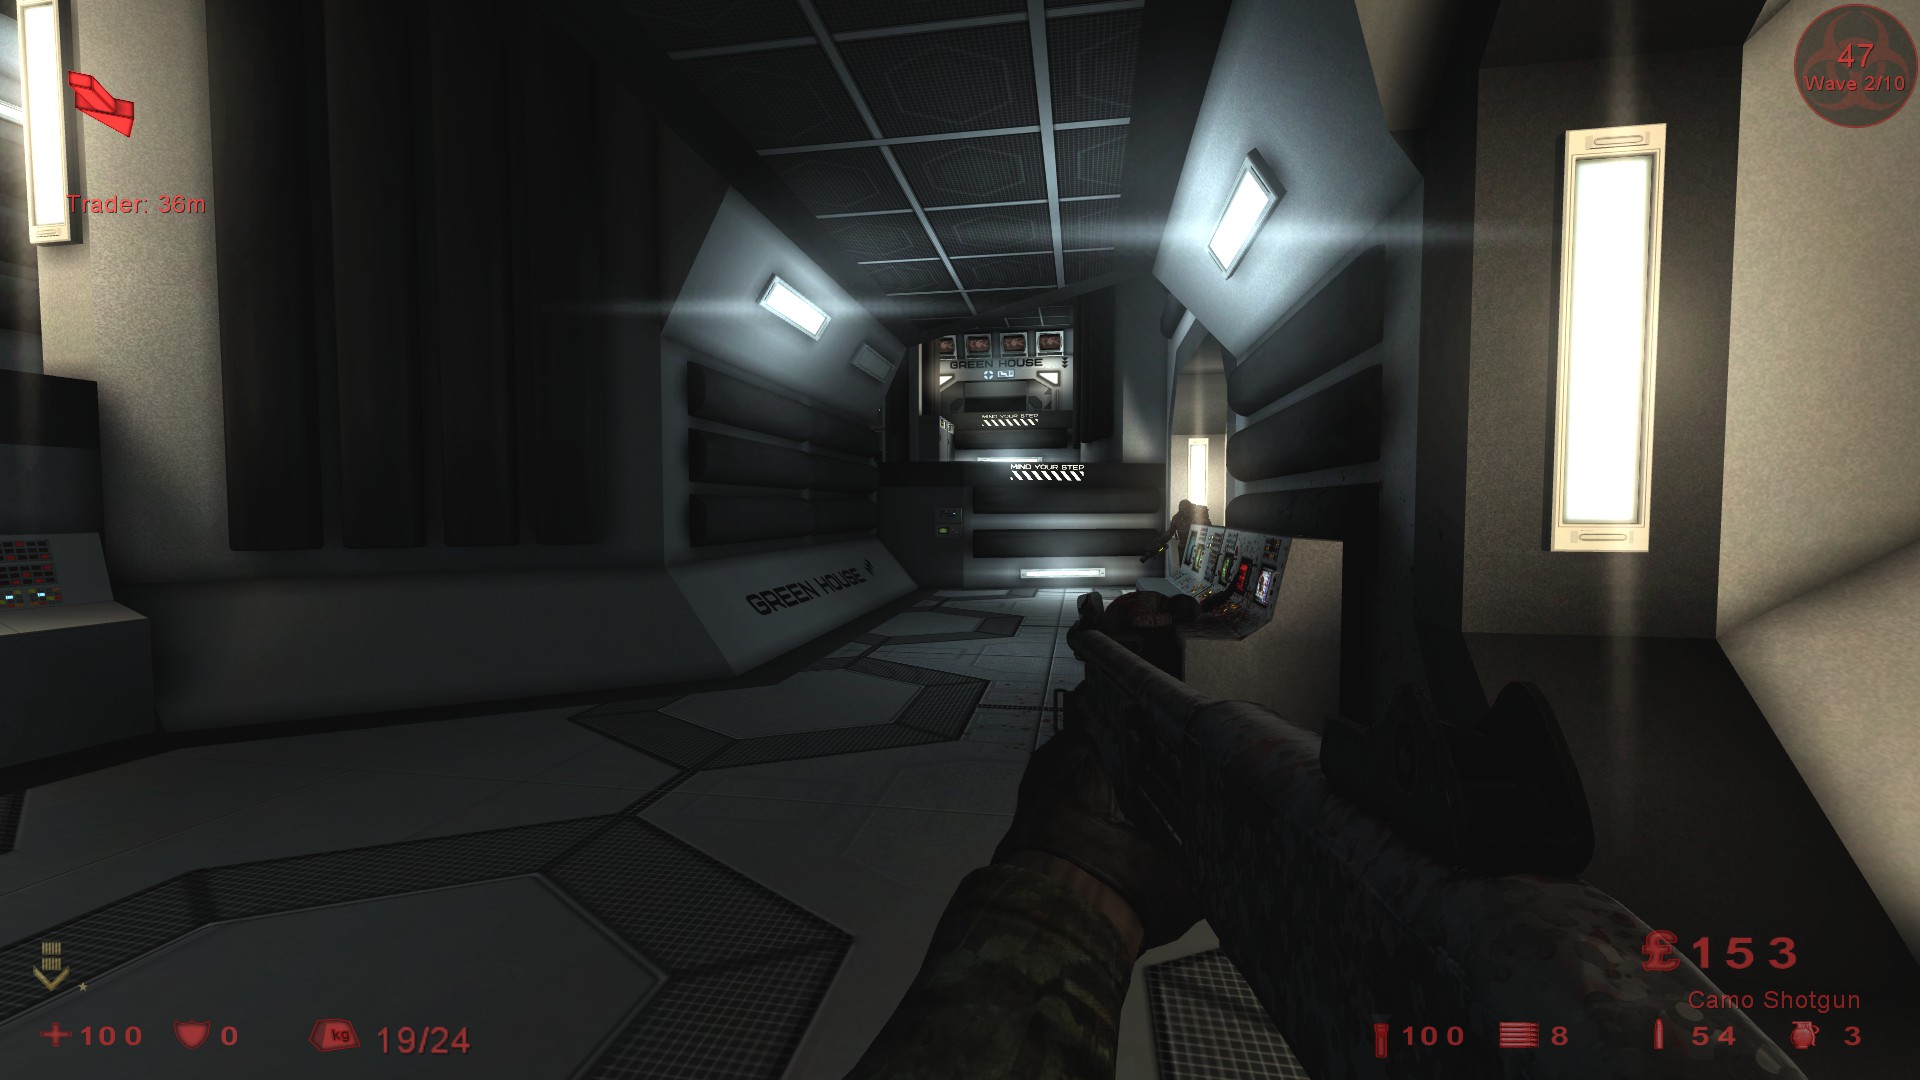
The door will be attacked often so be prepared to kite the remaining zeds once it breaks.
The Crawlers and Stalkers have a spawn point on your left so you will get a lot of these zeds during the game.
The most important thing to remember is firing and jumping, because of the zero gravity if you’re airborne and open fire you lose control of your player so I’d advise against jumping and firing, the Husks fireballs can also send you into the air and are especially dangerous if you are taking on a Fleshpound.
For the Patriarch, use 2 pipe bombs just in front of where you start and wait near the stairs, hit him with the AA12 as soon as he hits the pipe bombs.
The HoE achievement will also be given if you complete a short game.
Mountain Pass – Weld the door behind you and stand in this position.
If the door behind is broken shoot your way out and kite the remaining zeds, very easy camp spot and the only problem is the trader distance from this position on certain waves.
For the Patriarch, place 2 pipe bombs behind the door in front and close it, hit him with the AA12 as soon as he hits the pipe bombs.
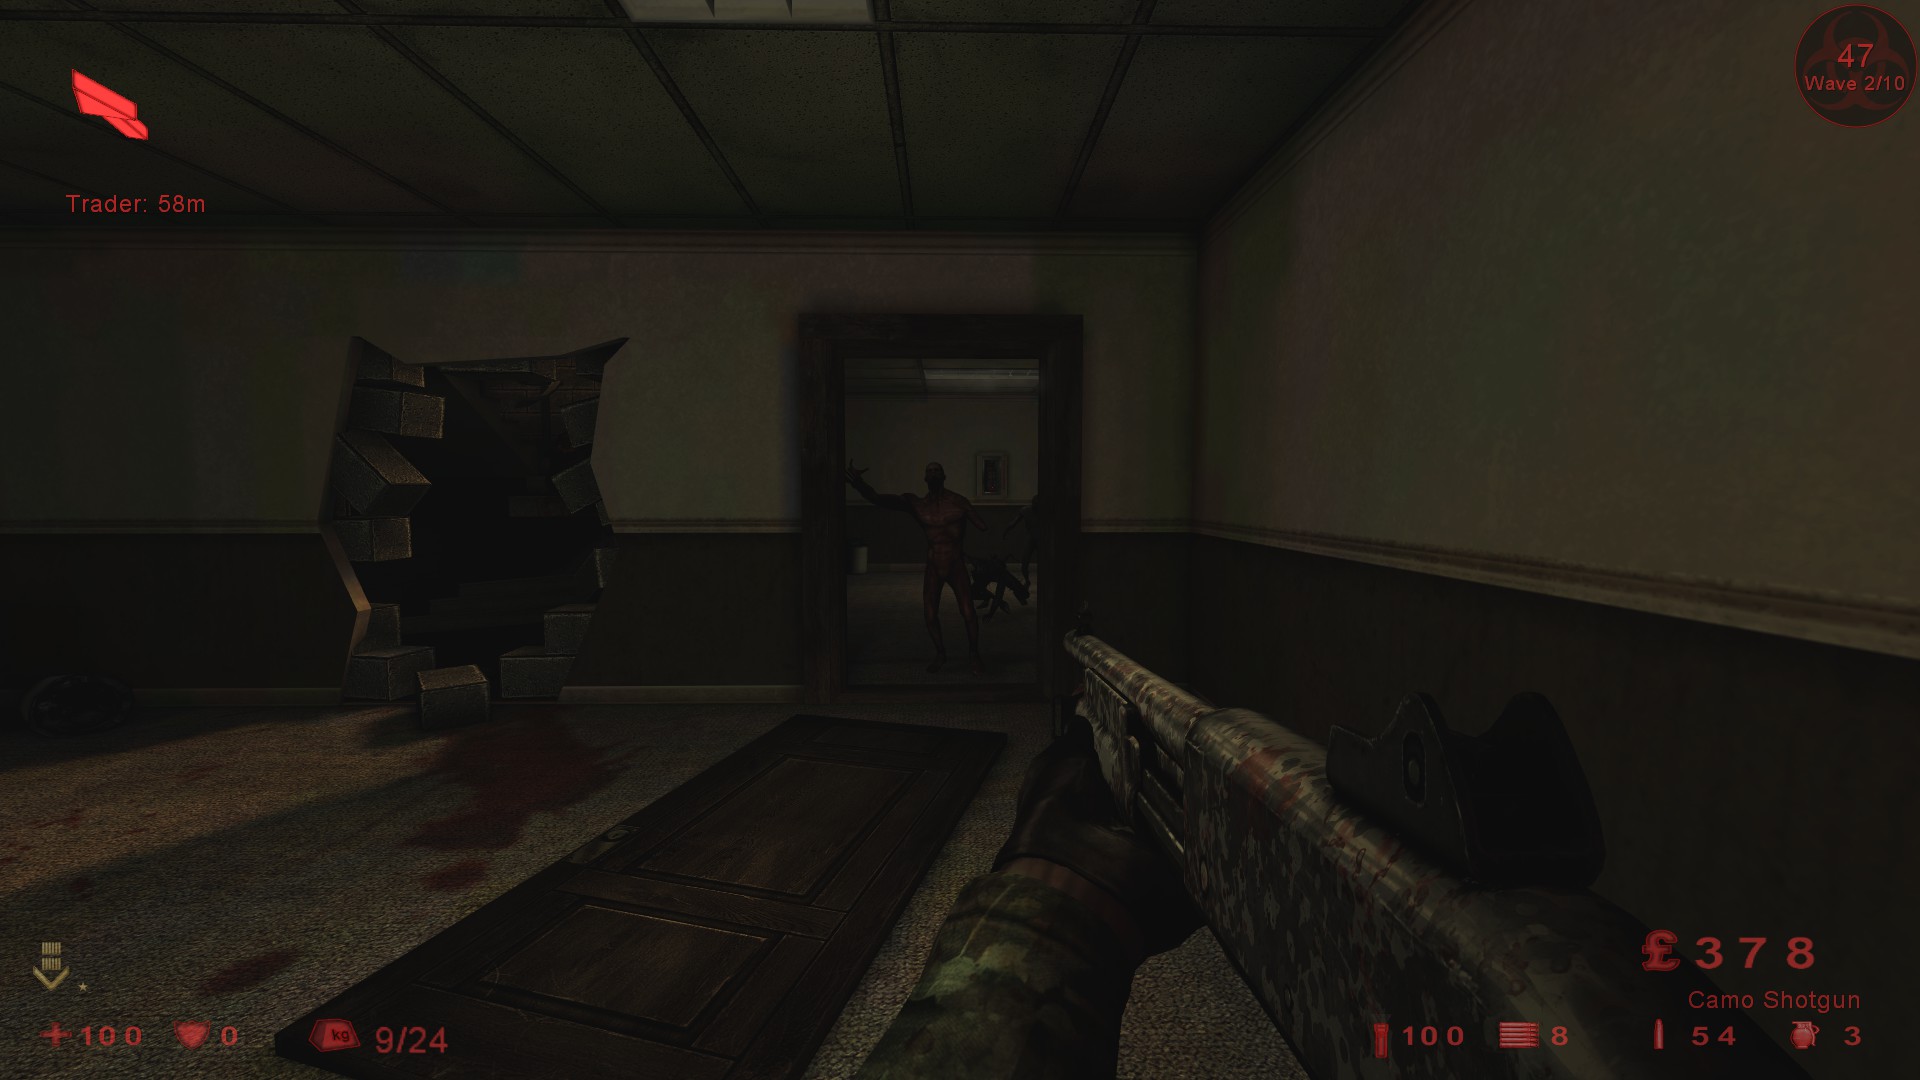
Offices – Weld the door on the ground floor and stand in this position.

Don’t move too far back or too far forward from this position or the zeds will spawn inside the broken wall area on your right. The majority of the zeds will approach from the front, however, the door behind will be attacked early. It should hold for the entire wave unless you have a Scrake or Fleshpound behind the door so listen for it breaking.
I placed 1 pipe bomb behind the door in wave 10 incase a Fleshpound spawned there.
For the Patriarch, place 2 pipe bombs where you were standing and wait inside the broken wall area, hit him with the AA12 as soon as he hits the pipe bombs.
Siren’s Belch – I tried a few spots on this map but the spawn area seems to be the better spot for a long game. Weld the door to your left and stand in this position.
You’ll have a good view of everything approaching but be careful of the Husk, retreat alongside the truck when you get pushed back. DO NOT go up the stairs as you’ll be overrun. The door wll be attacked so listen for it breaking then retreat alongside the truck to clear.
For the Fleshpounds/Scrakes, retreat alongside the truck again and hit them with lots of zeds behind them, ideal shotgun penetration for a Fleshpound and Scrake combo if they appear in a group and you need time to reload.
Be careful of the trader distance on some waves as you might need to get back to weld the door.
For the Patriarch, I used the attic area above the trader.
Place 2 pipe bombs outside the entrance and hit him with the AA12 as soon as he hits the pipe bombs.
The HoE achievement will also be given if you complete a short game.
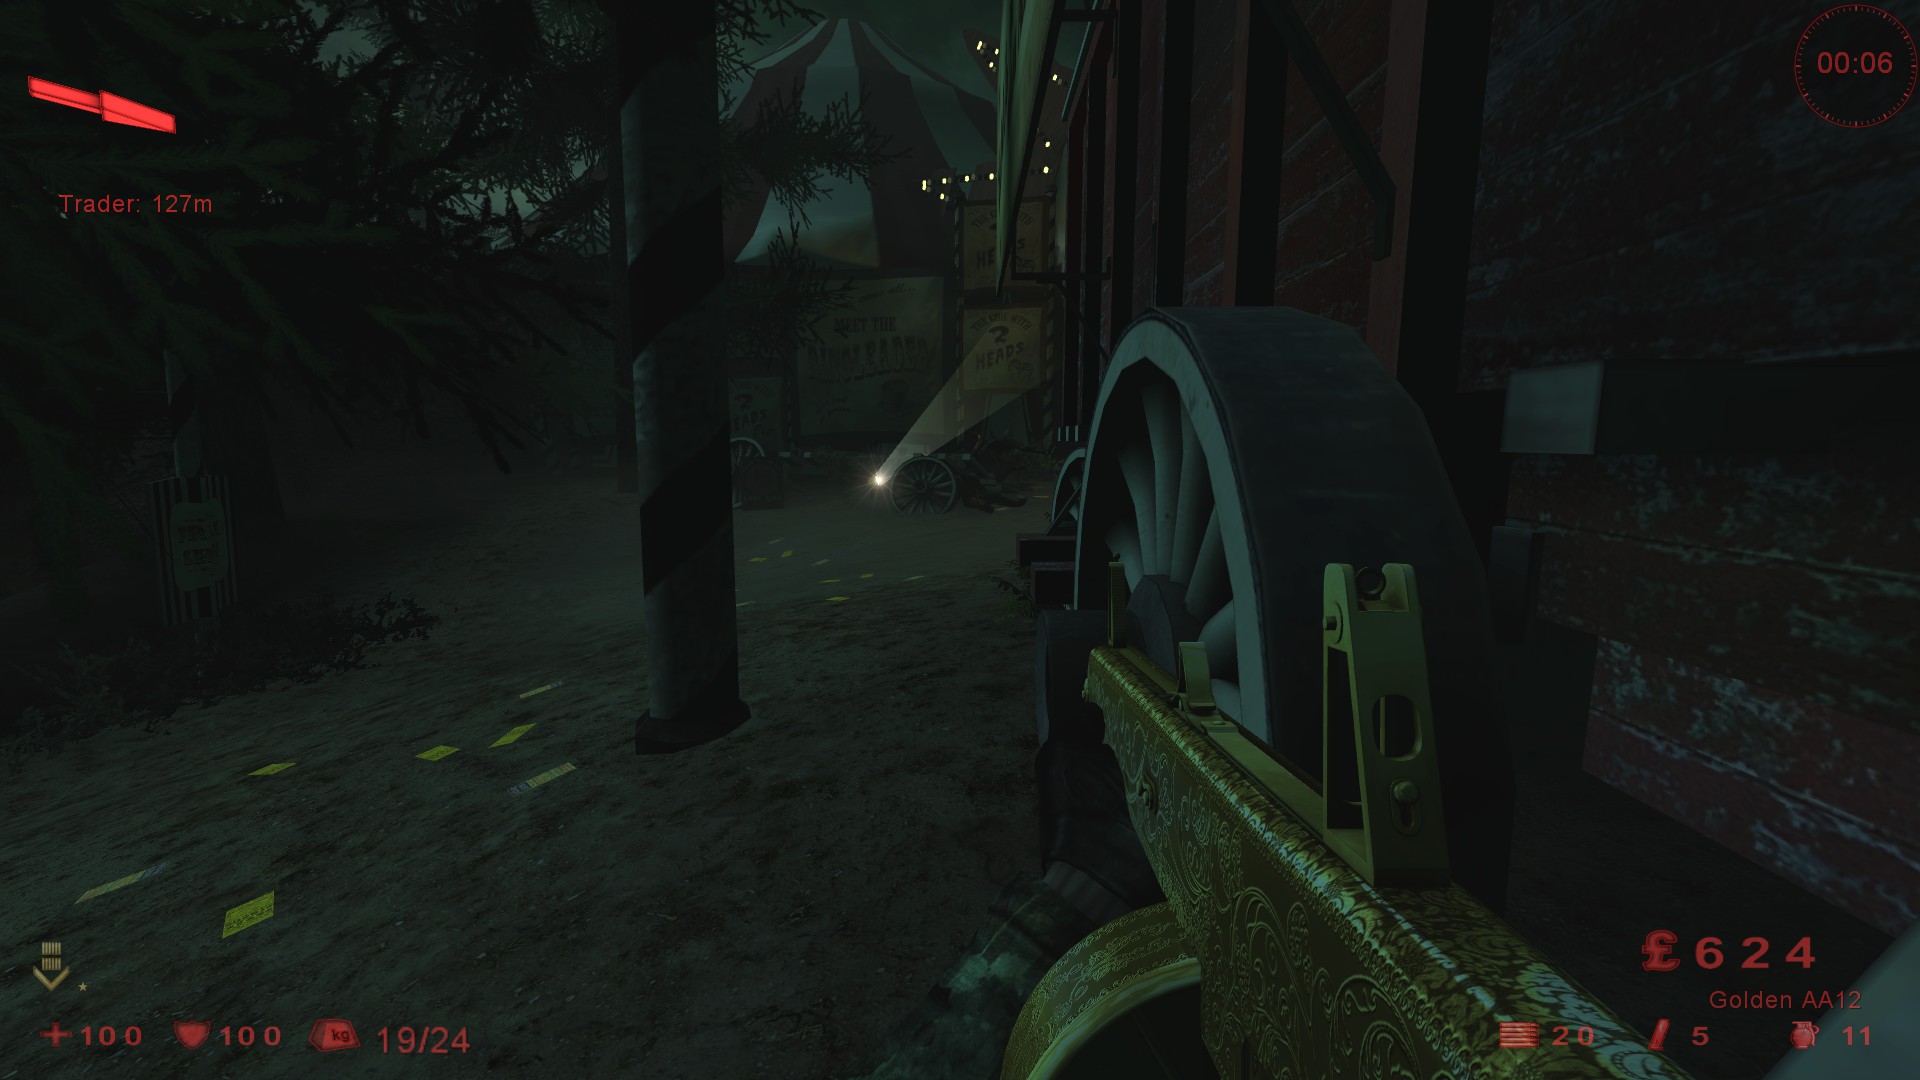
Steamland – Go to the far edge of the map and stand in this position.

Everything will approach from the front due to pathing issues with the zeds, the only real threat are the Sirens and Husks.
Be careful of the trader distance on some waves. You’ll also find lots of ammo and weapons on this map, sell the weapons to buy armour early if you need it.
For the Patriarch, place 2 pipe bombs near the ramp and wait around the corner where you’ve been standing, hit him with the AA12 as soon as he hits the pipe bombs, you will take a hit if he can’t get away to heal.
The HoE achievement will also be given if you complete a short game.
Steamland Objective – The standard solo strategy of using high-level Medic/Berserker and then Demolition for the Patriarch can also work here, with a few important caveats. First of all, because of the possibility of dangerous enemies (Scrake, Fleshpound) appearing as early as the 2nd wave, it is very useful to keep the game’s maximum 32 Zed spawn limit filled with trash (Clots, Crawlers, etc.) as you kite to victory. this means try not to kill anything weak until absolutely necessary.
1st objective: Kill everything.
2nd objective (breaker boxes): With luck, the boxes will be spread out enough that a Berzerker can sprint between boxes, welding them to 100% and moving on. With more luck, the Zeds will bunch up around a breaker box and become stuck. DON’T KILL WEAK ZEDs because each one killed increases the chance of a FP spawning.
3rd objective (escort Ringmaster): Stay close to Ringmaster and keep him healed, while killing everything. If a Scrake or Fleshpound spawns, you can put the Ringmaster between you, and he will draw attention. You can then kill the Zed easily.
4th objective (defend Ringmaster): Same strategy as previous round. Keep the Ringmaster healthy and use him as a distraction when necessary.
5th objective (retrieve gold): This takes the longest time but is not difficult. The two most important things to remember: 32 Zed spawn limit and dropping gold. At the beginning of the round, the gold safe spawns are not random, so you can get to them before the round starts as the Ringmaster is still talking. For each safe, unweld the door, grab the gold, and if you have enough time move with it on your desired path before dropping it and kiting. For this round, I used a counterclockwise kiting path, as wide as possible around the edges of the map, slowing down enough that the Zeds would not take shortcuts and cut me off. I found that with bunny-hopping, even weighed down with the gold, I could stay just out of reach of the kited mob depending on what was leading it, even a Stalker.
6th objective (Patriarch): Even with the strategy of only killing the near-minimum number of zeds possible, a L6 Demo should have enough dosh to buy a full stack of pipe bombs twice plus an M32+ammo. I laid down two batches of pipes around a corner pile of boxes and allowed Patty to stroll over them to his death.
Credit to dfg.
Stronghold – Make your way to this position and weld the door behind you.

Because of the position of the stairs the zeds will walk away from you before they walk towards you, they will also get stuck from time to time, use this time to reload or heal.
The door behind you will be attacked in certain waves so listen for it breaking and clear or kite as necessary.
This is very important: The trader distance is far away on certain waves so leave 1 zed alive if possible, you’ll have to judge if you can make it back in time if the door needs welding, get it wrong and the wave will be over as you’ll be overrun quickly.
Pipe bombs are not needed for the Fleshpounds as you’ll have plenty of grenades and the AA12 when they start to appear.
For the Patriarch, you can use the same spot and he will approach from the stairs, use 2 pipe bombs at the foot of the stairs and finish him off with the AA12 when he’s healed.
The HoE achievement will also be given if you complete a short game.
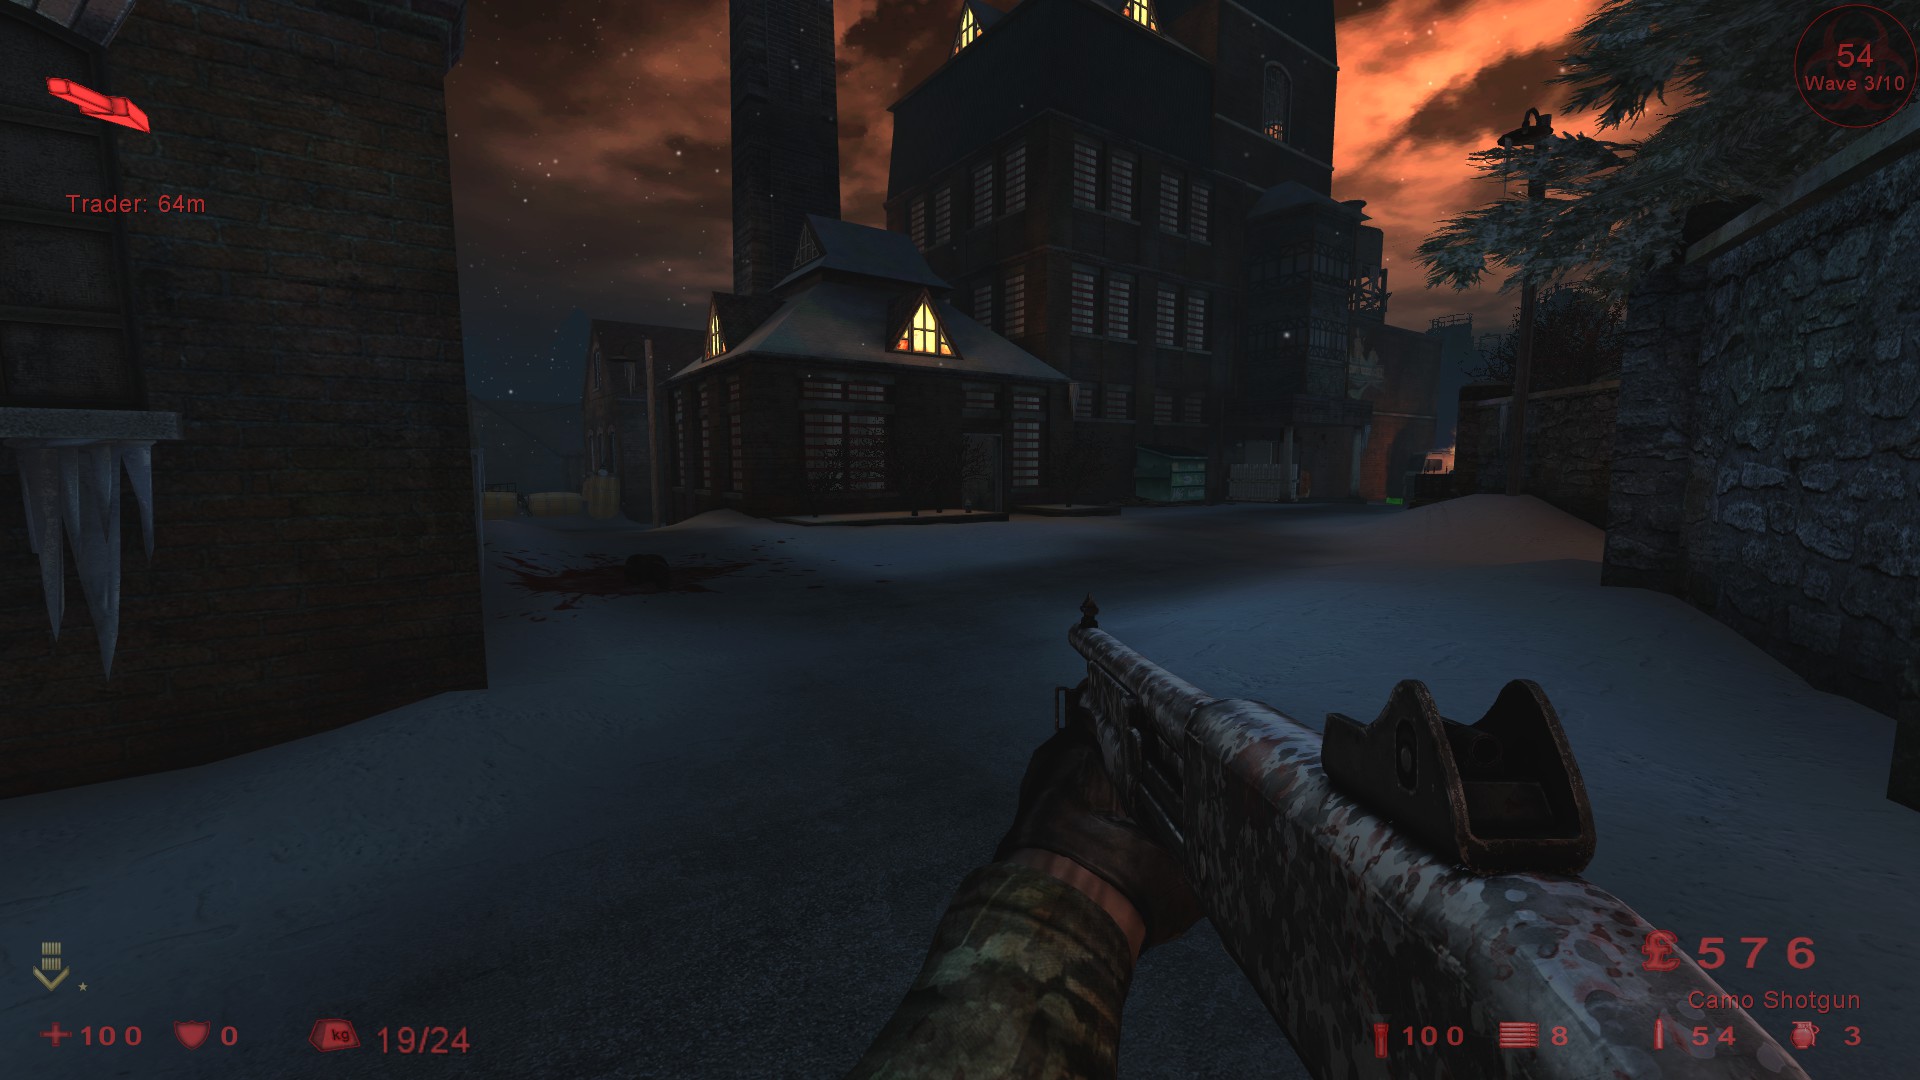
Suburbia – Weld the door behind you and stand in this position.
The door will be attacked early so listen for it breaking. Crawlers will jump through the hole in the wall on the left throughout the game.
Use pipe bombs for the Fleshpounds if needed.
For the Patriarch, place 2 pipe bombs just outside the doorway and wait inside the room, hit him with the AA12 as soon as he hits the pipe bombs.
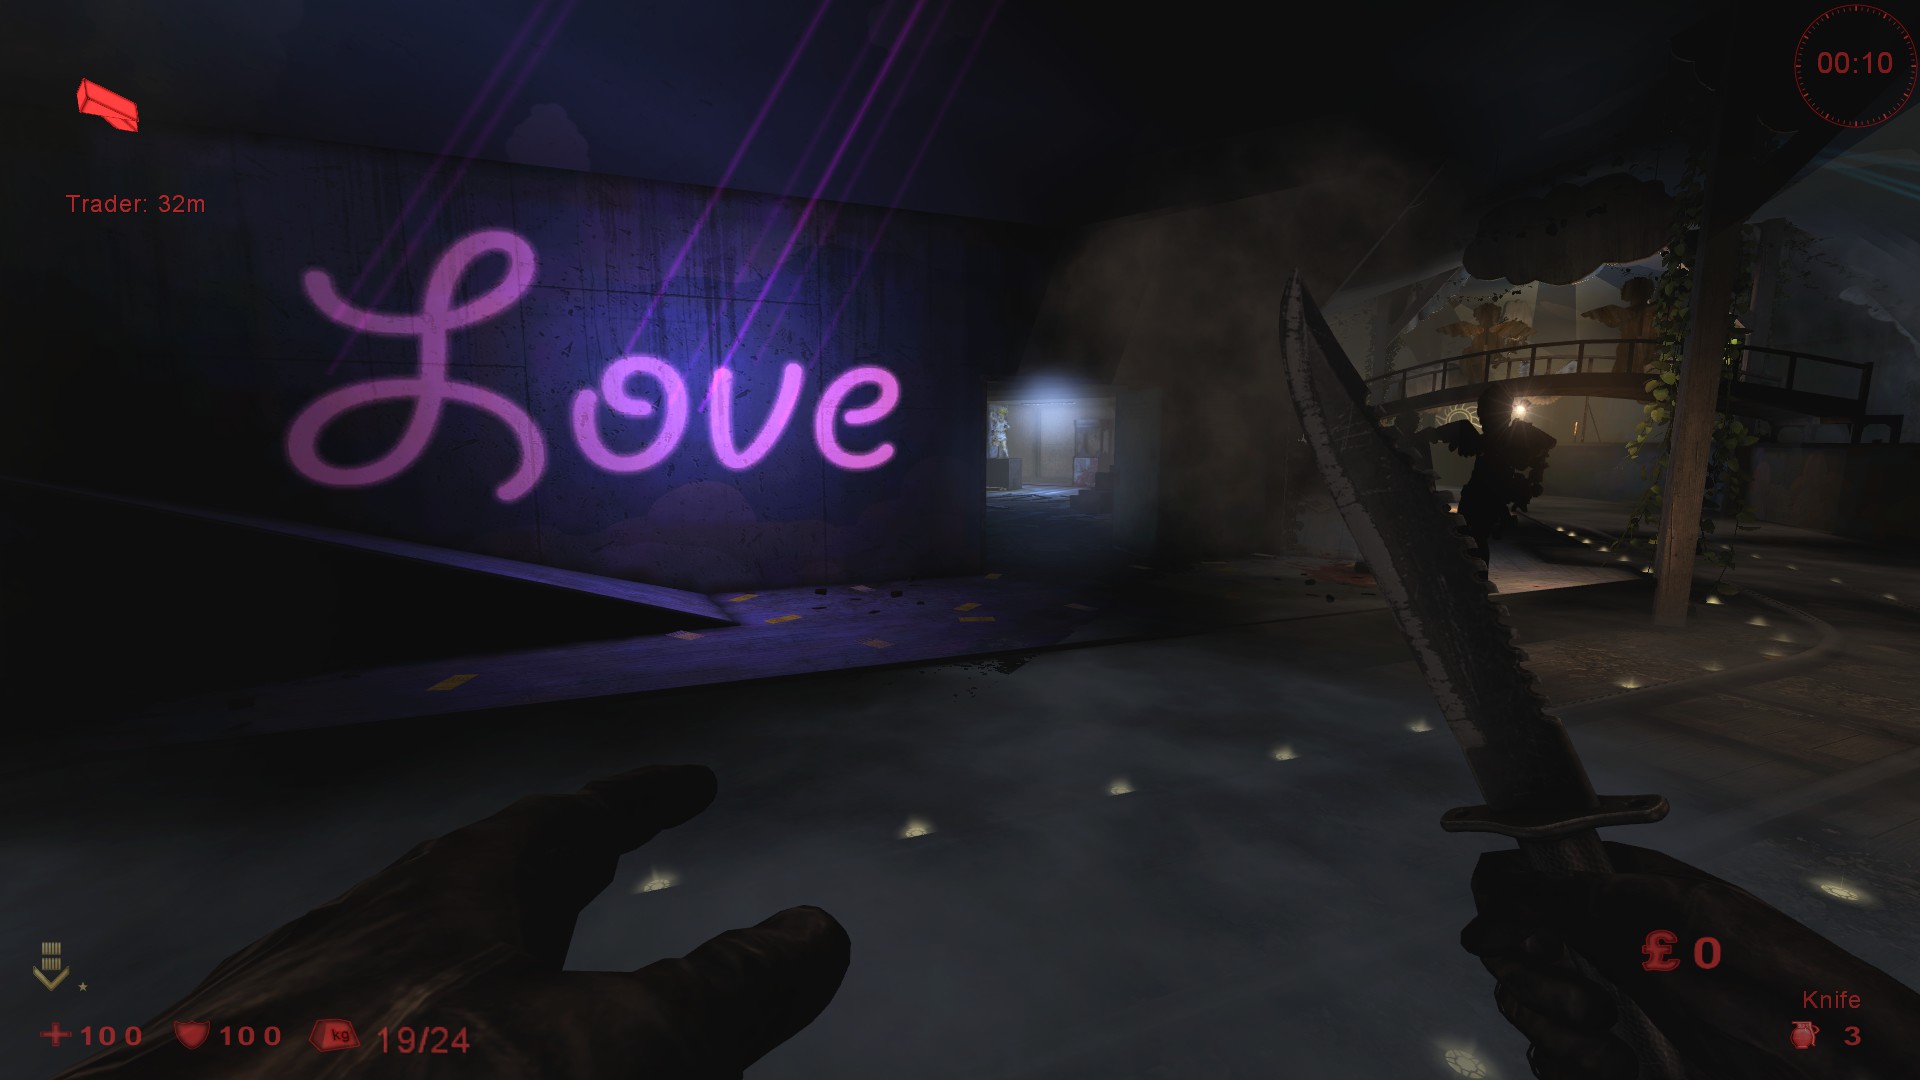
Thrills and Chills -The camp spot is left of spawn, follow the stairs around and you’ll eventually see the Stag statue, the camp spot is inside the barn behind it.
Weld the double doors behind you and the smaller door to your left and use this area.
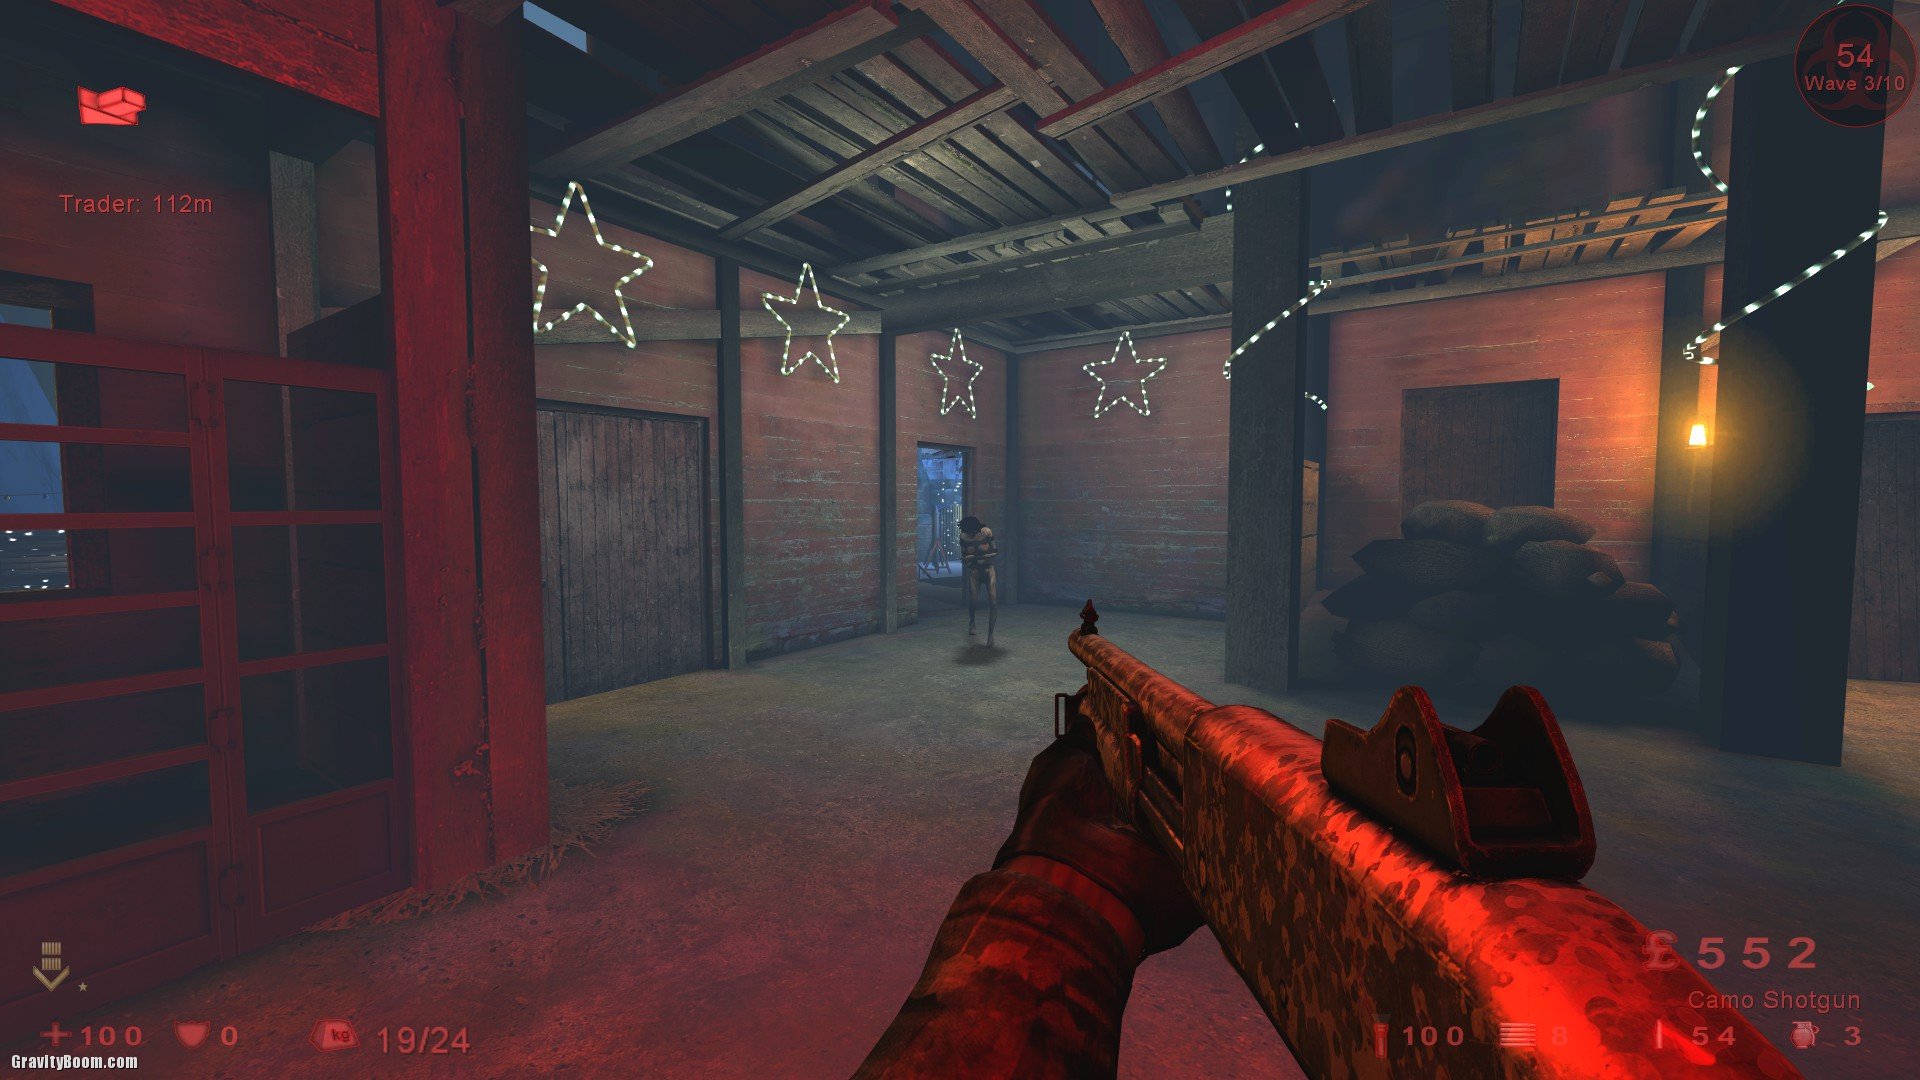
This is very important: If you move too far back the double doors behind you will be attacked, if you move too far forward then crawlers/stalkers will drop from the roof area on your right side (near the trader door), getting the perfect spot is hard as you clear the waves but you’ll have plenty of time to reload inside the barn, just be aware that if any of the doors blow you’ll need to make a run for it as you’ll be overrun quickly.
Try not to use grenades as you’ll only weaken the doors. You won’t need pipe bombs for the Fleshpounds as you’ll have plenty of time to reload.
Be very careful of the trader distance on some waves as you might need to get back and weld 2 doors before the wave starts and if they’ve blown in the previous wave this will take more time.
Be aware of the Husks fireballs as he can see you through the small openings on the left side of the barn.
For the Patriarch, DO NOT stand in the middle of the barn, he can see you as he approaches. Stand near the trader door with 2 pipe bombs near the small doorway and hit him with the AA12 as soon as he hits the pipe bombs. You will take a hit if he can’t get away to heal.
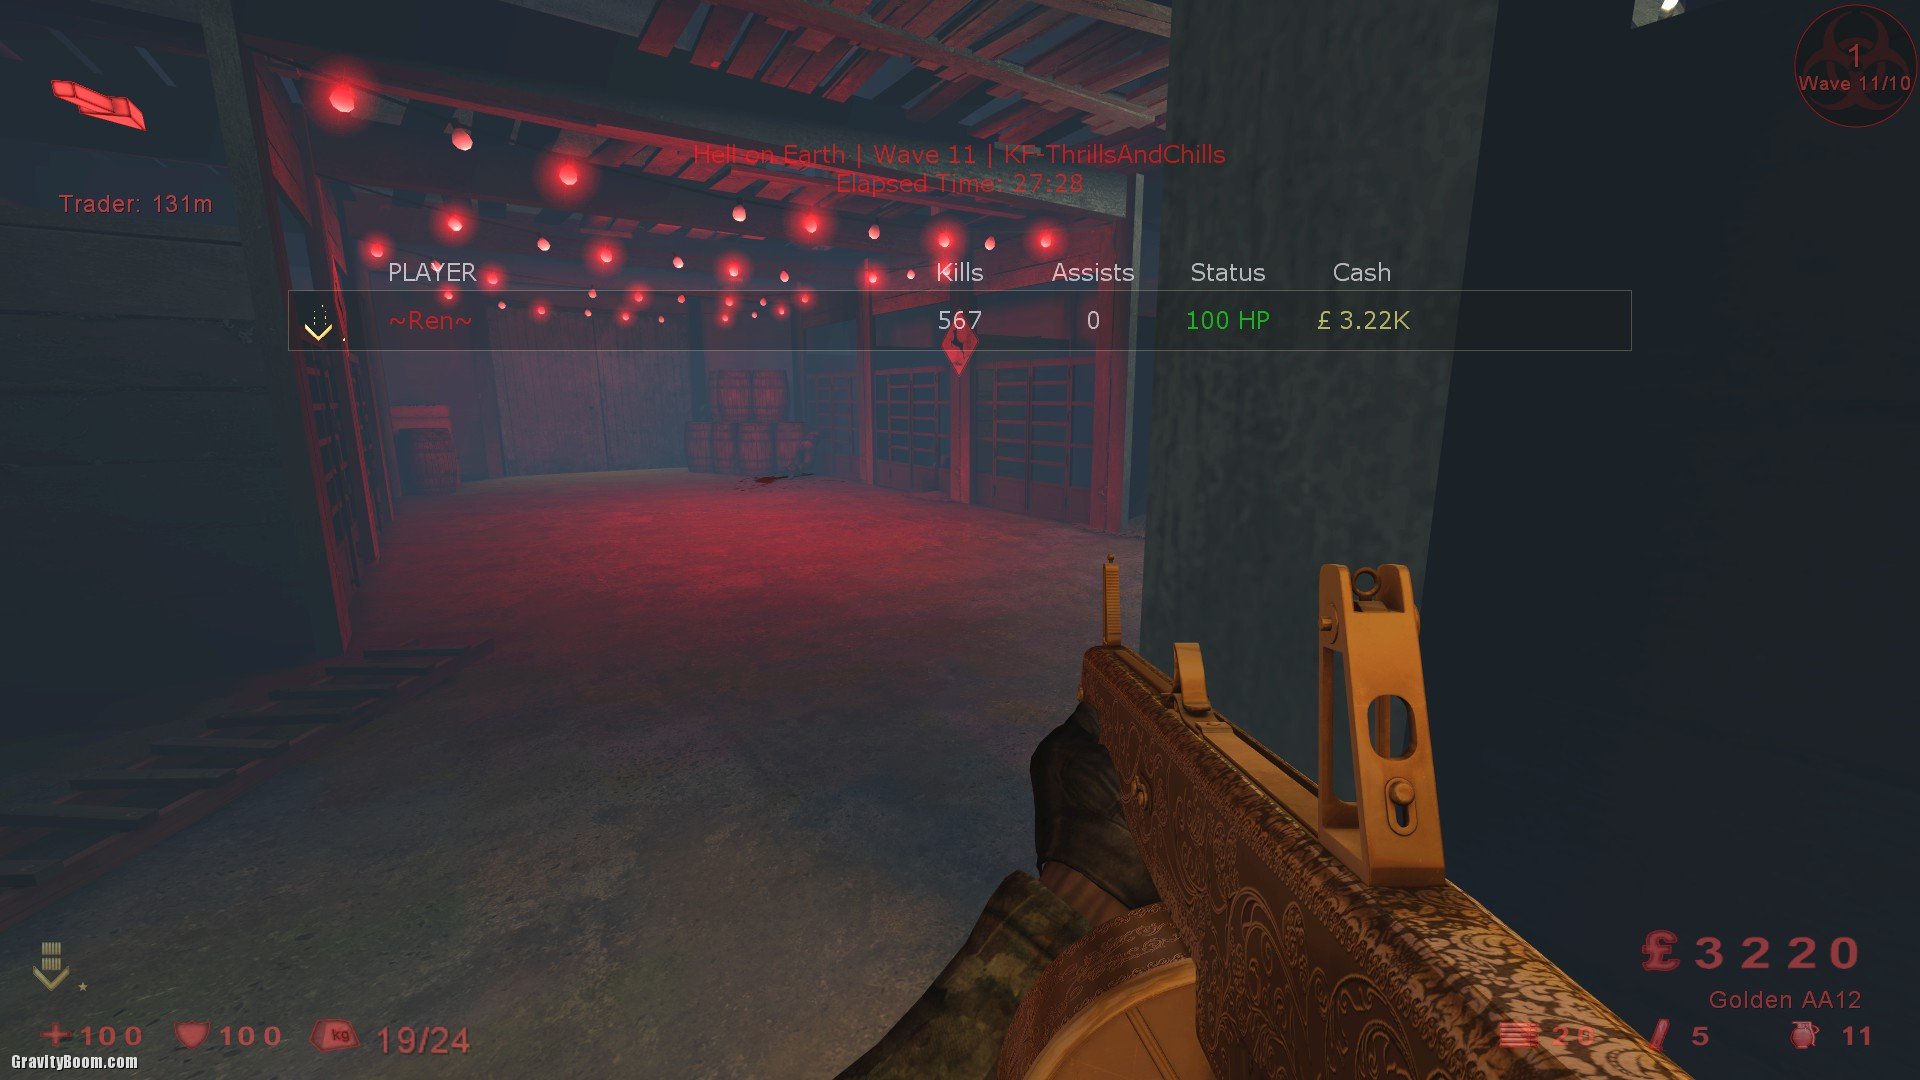
The HoE achievement will also be given if you complete a short game.
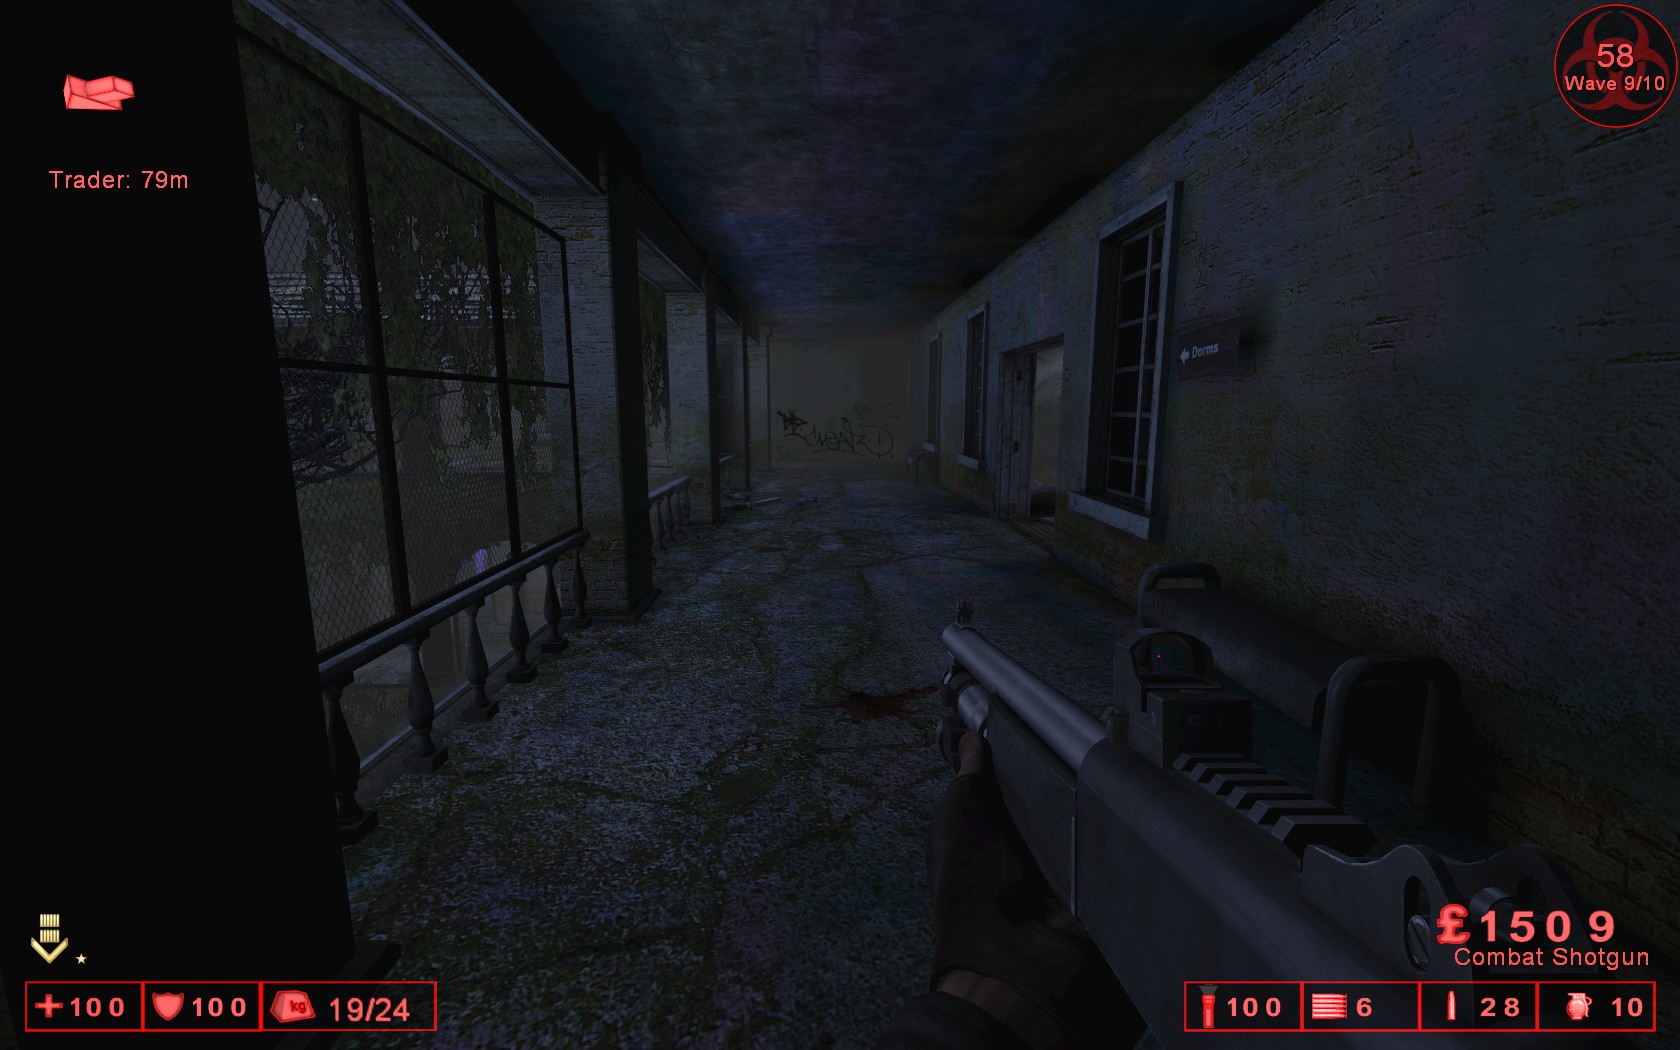
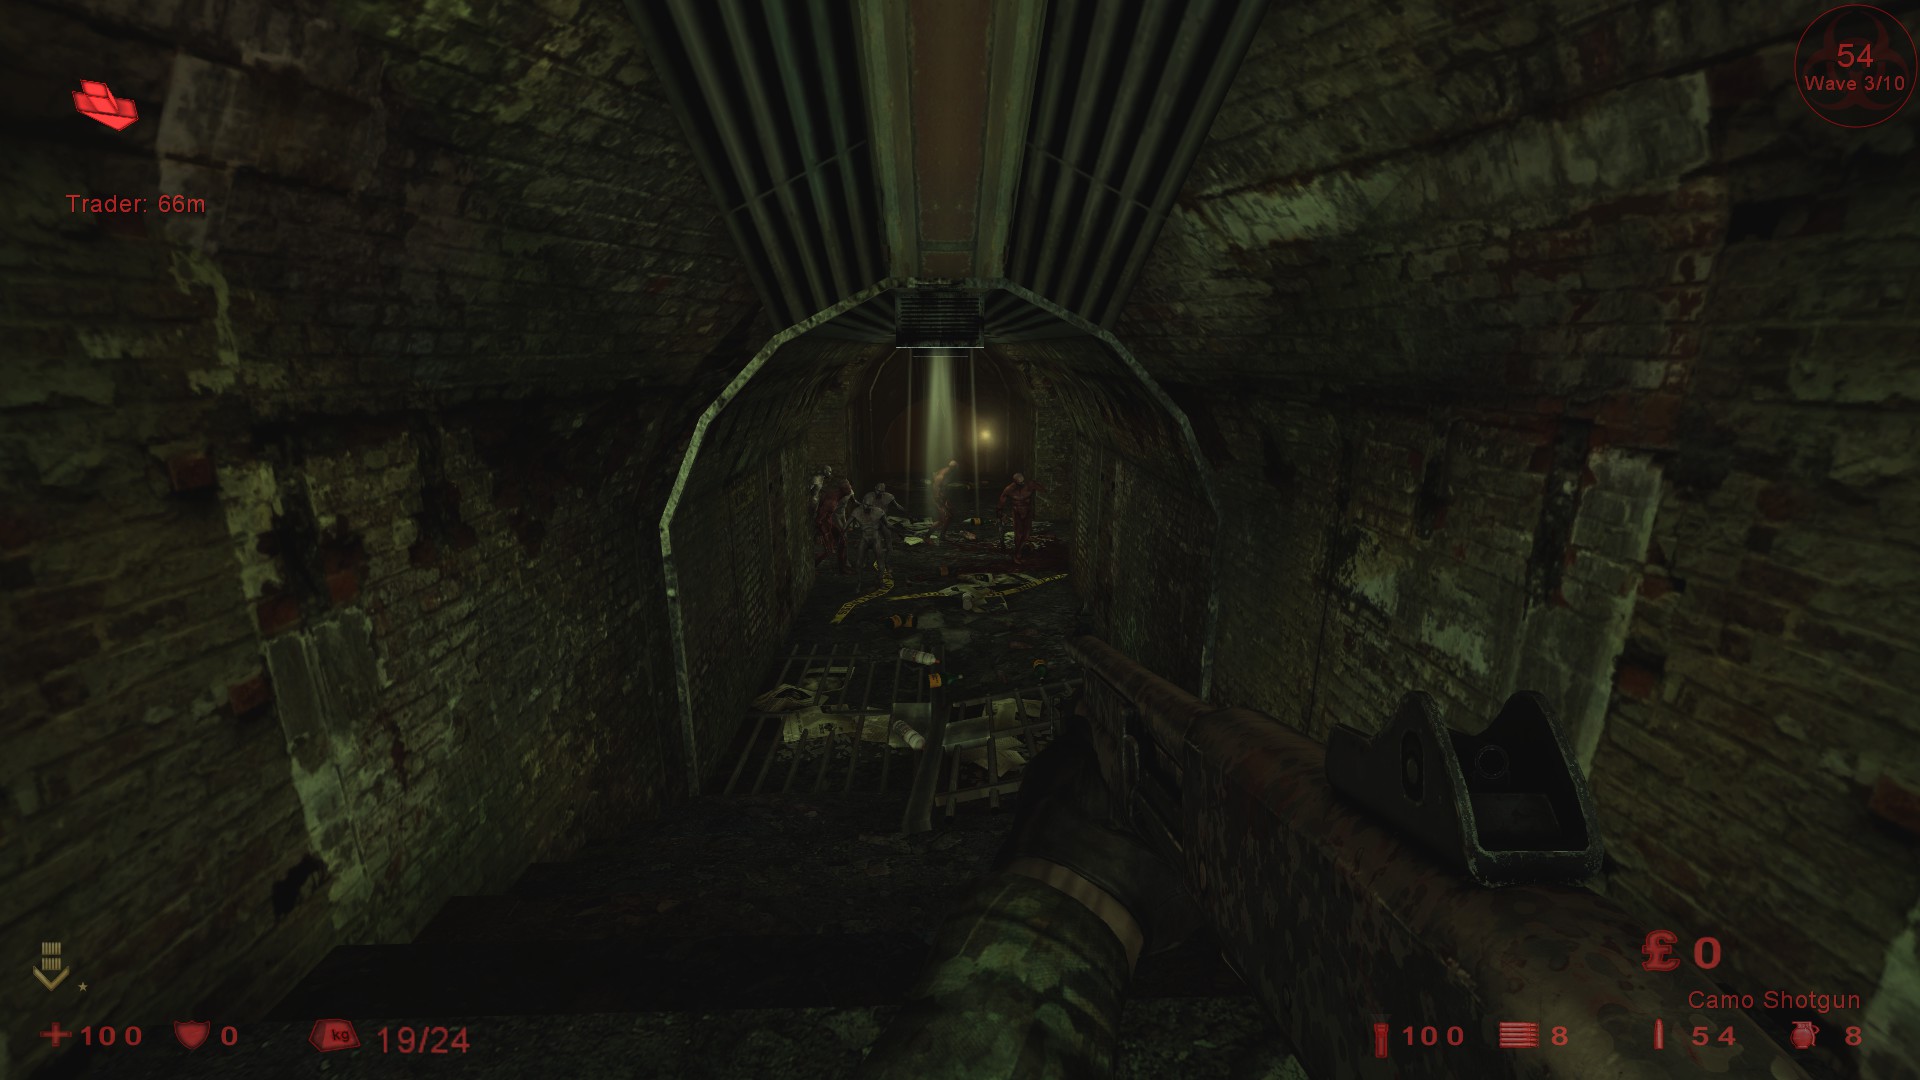
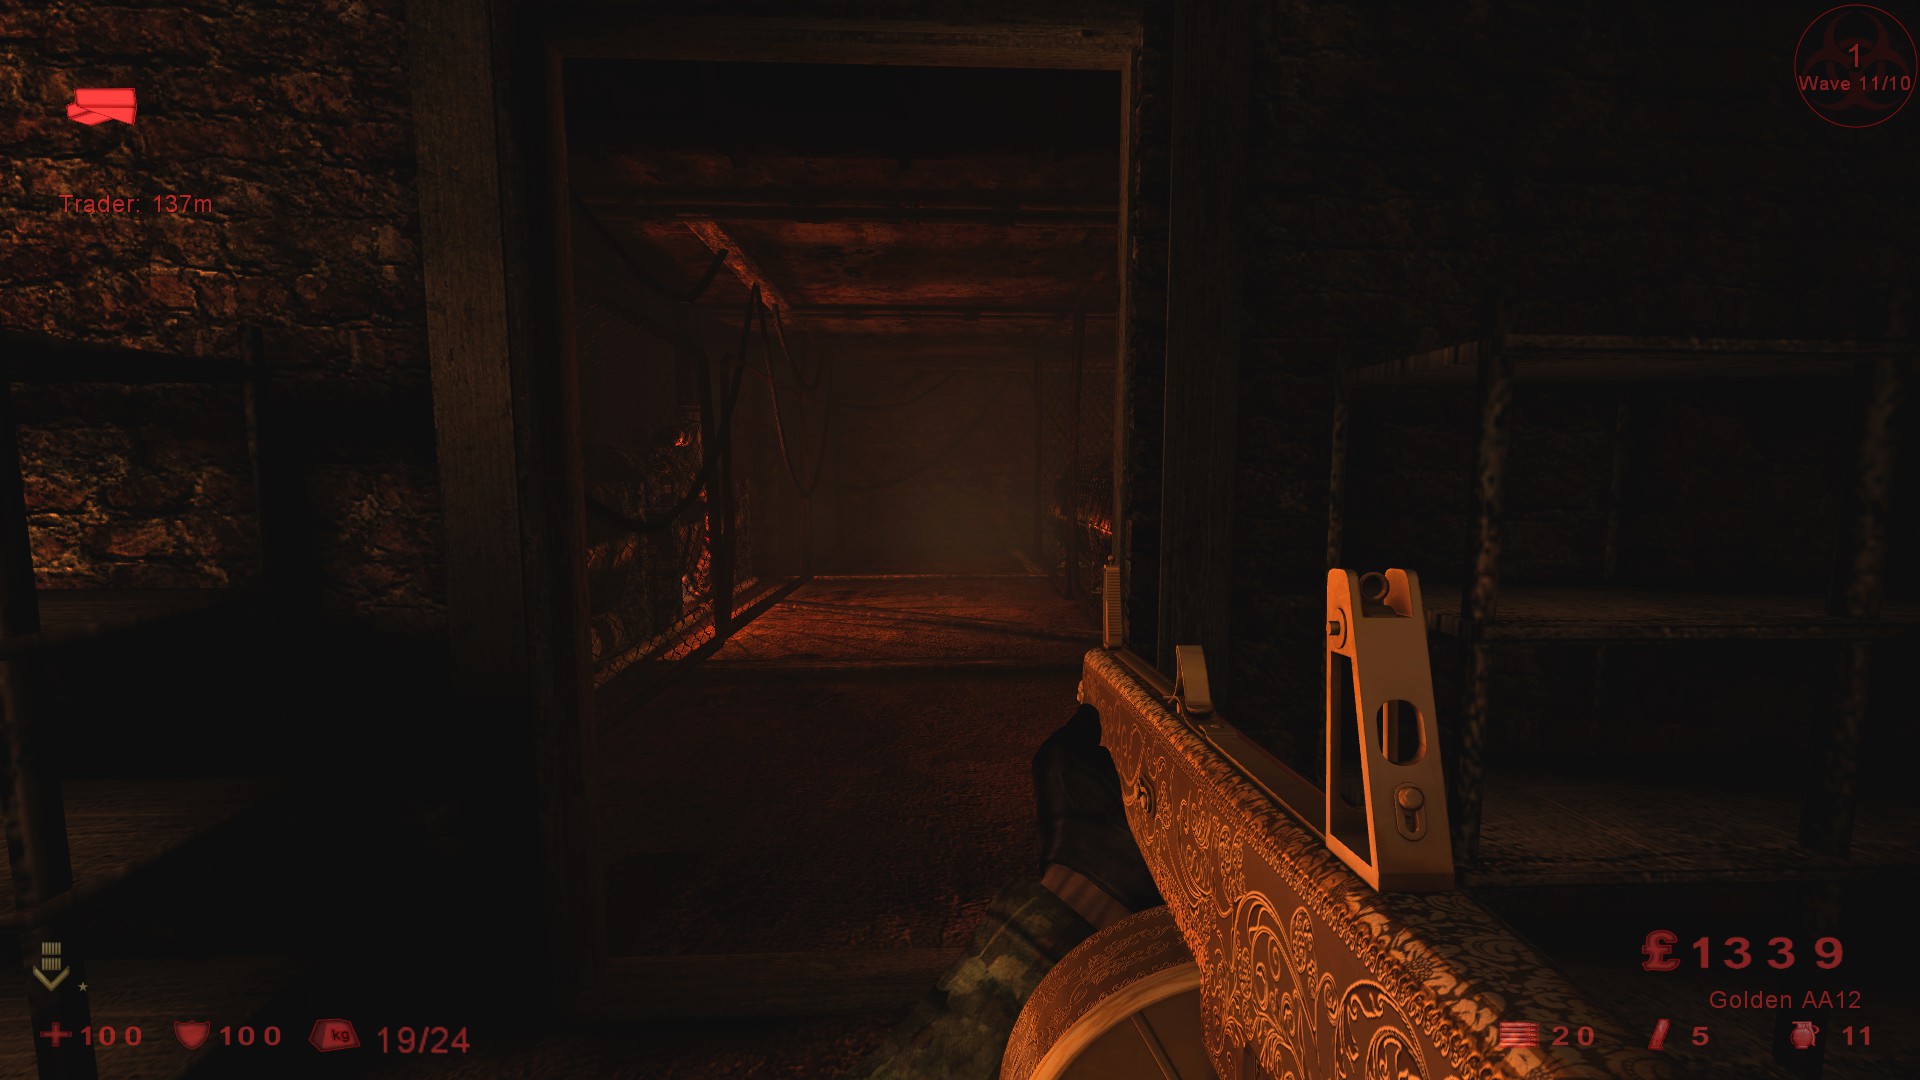
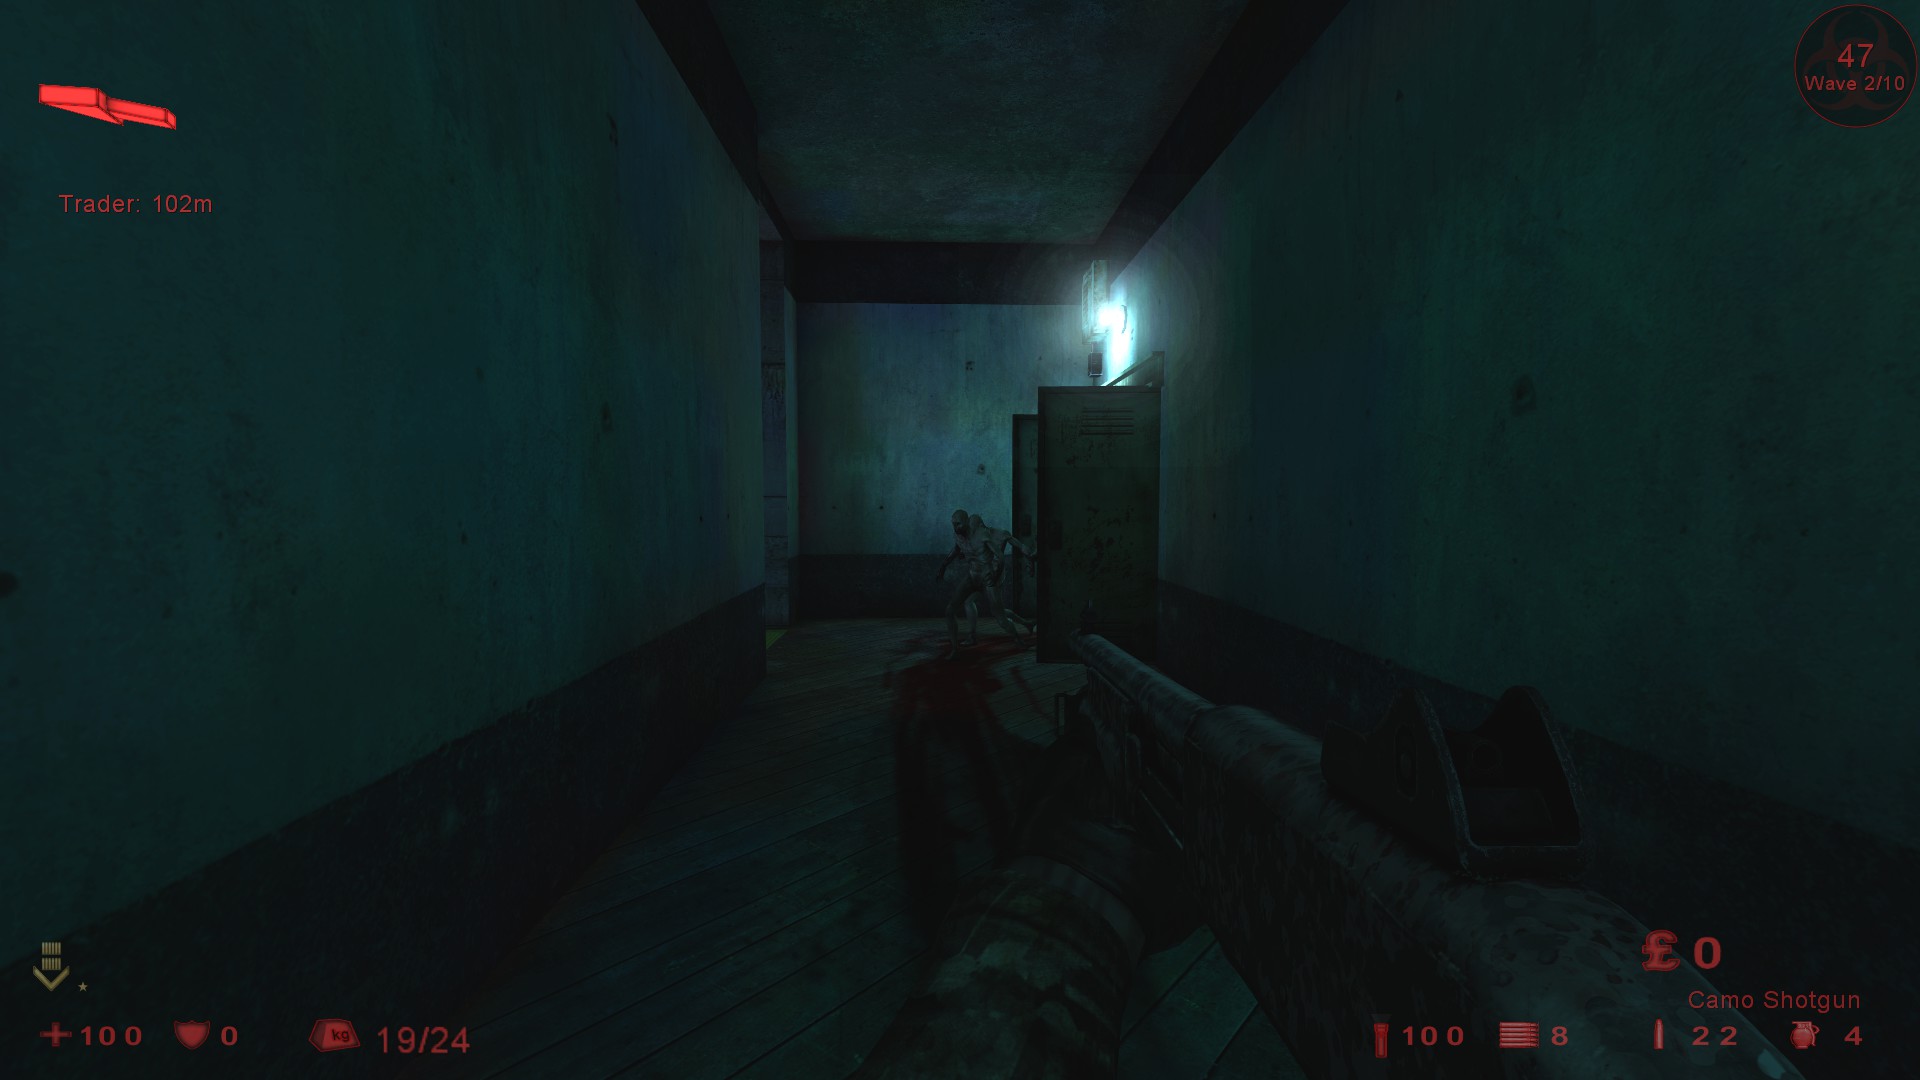
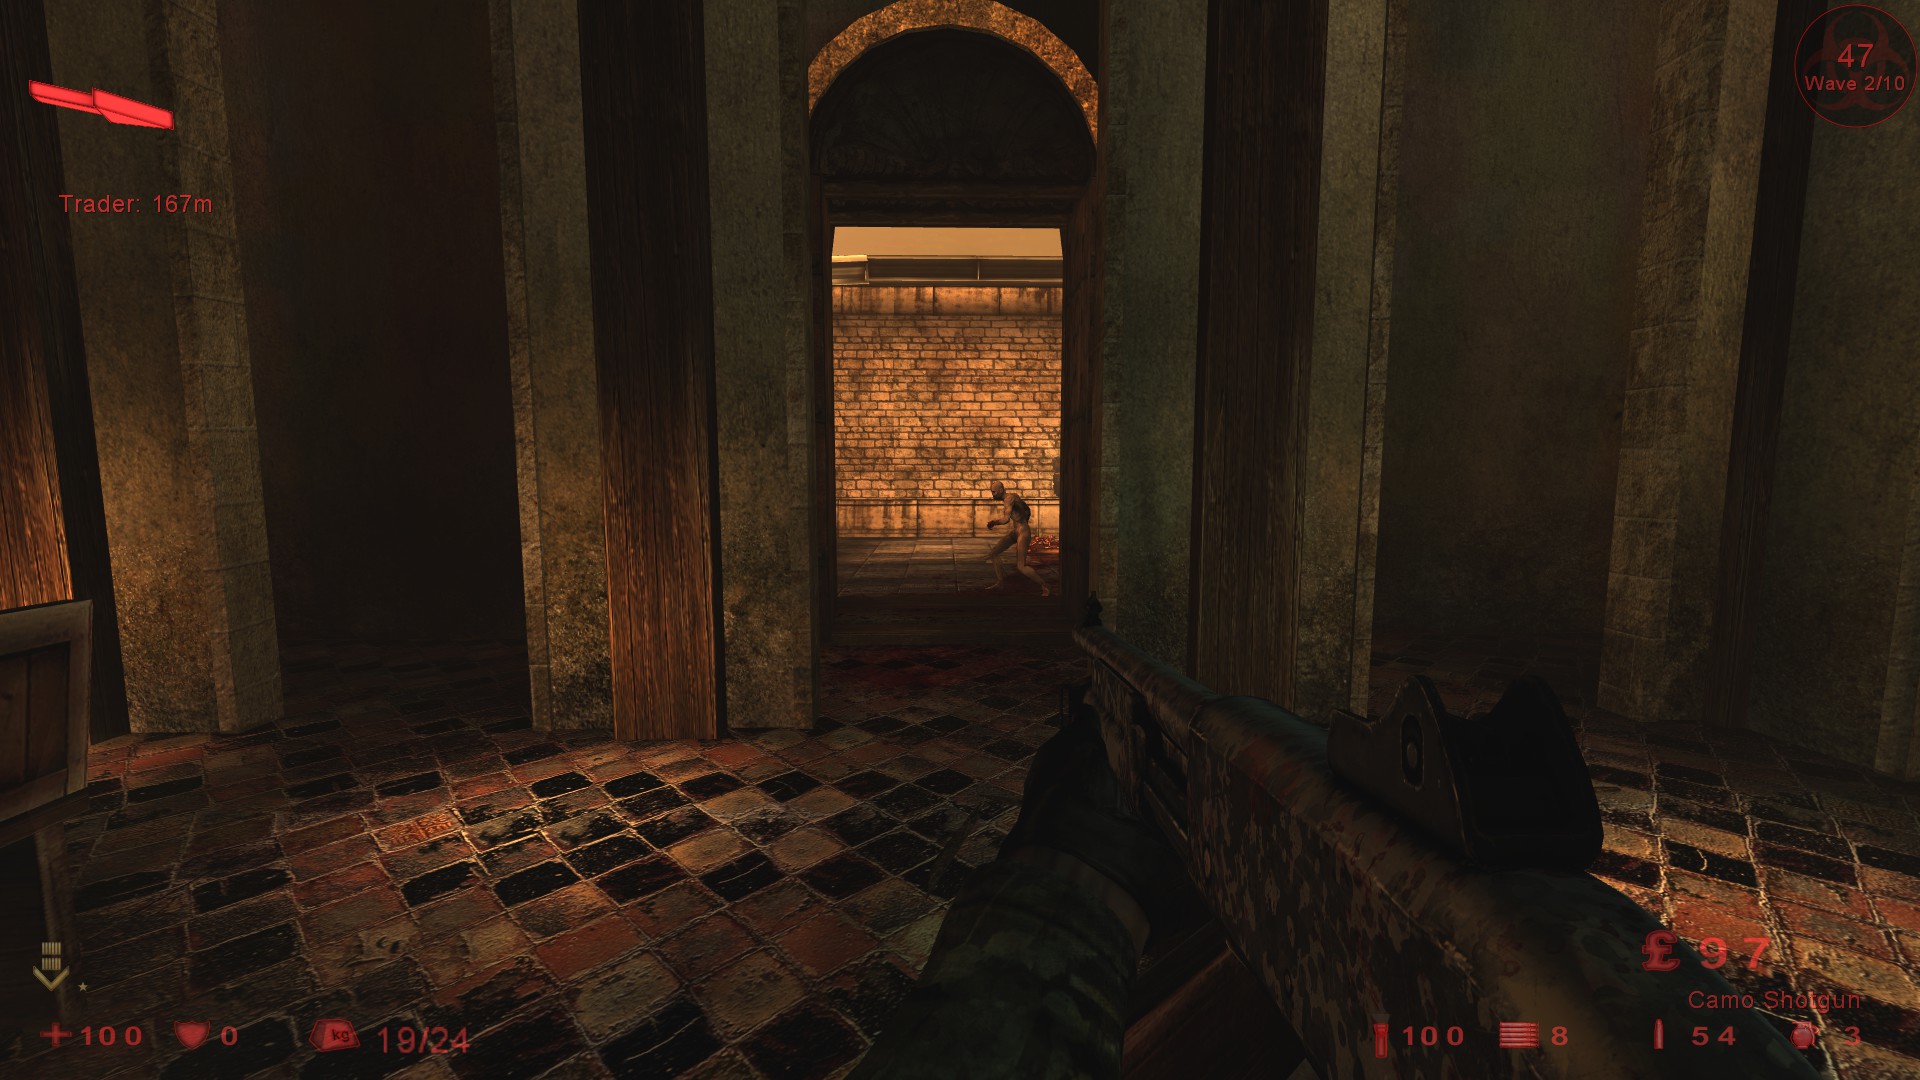
Transit – Make your way to this position, it’s quite easy to spot, look for the room with the hole in the floor near the trader on the first floor.
Everything will approach from the front door and as it’s narrow the zeds will get stuck from time to time, have the door facing outwards as it stops the zeds building up inside the room as the door will be easier to enter.
Be careful of the trader distance on some waves and make sure you know how to get back, I got lost twice 😛
You can use pipe bombs for the Fleshpounds if you want but everything will spawn close to you, if you rage 2 Fleshpounds then that can cause problems inside the room so I’d suggest just the AA12 and grenades, try not to throw too many or the door will blow up.
For the Patriarch, place 1 pipe bomb either side of the door and use the same room you’ve camped in, he will spawn quite close so be ready for him.
If you see him spawn outside the room use grenades to weaken him a little.
The HoE achievement will also be given if you complete a short game.
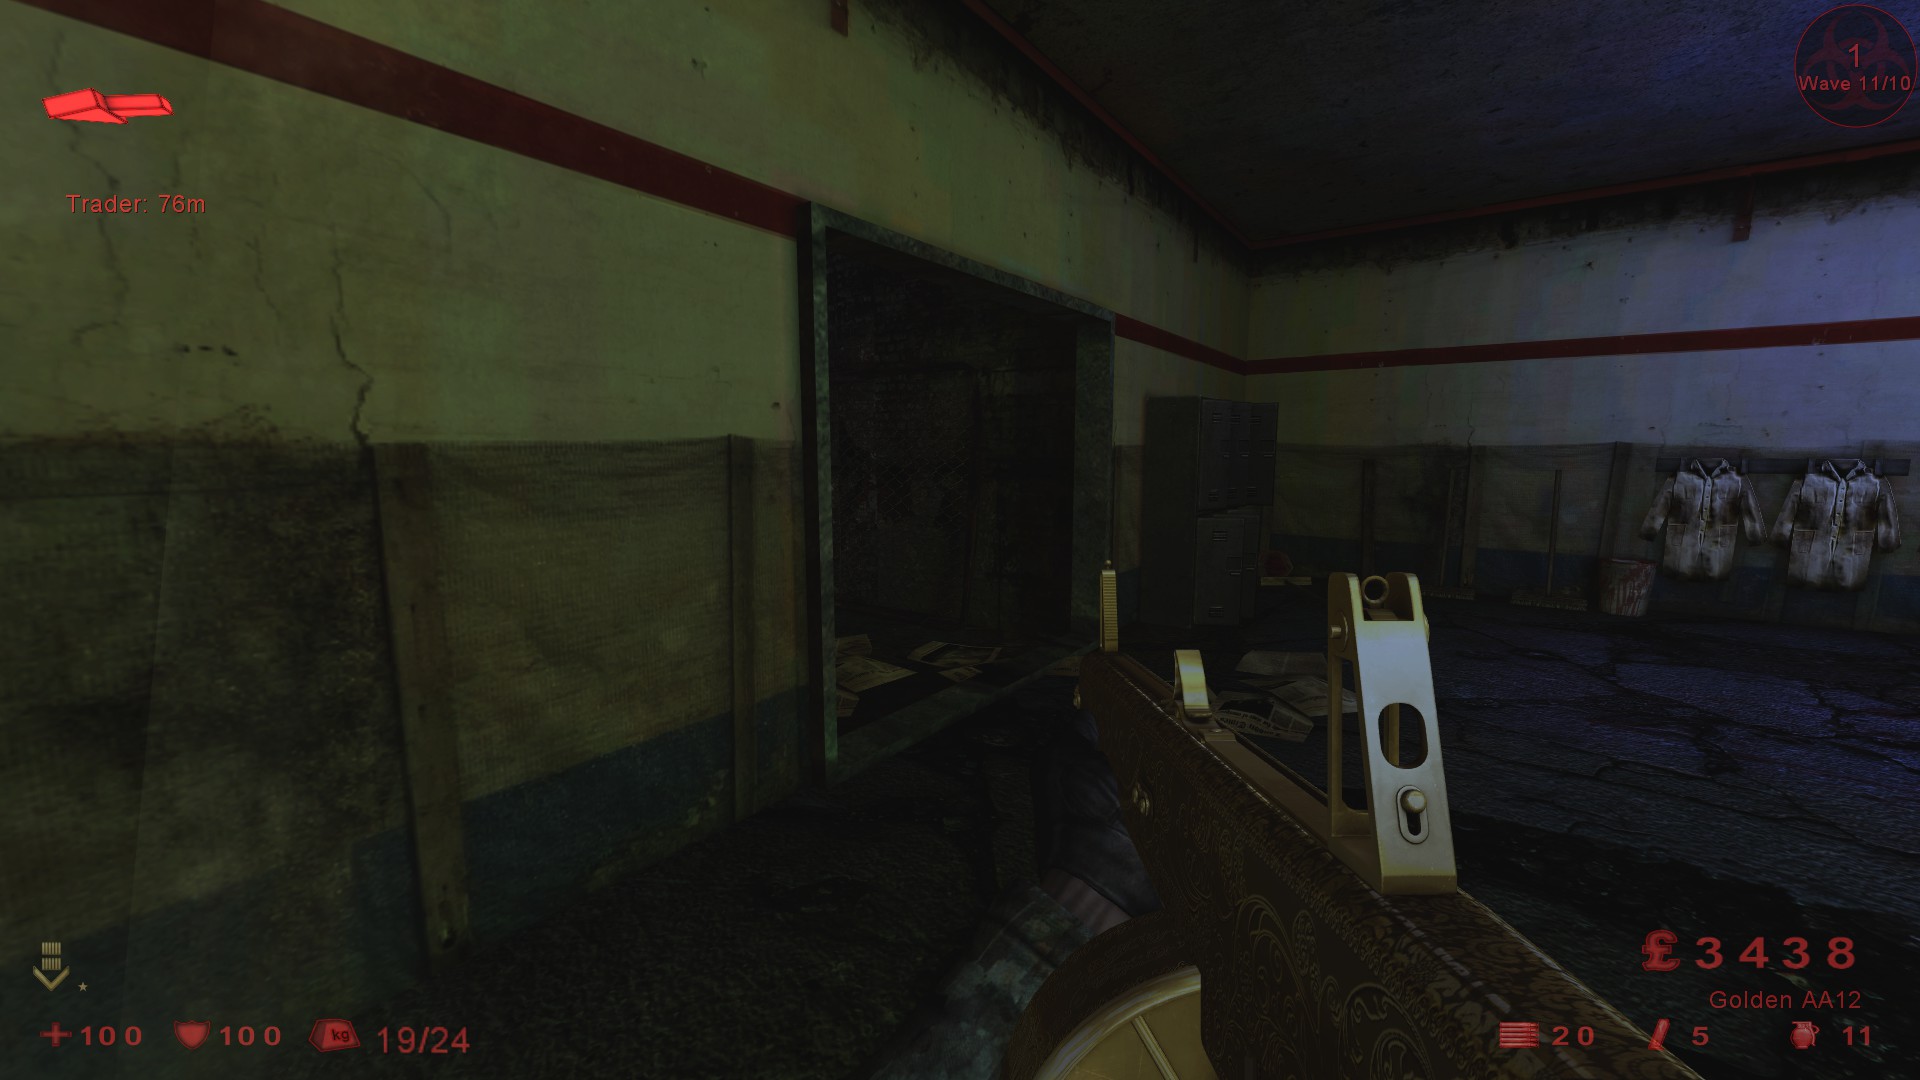
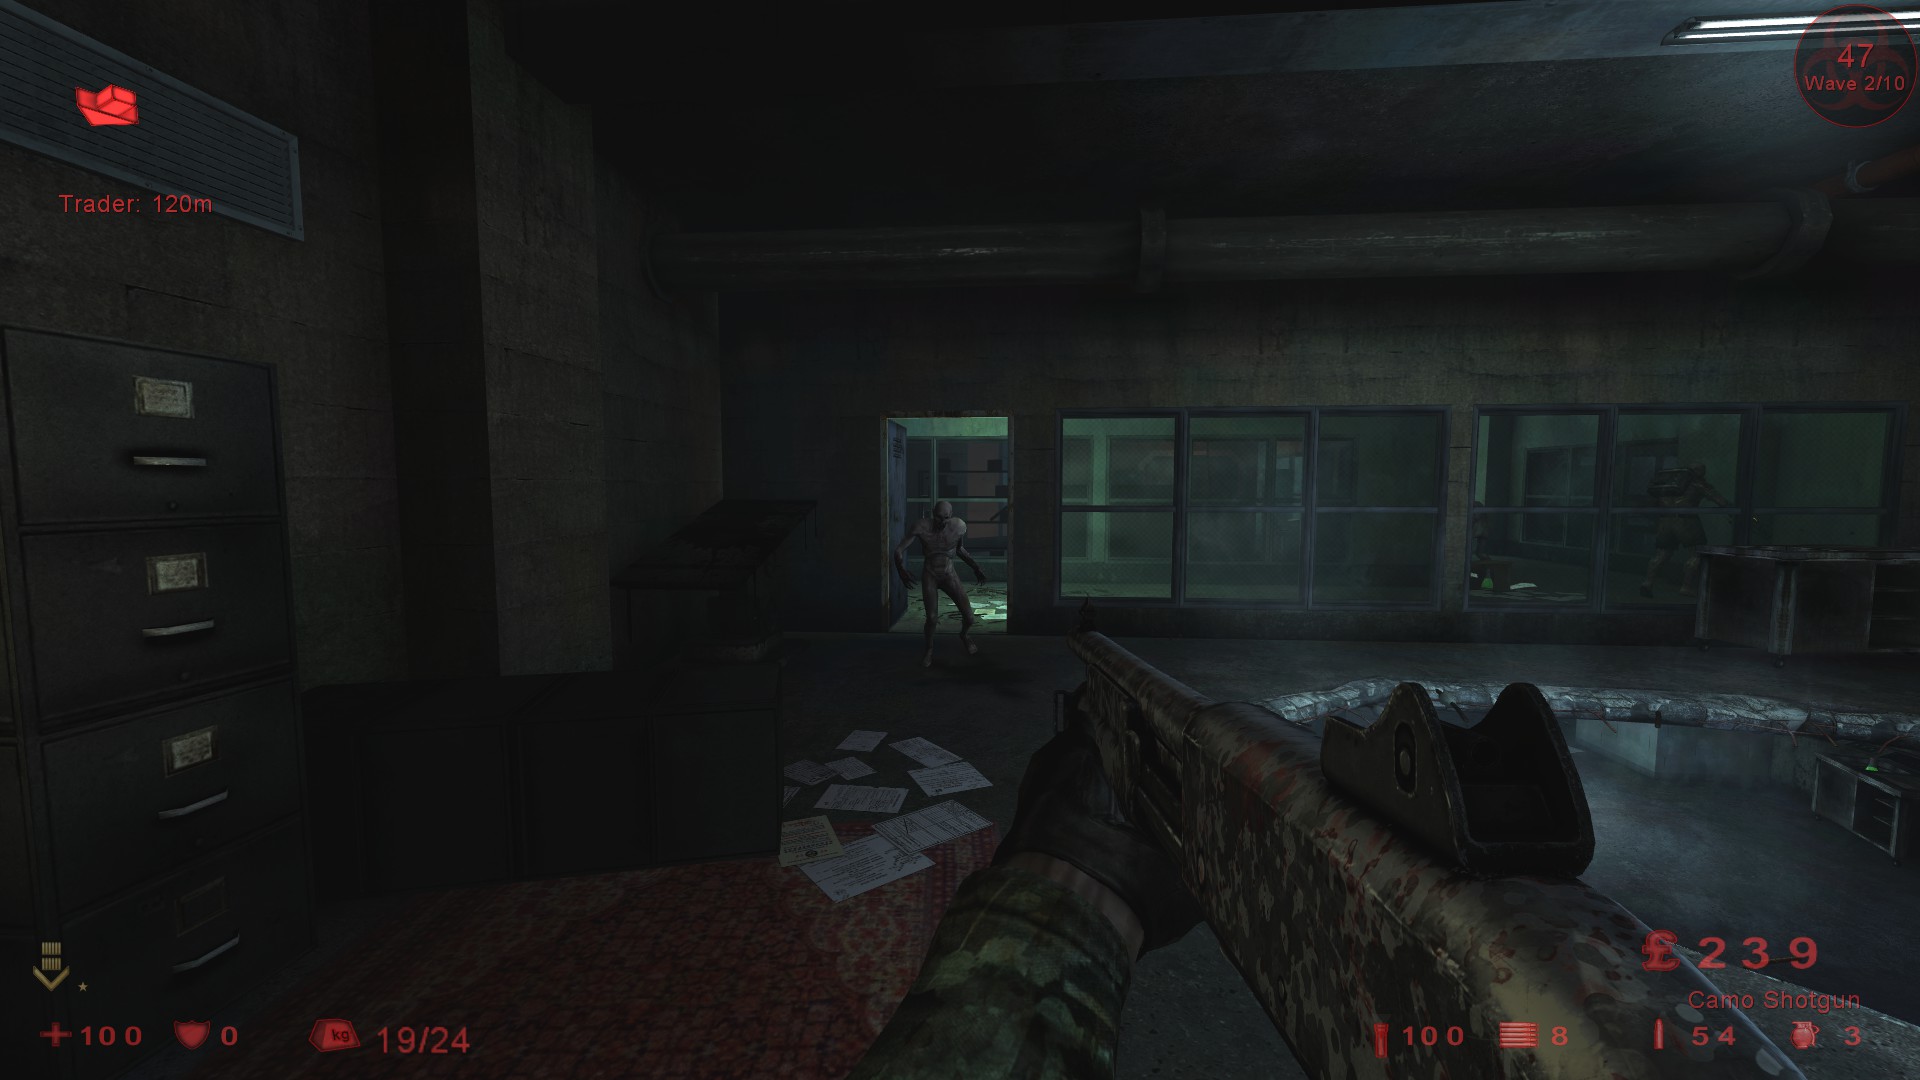
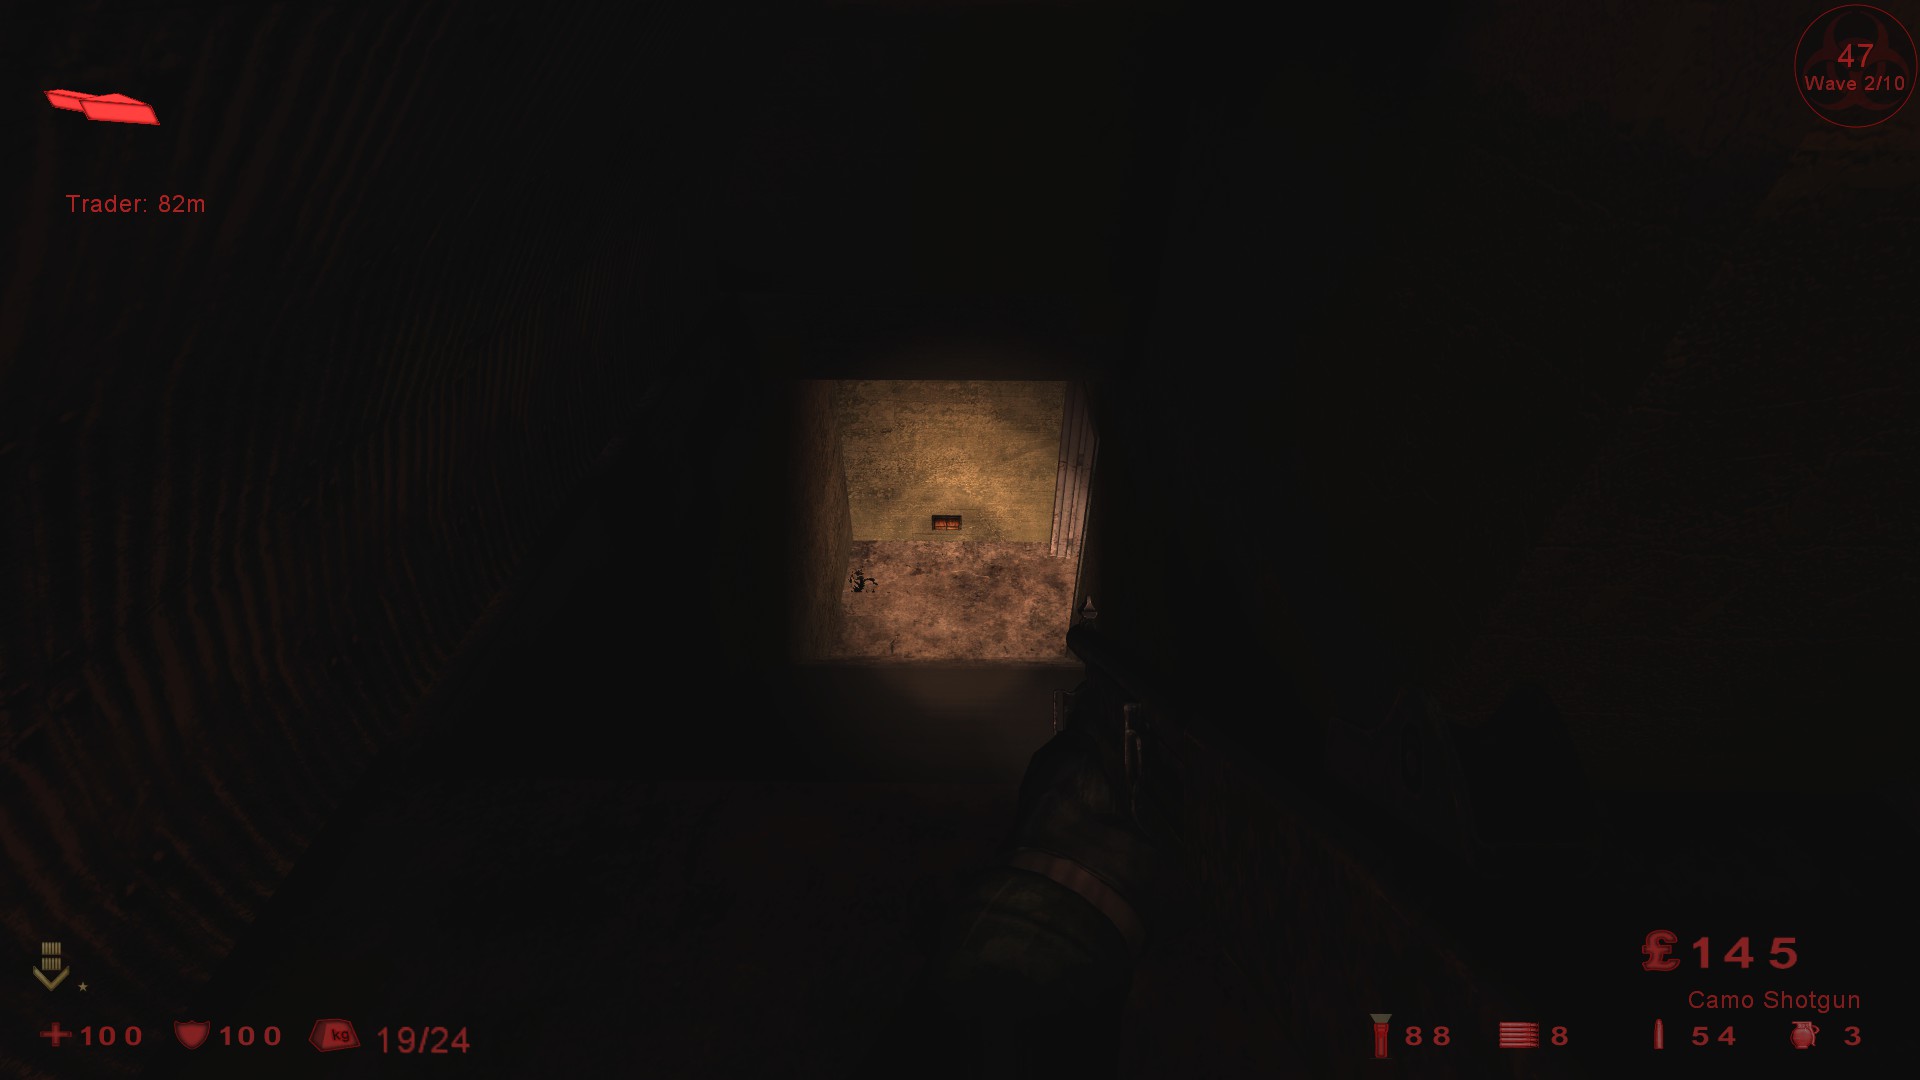
Transit Objective – First Wave: Start as a firebug and stay behind the counter next to the shop, you should be able to kill everything without getting hit once.
Shop: Buy dual flare revolvers but don’t buy anymore ammo for them.
Second Wave: Just have general awareness and kill everything you see, try to not get hit so you don’t waste ammo on armor.
Shop: Buy flamethrower ammo.
Third Wave: This wave really depends on luck, if you are lucky you won’t encounter any fleshpounds. If you encounter one shoot 6-8 bullets at his head and then throw a grenade, reload and shoot again to kill him.
Shop: Sell the flamethrower and one of the revolvers and change to berserker. Get your melee weapon of choice, preferably axe/claymore.
Fourth Wave: In this wave only kill fleshpound/scrake/siren as they are the only real danger in the wave. As long as you don’t kill anything else the max amount of zeds will be full of low tier zeds that aren’t dangerous for you. At the start of the wave repair the tool box at the top as soon as possible as only 1-2 zeds can attack that at a time, then go to the other tool box and repair it. You will have to repeat this for a very long time since zeds do lots of damage to tool box on HoE.
Shop: Armor
Fifth Wave: Similar to the fourth wave, just circle around the map until the time runs out. If a fleshpound spawns try to isolate him and kite until you kill him.
Shop: Sell everything and change to support specialist, get AA12, hunting shotgun and 2 pipes.
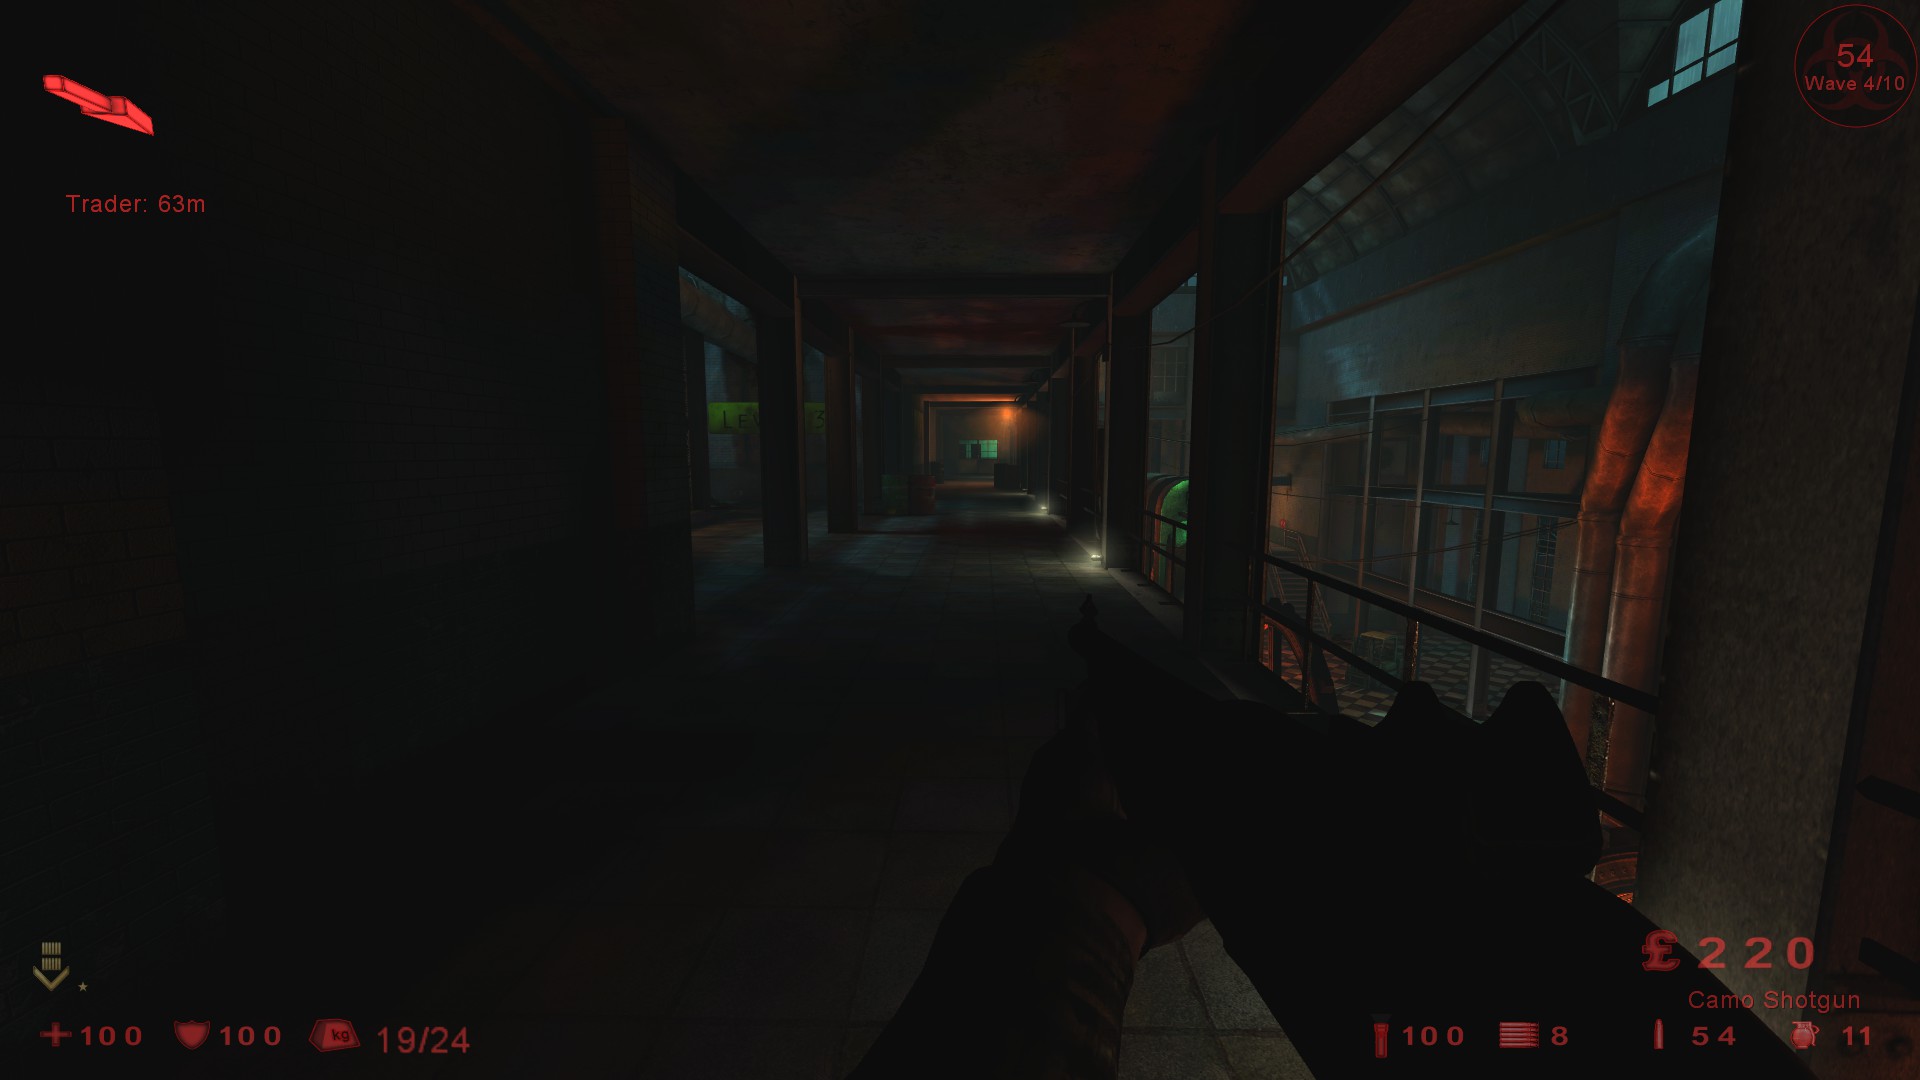
Sixth Wave: The same room you came in previously is the best spot for camping, go there and put the 2 pipes at the stairs and wait for the patriarchs to get close (you can see them through the huge window). As soon the pipe explodes shoot at the patriarch(s) with your AA12, if all goes well you should be able to kill one of them and the other either escapes or haven’t reached you yet. Just wait at the same spot and shoot him whenever he reaches you. Here is a screenshot of the camping location:
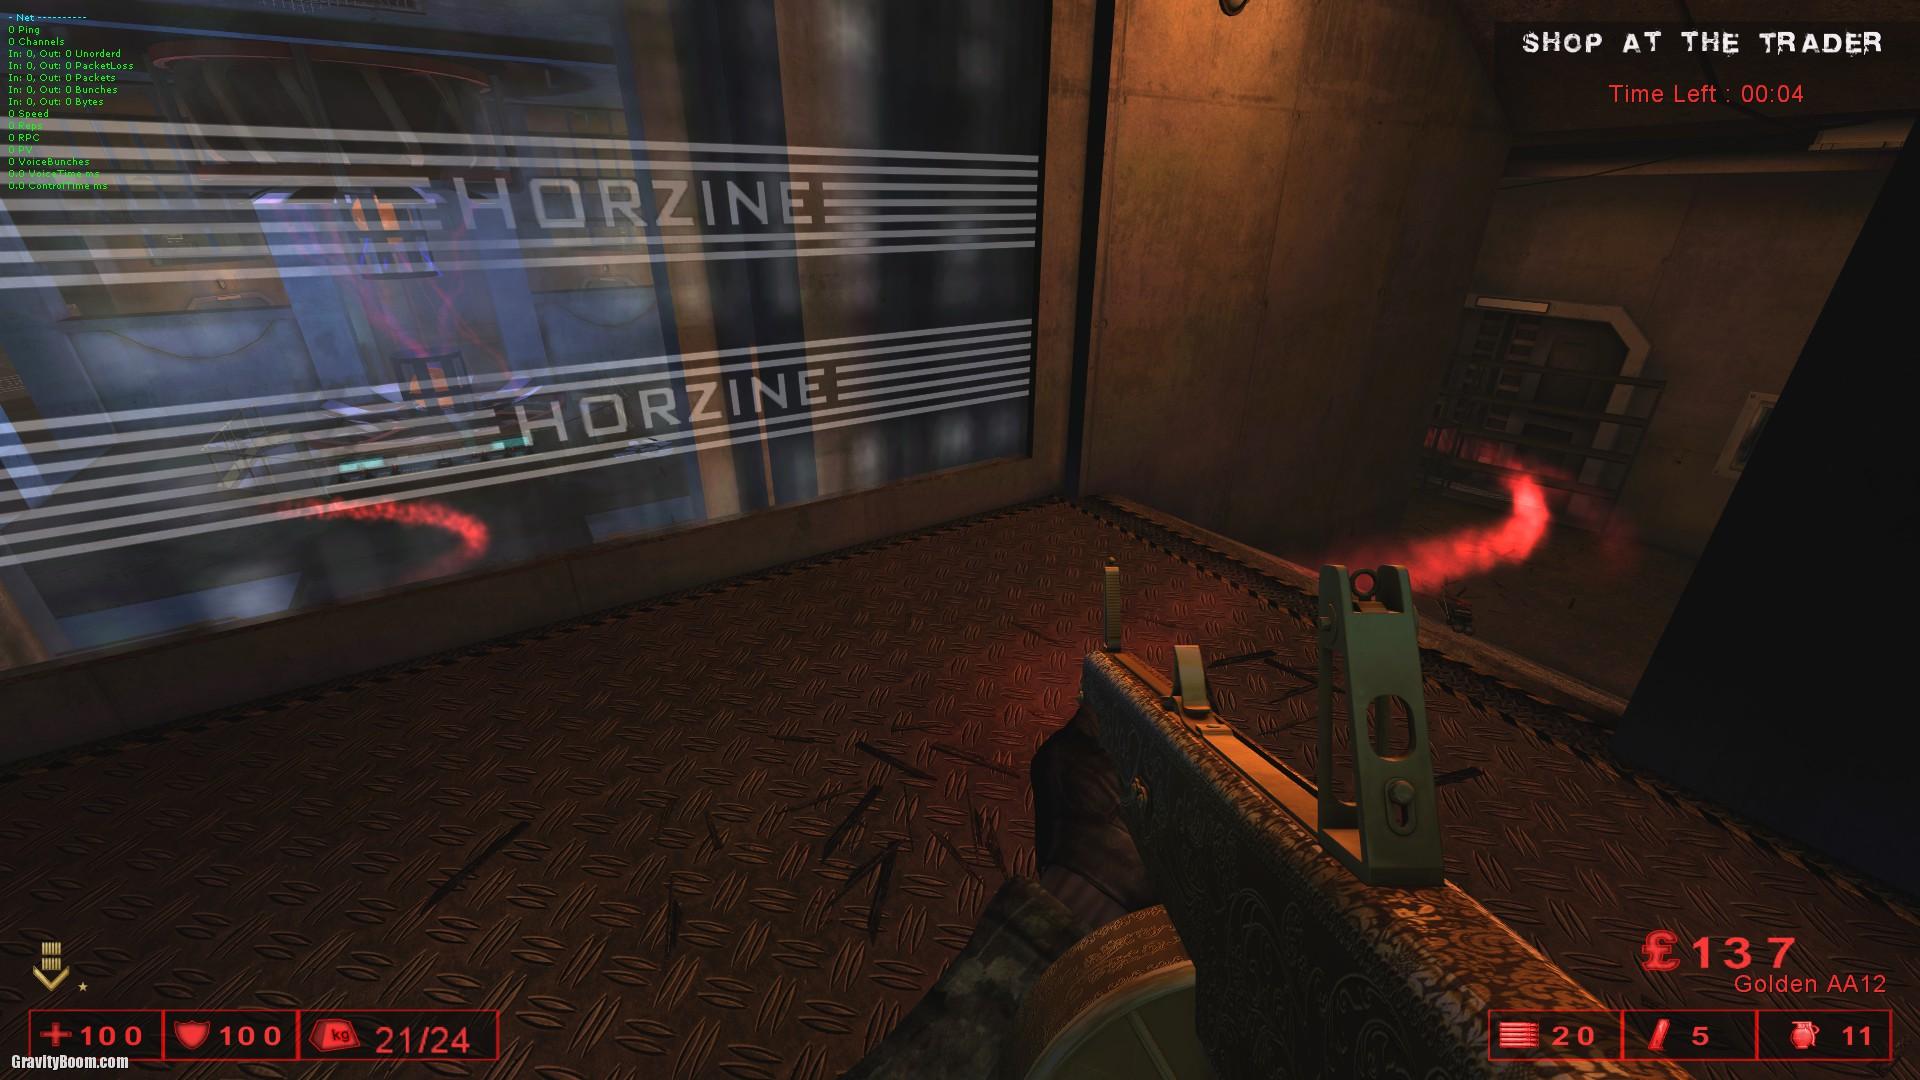
Credit to Feeed.
Waterworks – Use this position to camp.
Everything will approach from the front, the door can be welded if you want but the only real problem are Husks and Sirens.
For the Patriarch, place 2 pipe bombs opposite where you’ve been standing and close the door, hit him with the AA12 as soon as he hits the pipe bombs.
West London – Go inside the church and weld the far door near the trader, it will be attacked in the later waves but the door should hold for the entire wave.
Stand in this position on the overturned bench.
The bench gives a little height so you should avoid the Husks fireballs. The shotgun deals with everything upto a Scrake so switch to the AA12 for the Scrakes and Fleshpounds. You can use a pipe bomb in wave 10 if you want but grenades and the AA12 will be enough to kill both Fleshpounds.
You have a window to your left, be aware of any zeds coming through that window, you won’t get many but they can spawn in that area.
For the Patriarch, place 2 pipe bombs inside the doorway and close it. Hit him with the AA12 as soon as he hits the pipe bombs. You will take a hit if he can’t get away to heal.
Wyre – Use this entrance to go up the stairs and get to the camp spot. It’s the second floor of the ‘bunker’.

Weld the door leading into this room and stand at the top of the stairs.
Everything should approach from the stairs and with the shotgun penetration it’s an ideal camp spot for Support.
You won’t need pipe bombs for the Fleshpounds even if you rage two as both can be killed very quickly at the foot of the stairs. Scrakes are also easy to kill.
You have a weapon/armour spawn point behind you in the small room, check that for any armour that might spawn.
For the Patriarch, use 2 pipe bombs at the foot of the stairs and wait at the top just out of sight, hit him with the AA12 as soon as he hits the pipe bombs.
Nice guide! Me and a friend have been trying to do filthcross on that same spot but we get overwhelmed pretty quicklly.
As for the rest of the maps, I’d like to thank you for the advices since we have been having troubles with those maps, specially Stronghold, It took us several tries doing that map right, since zeds wouldn’t stop spawning in the back door but finally we made it with no major problems, specially if you place one pipebomb behind a welded door.
Anyway, the harder the map gets, the more fun It is 🙂
It’s so much easier completing solo games! What I found easiest was to start as a level 6 firebug. The flamethrower lasts for 3 or 4 waves. Then switch to Support Specialist and the AA-12. For the Patriarch I switched to Demolition and a full complement of pipe bombs was an instant kill. Nice!
Hi, first time I’ve seen this.
I’m glad to see it’s useful and thanks for noting me as the original creator 🙂
I’ve added a little note to the end of my guide for you as a thanks 🙂
Hey thanks. Sent you a friend request. Now we need some for KF2!